In the last tutorial, we wrote and executed a test case in TestNG. When we run a test case in TestNG or a test suite, if that matters, the results are shown at the bottom half of the screen (we will be talking in terms of eclipse only). These results are in terms of reports, and TestNG Reports required a separate section in this course as they are very detailed, explicit, and complex. Apart from this, TestNG has it's own default way of developing the reports in the transferrable format. Consequently, this post will combine the following topics:
- TestNG Reports' Dashboard in Eclipse
- Also, TestNG Console Report
- TestNG "Report" Section In Eclipse
- How To Generate and View Emailable Report In TestNG?
- Additionally, how To Generate and View Index Report In TestNG?
- How To Use Reporter Class To Generate TestNG Reports?
Before we try to generate reports that we can view and send outside of Eclipse, let's explore the Eclipse results dashboard and the meaningful insights it gives.
TestNG Reports' Dashboard In Eclipse
It is important to note that we will walk through this tutorial in continuation of the previous tutorial about the TestNG test case. In that tutorial, we ran a test case that would open the browser and close it using Selenium. If you do not know how to run the tests in TestNG, we recommend to read that tutorial first. The test source code looked like this:
import org.openqa.selenium.WebDriver;
import org.testng.annotations.Test;
import org.testng.annotations.BeforeMethod;
import org.testng.annotations.AfterMethod;
import org.openqa.selenium.*;
import org.openqa.selenium.chrome.ChromeDriver;
import org.testng.Assert;
import org.testng.annotations.*;

public class TestNG {
    WebDriver driver ;
    @Test
    public void f() {
	   String baseUrl = "https://www.toolsqa.com/";
	   System.out.println("Launching Google Chrome browser");
	   driver = new ChromeDriver();
	   driver.get(baseUrl);
	   String testTitle = "Free QA Automation Tools For Everyone";
	   String originalTitle = driver.getTitle();
	   Assert.assertEquals(originalTitle, testTitle);
   }

   @BeforeMethod
    public void beforeMethod() {
	System.out.println("Starting Test On Chrome Browser");
    }

    @AfterMethod
     public void afterMethod() {
	 driver.close();
	 System.out.println("Finished Test On Chrome Browser");
    }
}
When we run this test, there are two separate sections in the Eclipse where these reports are visible.
- Console
- Report Section
Console Reports In TestNG
Console reports in TestNG are short and simple, which just denote the overall summary of the test.
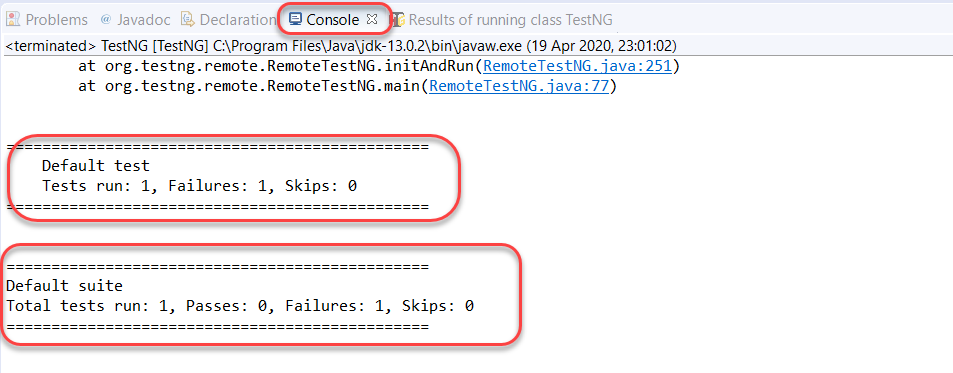
Along with these short stats, the console also shows a bunch of process commands from TestNG that we do not need to bother. If there is any hindrance in running these tests, the error commands display in the console tab only. The console works like a typical console in every language.
TestNG Report Section In Eclipse
Alongside the console tab, the reports tab lies in Eclipse that generates a more in-depth view than what we had in the console.

The top section of the report contains the same summary that we saw in the console part. We have marked it in the above screenshot.
Below the summary, TestNG provides the class name and the function name that were part of the tests.
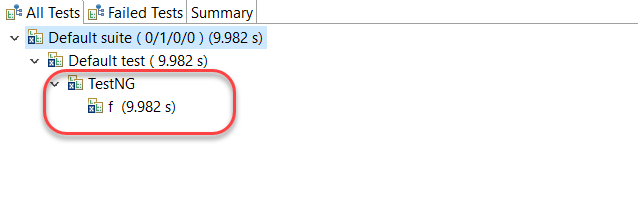
Along with that, the time is taken to execute the "f()" test method is available alongside. It is the default view that comes under the "All Tests" part.
Failed Tests and Summary of the tests are also visible with the different tabs besides All Tests, as shown in the below image.
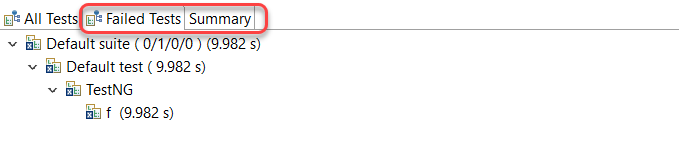
The above screenshot is of the Failed Tests tab, and it looks the same as the All Tests tab. It is because we had one test, and that failed in execution. The UI is similar to both of them.
The summary tab of the TestNG reports section contains a few different things. Click on the "Summary" tab:
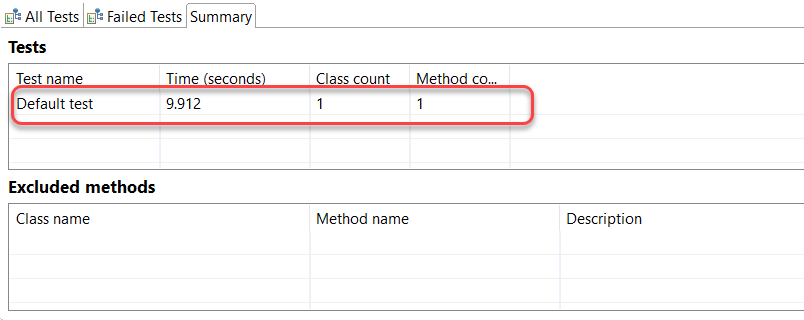
The summary will show a complete summary of the different tests that we executed. If you run a test suite, then there will be multiple tests; otherwise, if you have executed a single test like me, a single test will be seen. The Time (seconds) column will show the total time that took to execute the test with the other two columns showing the count of classes and methods in the tests, respectively.
It was about the Eclipse reports or summary when we run the tests. But, ultimately, we need to email these reports to other team members as well. For this, we need to make use of what is called an "emailable-report" in TestNG. Let's see how to generate that.
How To Generate Emailable Report In TestNG?
Emailable reports are generated in TestNG to let the user send their test reports to other team members. Emailable-reports do not require any extra work from the tester, and they are a part of overall test execution. To generate emailable reports, first, run the TestNG test class if you have not already.
Once we have run the test case, a new folder generates in the same directory with the name test-output.
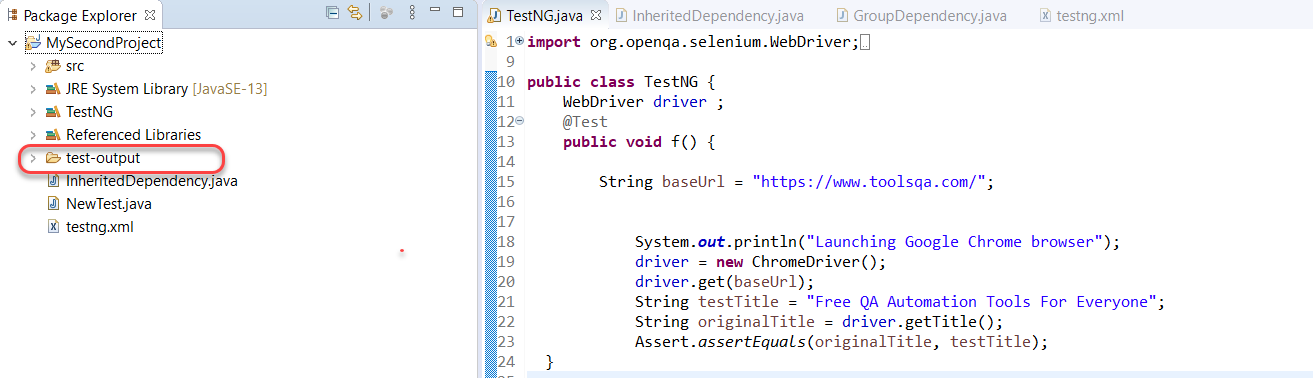
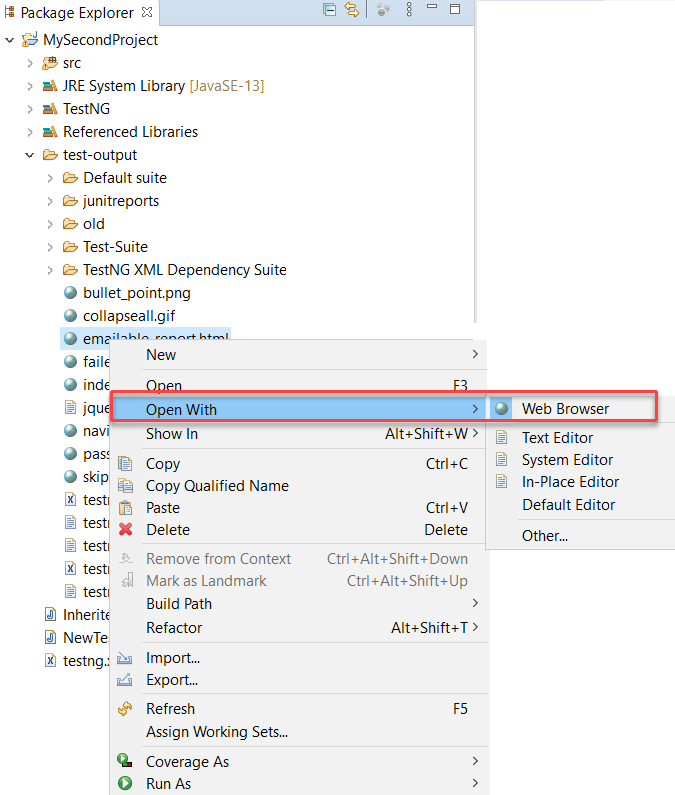
Explore this folder. It will contain multiple files in it. We will talk about them at different points in this course. For this tutorial, we will focus on an emailable-report.html file.
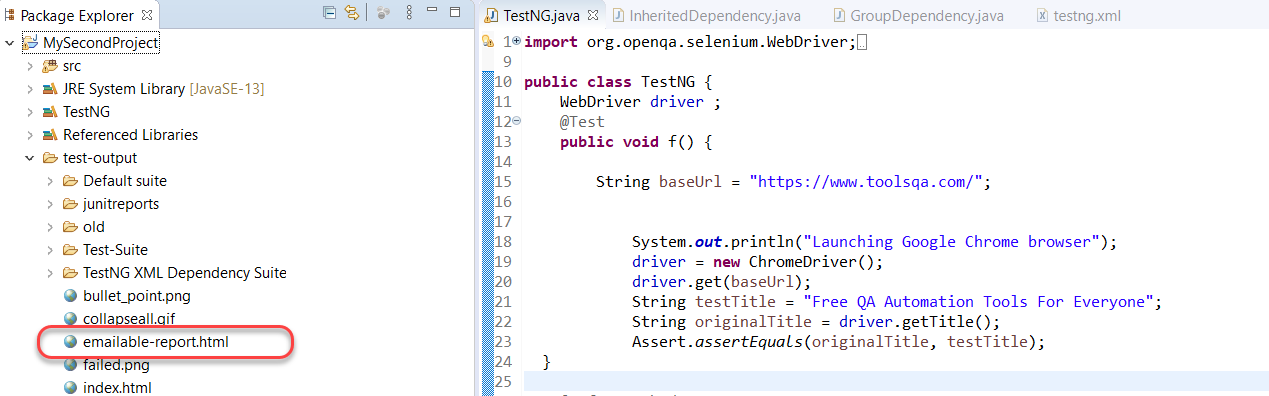
Right-click on the file. Choose Open With -> Web Browser.
It will open the report inside Eclipse. For a better view, copy the URL from the address bar in Eclipse.
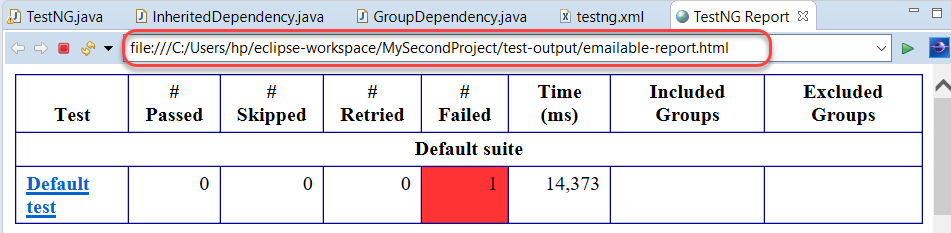
Paste this URL to any browser of your choice to see the emailable-report in a better view.
Another important file that resides inside the test-output folder is index.html. Let's have a look at that.
How To Generate Index File In TestNG?
Emailable reports are a type of summary reports that one can transfer to other people in the team through any medium. Index reports, on the other hand, contains the index-like structure of different parts of the report, such as failed tests, test file, passed test, etc.
To open the index.html file, locate it in the same test-output folder.
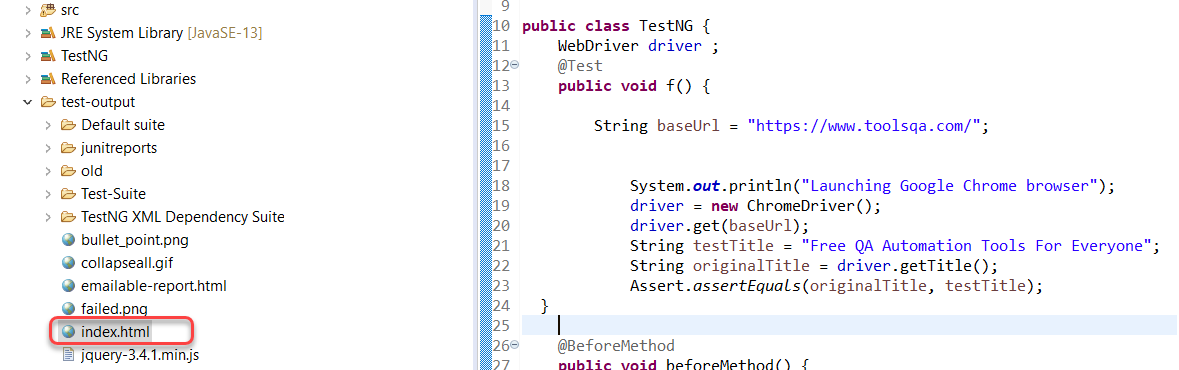
Similar to the last report, open this one in the browser.
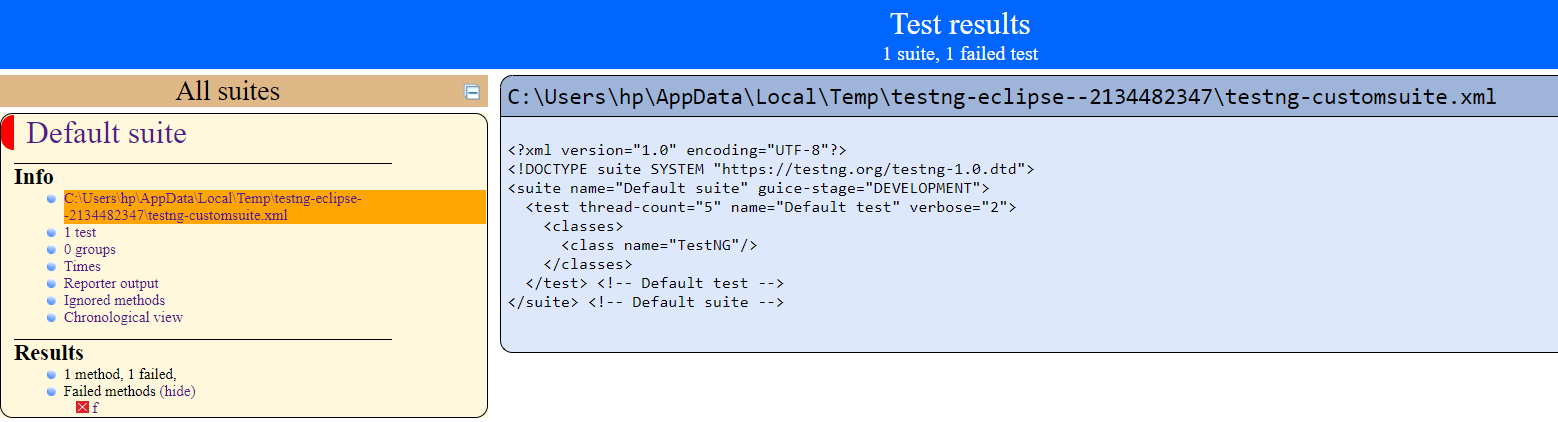
We can divide this report into two parts. The left part contains the index, and this is the reason it is called an index report, while the right part contains the explored content of that index.
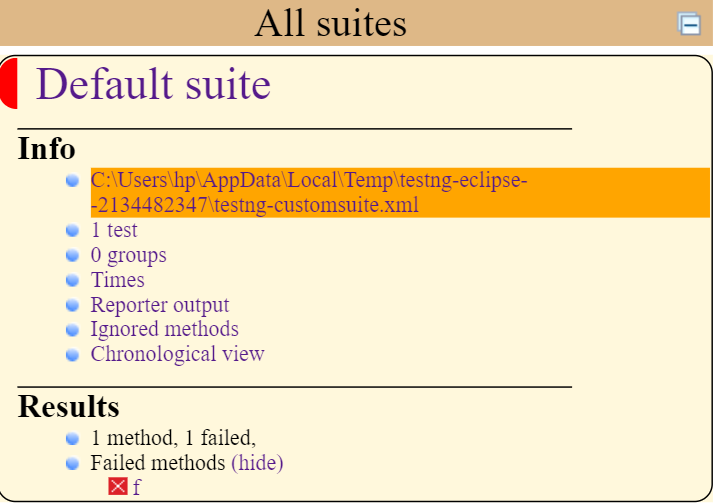
More straightforwardly, whatever you choose in this index is projected on the right side. In the above example, the highlighted XML index projects on the right. It is more handy and user-friendly to operate.
How To Use Reporter Class To Generate TestNG Reports?
Reporter class is an inbuilt class in TestNG. The reporter class in TestNG helps in storing the logs inside the reports that are user-generated or system-generated so that in the future, when we look at the report, we can view the logs directly from there rather than rerunning the test case.
To use the reporter class, we use the following syntax:
Reporter.log(string);
Simply we are calling the "log" function of the Reporter class of TestNG.
Observe the following code snippet from the test case code that we used at the start of this tutorial.
public void f() {
	  String baseUrl = "https://www.toolsqa.com/";
	  System.out.println("Launching Google Chrome browser");
	  driver = new ChromeDriver();
	  driver.get(baseUrl);
	  Reporter.log("We used Google Chrome Ver 80 for this test");
	  String testTitle = "Free QA Automation Tools For Everyone";
	  String originalTitle = driver.getTitle();
	  Assert.assertEquals(originalTitle, testTitle);
  }
We want to log the string "We used Google Chrome Ver 80 for this test" onto the reports. Follow the above-said procedures to run the test case and generate the emailable-report.
Once done, open the emailable report in the browser:
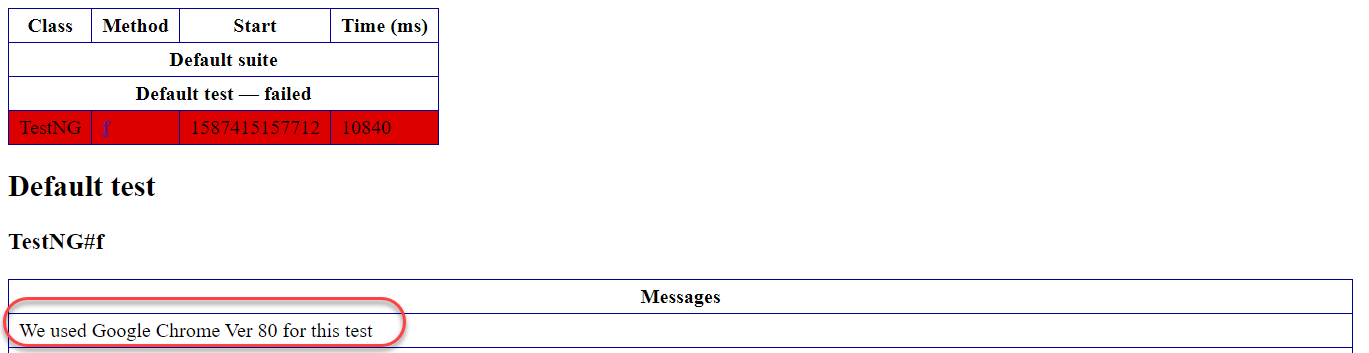
And here we go, we have a message logged into the report for every team member that receives it. Great! It was all about the generation of TestNG reports and viewing them in Eclipse and your browser. Reports serve a similar purpose as your result card in exams. They help us analyze the complete summary without reading a single line of the code. Since reports contain a vast number of elements (including those which are put by the tester in the code), we cannot explain everything in the tutorial or rather this course. Although we will pick up important stuff as we progress. Therefore, I would recommend to give some time on these reports and navigate to every link you see. It would help a lot in the future.
Common Questions About TestNG Reports
Can the tester customize the TestNG reports?
Yes, the tester is free to customize the TestNG reports according to his will. For this purpose, we use two interfaces in TestNG:
- ITestListener Interface
- IReporter Interface
Can we generate a PDF report instead of HTML reports in TestNG?
Yes, TestNG allows generating PDF reports. The tester needs to download external Java APIs for this and read the documentation on how to use them. Moreover, they are readily available over the internet.
Do TestNG reports need external code to write?
No, there is no need to write any code to generate reports in TestNG. In other words, the reports generation happens by default.
What are the two ways to generate a report in TestNG?
We can generate the TestNG reports in two ways:
- Emailable Reports
- Index Reports