Selenium Automation enables you to decrease manual effort, but you might come across many functionalities that are repetitive in the test execution. As a result, you might have to use the same locator multiple times. Now, if you duplicate the same code multiple times, it can lead to unmanageable projects. Over to it, if at all a locator changes, you will have to go through the entire code again and make the changes at all the places where that locator is used. Consequently, to overcome this, the Page Object Model using Page Factory is implemented in Selenium automation frameworks. It helps in maintaining the test scripts by separating the test objects from the test scripts. Subsequently, in this article, you will learn how PageFactory can be used in your Selenium test automation to create an optimized framework. We will cover the below points-
- What is the Page Object Pattern?
- How to implement a Page Object Pattern?
- What is PageFactory in Selenium?
- What are the PageFactory Annotations?
- How to implement the Page Object Model using PageFactory?
- How to create a Page Factory Pattern in the Selenium Project?
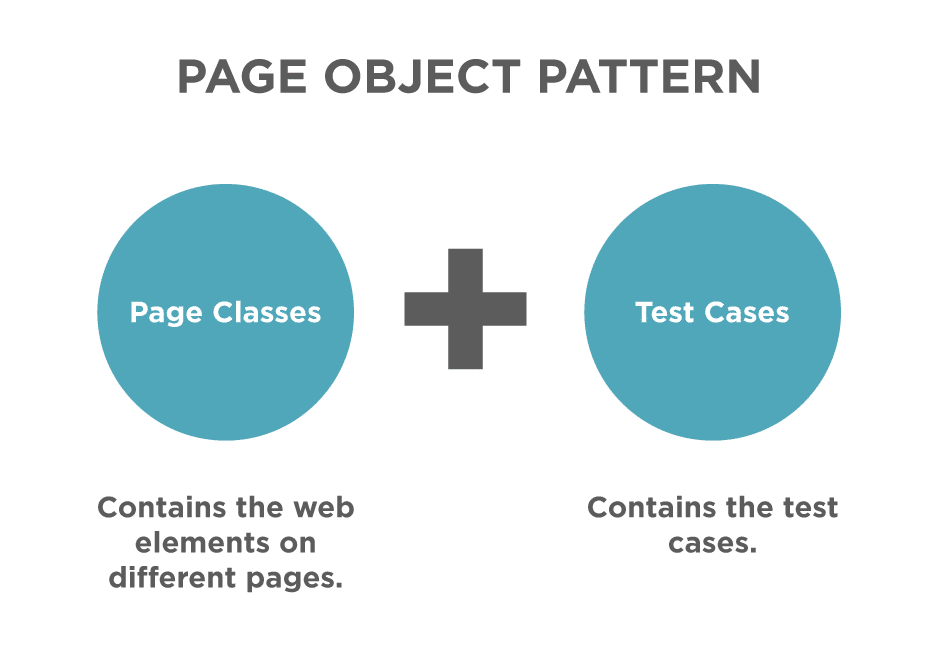
What is the Page Object Pattern?
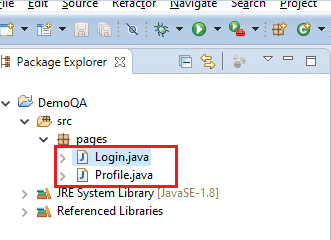
Page Object Model /Pattern is a design pattern used in Selenium, where we create an object repository to store web elements. A java class is created that corresponds to each web page, consisting of the WebElements on the page and the corresponding methods that act on elements. In simple words, all web page elements are in a java class by identifying them through their locators. Additionally, the creation of multiple java classes happens for the different web pages of a website. These java classes act as a repository to store the various elements that we can interact with within our test cases. Consequently, the project structure of a simple Page Object Model/Pattern generally looks like below:
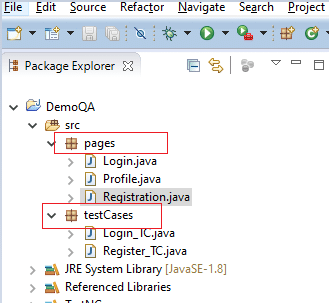
You can see that different page classes are kept separate from the test classes in different packages in the above image.
How to implement the Page Object Pattern?
A simple implementation of Page Object Patten can happen, as shown below:
You can see how the page elements separate from the test cases in the page object pattern. Now we will see how we can implement the same. There are two ways to implement the Page Object Pattern in your test project:
- First, Using the Regular Java Classes- In this method, we create java classes for the different pages that consist of the various web elements on that page. Moreover, we use these web elements in Test Cases that reside in different classes. Additionally, you can check out the Page Object Model article to learn more about this approach.
- Second, Using the Page Factory Class- It is an extension to the Page Object design pattern, which we will discuss in this article.
What is Page Factory in Selenium?
Page Factory is a class provided by Selenium WebDriver to implement the Page Object Model. The Page Object Repository is separated from the Test Methods using the Page Factory concept. Using it, you can initialize the Page Objects or directly instantiate them. In simple words, the Page Object Model lets you create separate java classes for different pages of a website. These different classes contain the locators for different web elements (like button, text field, dropdown, etc.) present on the page and the methods to perform actions on these elements. By doing so, you can simplify your code and segregate the test methods and the object repository. Subsequently, there are two simple steps through which we need to define and use Page Factory in Selenium projects:
- Using the @FindBy annotation- Unlike the regular approach of initializing web page elements using FindElement or FindElements, the Page Factory uses the @FindBy annotation. The annotations used in Page Factory are descriptive. Moreover, they help improve code readability, which we will discuss in the next section. It provides the following syntax to locate the web elements:
@FindBy(id="userName")
WebElement username;
- Initializing the elements using initElements()- This is a static method used to initialize the web elements that we locate using the @FindBy or other annotation(s), thereby instantiating the page class.
PageFactory.initElements(WebDriver driver, java.lang.Class.pageObjectClass);
Another interesting concept offered by Page Factory is the lazy load concept using the AjaxElementLocatorFactory. It can be used when your application uses Ajax elements. Additionally, you can use it while trying to find an element to perform an operation and pass a timeout value, until which the driver would wait before throwing an exception. In other words, it is a variant of implicit wait using the class AjaxElementLocatorFactory. Subsequently, the syntax is as follows-
PageFactory.initElements(new AjaxElementLocatorFactory(driver, 20), this);
What are the Page Factory annotations?
As discussed above, Page Factory annotations are very descriptive and make the code very readable. Moreover, the annotations help to set up a location strategy for the web elements. Important annotations used in Page Factory are discussed below:
@FindBy
The @FindBy annotation is the essence of the Page Factory approach. It is used to locate web elements using different locators strategies. Additionally, it helps in quickly locating the web elements using one search criteria. Before declaring the WebElement, we pass its attribute and the corresponding value. Subsequently, there are two ways to use this annotation:
- First, by specifying both 'How' and 'Using'
@FindBy(how = How.ID, using = "userName")
WebElement username;
- Second, by directly using locator(id, XPath, CSS, etc.) You can explore more about the methods to find elements using Selenium.
@FindBy(id="userName")
WebElement username;
Both the above annotations point to the same web element.
Note: 'How' can be used with any of the locators, i.e., 'id,' 'name,' 'XPath,' etc.
@FindBys
To locate a web element with more than one search criteria, you can use @FindBys annotation. This annotation locates the web element by using the AND condition on the search criteria. In simple words, @FindBys uses multiple @FindBy for each search criteria.
Consider the below HTML code:
<div class = "custom-control-check-box">
   <input type="checkbox" id="game-chk-box" class="custom-control-input" value="1"/>
</div>
The web element locator using the @FindBys annotation for the above element would look like below:
@FindBys({
 @FindBy(class="custom-control-check-box"),
 @FindBy(id="game-chk-box")
})

WebElement chkBox;
We can locate the web element 'chkbox' only if both the criteria meet, i.e., the class value is "custom-control-check-box," and the id value is "game-chk-box." Also, note that the criteria are mentioned as in a parent-child relationship. The class criteria are from the parent tag <div>, while the id criteria are from the child tag <input>.
@FindAll
The @FindAll annotation locates the web element using more than one criteria, given that at least one criteria match. Contrary to @FindBys, it uses an OR conditional relationship between the multiple @FindBy.
Consider the HTML code below:
<button id = "submit" type = "submit" name= "sbmtBtn" class =" btn btn-primary">Submit</button>
The element can be located using @FindAll annotation as below:
@FindAll({
 @FindBy(id="btn", //doesn't match
 @FindBy(name="sbmtBtn"), //Matches
 @FindBy(class="btn-primary") //doesn't match
})
WebElement submitButton;
The above annotation would locate the submit button even though only one criterion matches @FindAll works on one or more criteria.
@CacheLookUp
The @CacheLookUp annotation is very useful when you are referring to the same web element multiple times. Consider an application where each test case requires Login operation. In such a scenario, using @CacheLookUp, we can store the web elements in cache memory right after reading for the first time. It fastens our execution and the code, need not look up for the element on the web page and directly references it from memory.
The @CacheLookUp can be prefixed with any of the annotations discussed above, i.e., @FindBy, @FindBys & @FindAll.
@CacheLookUp
@FindBys({
 @FindBy(class="custom-control-check-box"),
 @FindBy(id="game-chk-box")
})

WebElement chkBox;
Note: It always uses @CacheLookUp with web elements whose attribute value changes rarely. Since it maintains a reference in memory if the locator value changes your code would not locate the element, as it will always reference the cache memory.
In the following section, you will see the use of all the above annotations in automating a test using Page Factory in Selenium.
How to implement the Page Object Model using PageFactory?
Now that you know what Page factory is? And how do we go about its various annotations? We will implement Page Factory in a simple use case through the Page Object Model.
Consider the following scenario for automation:
- Open the URL of the demo website.
- Enter the username and password.
- Click on the Login button.
- Verify the logged-in username.
- Click on the Logout button.
To automate the above scenario using Page Factory in Selenium, we will follow a series of steps which are described below-
How to create a Page Factory Pattern in the Selenium Project?
Follow the steps as mentioned below to create the Page factory and automate the scenario mentioned above:
- Firstly, create a Java class for each page.
In our example, there are two pages that we will be working with - Login Page and Profile Page. We will create two separate classes for each of the pages, following the Page Object Model approach.
- Secondly, we will be locating web elements using the @FindBy, @FindBys, and @FindAll annotation and create methods for actions that will be performed on these web elements in the java classes that we created in Step#1. Moreover, we are also using the @CacheLookUp annotation for the Logout button, storing the reference in cache memory for future use. Note that elements corresponding to the pages would be kept in their respective classes.
The code for both the java classes would look like below:
Login Class
package pages;

import org.openqa.selenium.WebDriver;
import org.openqa.selenium.WebElement;
import org.openqa.selenium.support.FindAll;
import org.openqa.selenium.support.FindBy;

public class Login {

	final WebDriver driver;

	//Constructor, as every page needs a Webdriver to find elements
	public Login(WebDriver driver){
			this.driver=driver;
		}

	//Locating the username text box
	@FindAll({
		@FindBy(id="wrapper"),
		@FindBy(id="userName")
	})
	WebElement username;

	//Locating the password text box
	@FindBy(id="password")
	WebElement pswd;

	//Locating Login Button
	@FindBy(id="login")
	WebElement loginBtn;


	//Method that performs login action using the web elements
	public void LogIn_Action(String uName, String pwd){
		username.sendKeys(uName);
		pswd.sendKeys(pwd);
		loginBtn.click();
	}
}
Profile Class
package pages;

import org.openqa.selenium.WebDriver;
import org.openqa.selenium.WebElement;
import org.openqa.selenium.support.CacheLookup;
import org.openqa.selenium.support.FindBy;
import org.openqa.selenium.support.FindBys;

public class Profile {

final WebDriver driver;

	//Constructor, as every page needs a Webdriver to find elements
	public Profile(WebDriver driver){
			this.driver=driver;
		}

	@FindBys({
		@FindBy(id="books-wrapper"),
		@FindBy(id="userName-value")
	})
	WebElement user;

	@CacheLookup
	@FindBy(id="submit")
	WebElement logoutBtn;

	//Method to check logged in username
	public void verifyUser(String usrNm){

		if(user.getText().equalsIgnoreCase(usrNm))
			System.out.println("Correct username, ie " +user.getText());

		else
			System.out.println("Incorrect username..." +user.getText());
	}

	//method to logout
	public void logout_Action(){
		System.out.println("Let's log off now!!!!");
		logoutBtn.click();
	}
}
3. Thirdly, after locating the web elements and writing the methods corresponding to them, the next step is to write the test class. We will create a package names 'testCases,' which will comprise the different test case classes. The project structure would look like below-
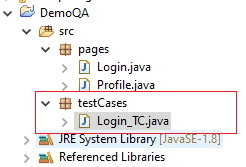
For our example, we will create a single test class named 'Login_TC.java' as shown in the snapshot above.
Test Case
package testCases;

import java.util.concurrent.TimeUnit;

import org.openqa.selenium.WebDriver;
import org.openqa.selenium.chrome.ChromeDriver;
import org.openqa.selenium.support.PageFactory;

import pages.Login;
import pages.Profile;

public class Login_TC {

static WebDriver driver;

public static void main(String[] args) {

		driver = new ChromeDriver();

		driver.manage().timeouts().implicitlyWait(10, TimeUnit.SECONDS);
		driver.get("https://demoqa.com/login");

		//Instantiating Login & Profile page using initElements()
		Login loginPg = PageFactory.initElements(driver, Login.class);
		Profile profilePg = PageFactory.initElements(driver, Profile.class);

		//Using the methods created in pages class to perform actions
		loginPg.LogIn_Action("---your username---", "---your password---");
		profilePg.verifyUser("---your username---");
		profilePg.logout_Action();

		driver.quit();
						}

}
Let us now understand the code that is implementing the different page classes.
- Login loginPg = PageFactory.initElements(driver, Login.class); & Profile profilePg = PageFactory.initElements(driver, Profile.class); -- We create an instance of each Login and Profile class and use it to refer its objects.
- Once the class instantiates, you can use the corresponding class's methods to perform specific actions. Additionally, to see the class methods, you need to write the instance name, i.e.,' loginPg' followed by a dot, and Eclipse would suggest the public methods and the objects present in it. You can use any of these methods as per your requirement.
- loginPg.LogIn_Action("---your username---", "---your password---"); , profilePg.verifyUser("---your username---"); & profilePg.logout_Action(); --We have directly called the 'LogIn_Action', 'verifyUser' and 'logout_Action' methods sequentially to perform our test steps.
- We finally use the 'driver.quit()' method to close our browser session.
Note: You can create your own user for testing by clicking on the Register button on the login screen and use it in the test script.
Subsequently, let us execute the same and see how the results of our Page Factory implementation look like-
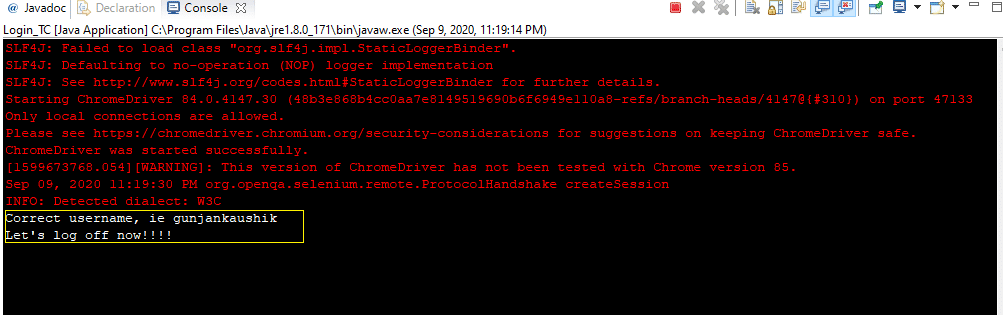
As in code in our elements action methods, we can see the print statements printed on the console.
And there you go, you are now ready to use and implement Page Factory in your Page Object Model and leverage its features for making your code readable, maintained, and fast.
Key Takeaways
- You now know how the Page Factory class in Selenium can enhance the regular Page Object Model.
- Additionally, you have enough reasons to use Page Factory Model/Pattern, knowing its numerous advantages.
- Moreover, you have learned the different Page Factory annotations and know which one suits the best as per your need.
- Also, there are two important steps to build Page Factory Design for your test method- locating elements(@FindBy(s)/@FindAll) and initializing elements(initElements()).
- To fasten your execution, you now know where you can use the @CacheLookUp annotation.