As we know, a lot of IDEs exist in the market, which makes the life of a developer very easy by providing various features such as "Auto code completion", "Syntax Highlighting", "Debugging", etc. Eclipse is one of the most used IDE by the java developers. Now to make use of any third-party libraries in a project, all of these IDEs provide their ways to integrate and use functionalities of those libraries in your project. As we know, all the Java libraries are bundled and provided as JARS(Java Archives), which can be included in a project and then the project can invoke the needed functions of various classes bundled in those jar files. Similarly, Selenium WebDriver for Java also provides a set of jar files, which we need to include in the project to access and use the functionalities provided by Selenium WebDriver. Therefore, we will discuss Selenium Eclipse subsequently.
In this article, we will cover the details of how we can configure the Selenium WebDriver jars in Eclipse. Additionally, we will also understand how to set up other details in Eclipse. It is ready for kickstarting the learning journey for writing a web automation test using Selenium WebDriver.
- How to launch Eclipse and create a workspace?
- Create a new project in Eclipse?
- Create a new package under the project?
- And, create a new class under the package?
- How to Add Selenium WebDriver Jars to the project?
How to configure Selenium WebDriver in Eclipse?
Writing a test case in any programming language is almost the same as writing code to develop an application. Before starting the coding for any application, we need to do some setup and configurations in the IDE, which we will use to develop. Following the same, before starting the development of automation test cases using Selenium WebDriver, we need to perform specific configurations in the Eclipse IDE. It ensures it has all the dependencies which we need for the development of the test cases. So, before using the Selenium WebDriver for Java for the test case development, we need to Configure Eclipse. It results in the Selenium WebDriver's correct configuration and it's availability for the development of the web automation test cases.
After downloading the Selenium WebDriver, follow the steps mentioned in the following sections to configure the Selenium WebDriver in Eclipse :
Launch Eclipse and create a workspace?
The first step for a start using the Eclipse IDE is to download and start the Eclipse. Once Eclipse will be started, it will ask you to create a workspace.
Note: Eclipse workspace is a directory on the system where all the Eclipse plugins, configurations, or other project-related information will be stored.
You can follow the steps detailed in the article "Download and Start Eclipse" to kickstart the installation and start of Eclipse.
After setting up the workspace, the next step is to create a "Project " in Eclipse. Let's see how we can achieve the same in Eclipse:
Create a new project in Eclipse?
Before you create a new project in Eclipse, you need to know what it is? A project is a collection of source files and the settings which help to build, run, and debug the source files. In Eclipse, a project is on the topmost hierarchy, just after the workspace. One project will contain all the related source files and dependent libraries. You can have multiple projects under one Eclipse workspace.
Follow the steps as mentioned below to create a new Java Project in Eclipse:
- Navigate to File > New > Project. Alternatively, you can directly select the Java Project option under the New menu.
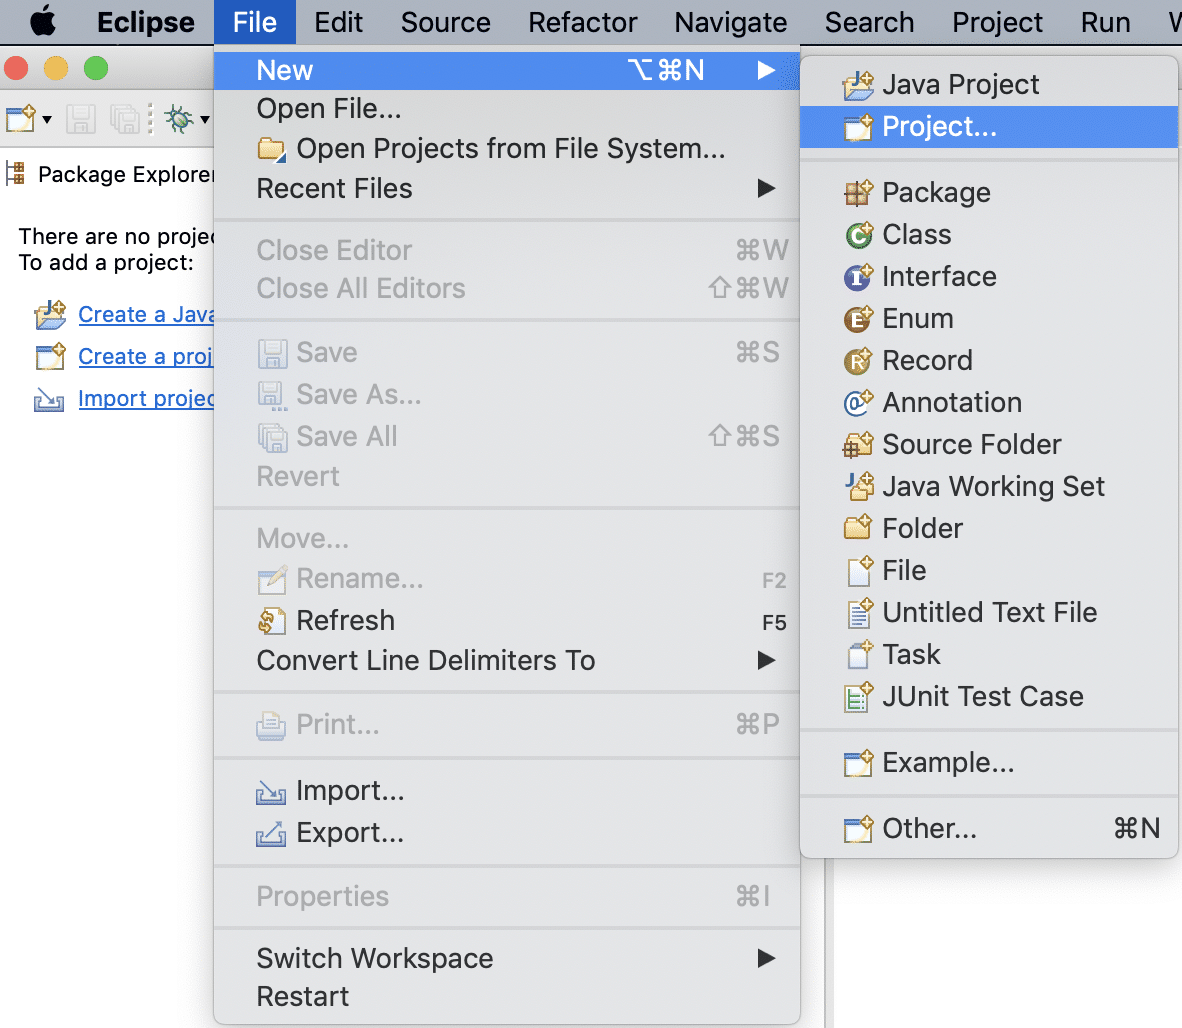
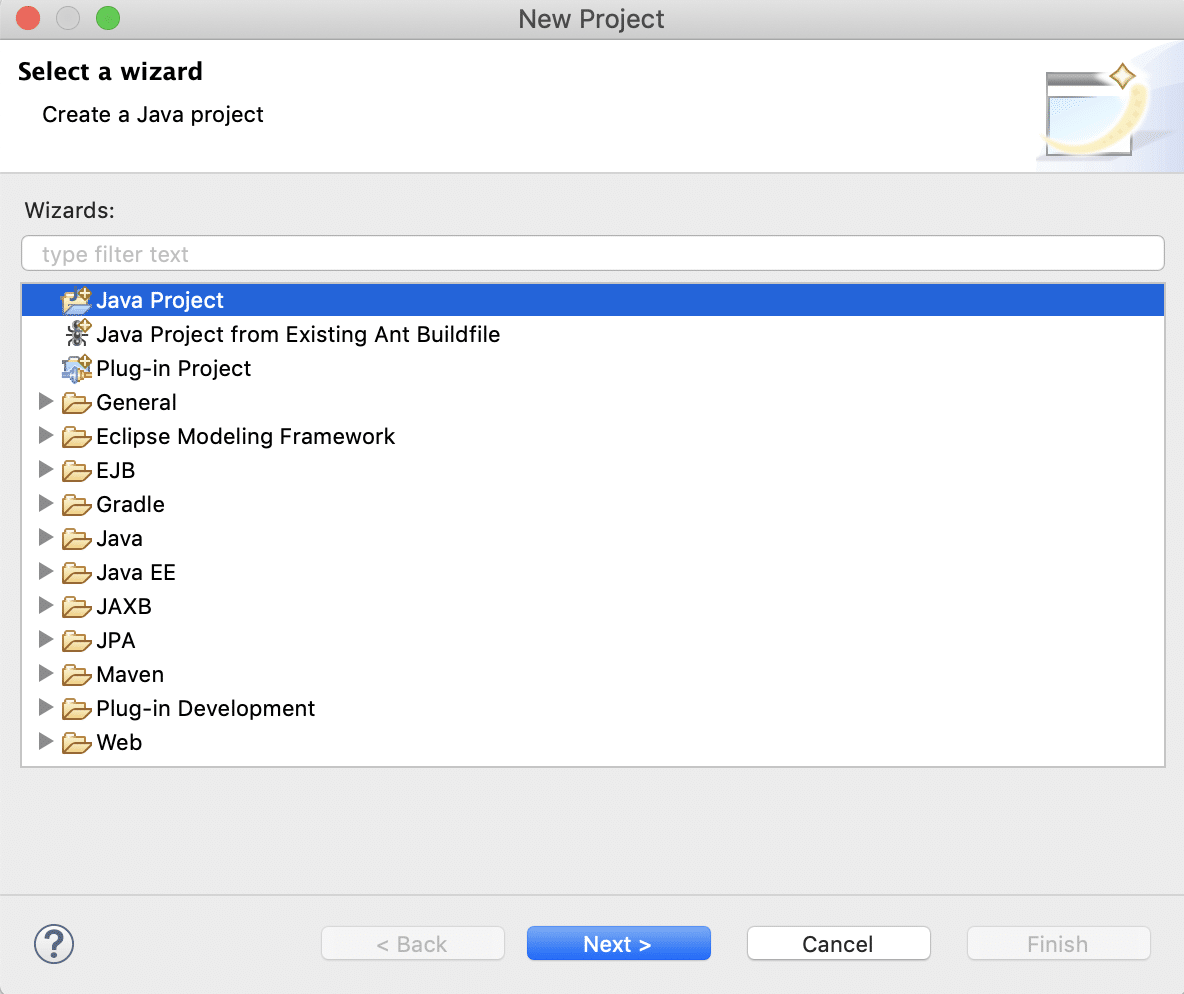
- It will open the "New Project " wizard. From the New Project dialogue box, select Java Project and click on Next.
- On the "Create a Java Project " wizard, specify a name to the Java project and select other options as shown below:
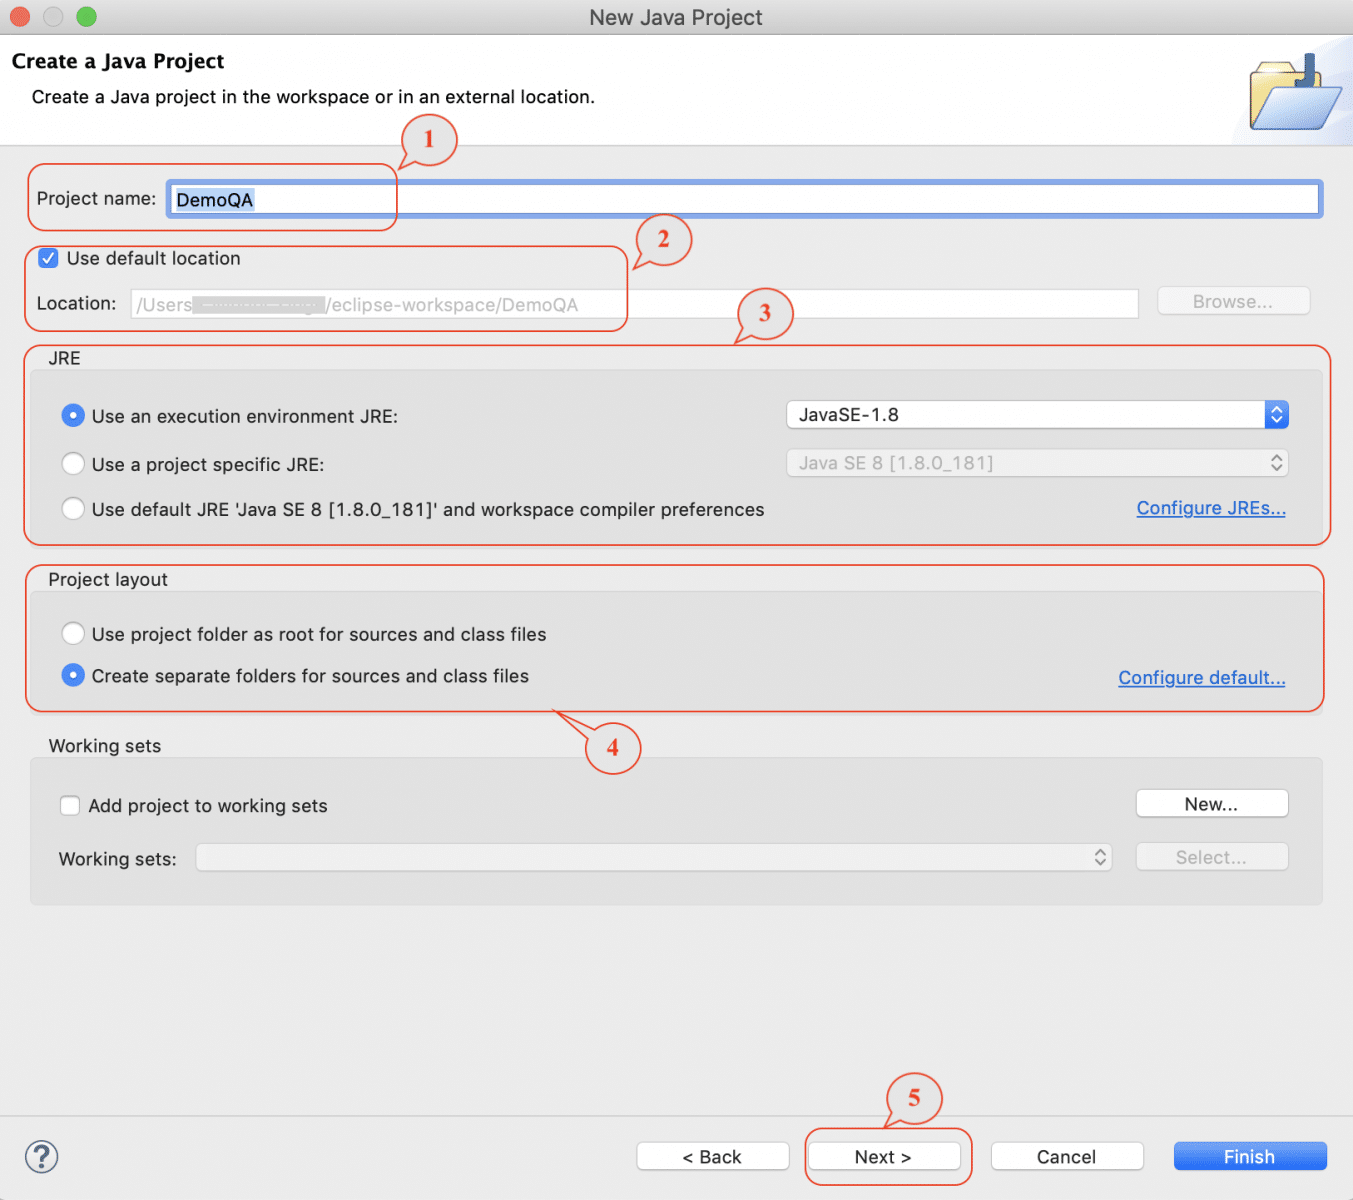
As we can see, we have specified the following options on the above dialogue box:
- As highlighted 1, "DemoQA" has been specified as the name of the project.
- The marker 2 highlights the path of the project. By default, the project will create under the workspace folder. But, you can save the project in any other folder also, by deselecting the checkbox "Use default location" and selecting the path of the folder by clicking the "Browse" button.
- The marker 3 highlights the JRE(Java Runtime Environment), which we will use for this project. By default, Eclipse will show the latest version of JRE installed on your machine(Eg, in our case, it is showing JavaSE-1.8. If you want to use some different version of JRE for the project, you can select the same from the drop-down. Also, there is an option to select "Project Specific JRE", which will be applicable just for the current project. These options come handy when you have multiple projects under the same workspace, and you want to set a different version of JRE for the various projects.
- The marker 4 shows the options of how the arrangement of source and the compiled files will be under the project. When we select the default option "Create separate folders for sources and class files", Eclipse will create a different folder for the source files, which will be by default named as "src" and a different folder for the compiled class files, which will be by default named as "bin". If we want to keep both source and class files under the parent project folder, we can select the option "Use project folder as root for sources and class files".
- After completing all the configurations as mentioned above, either you can click on the "Finish" button to close the dialogue box or click on the "Next" button, as heightened by marker 5, which will open the dialogue box showing the folders for the project, sources, and classes as shown below:
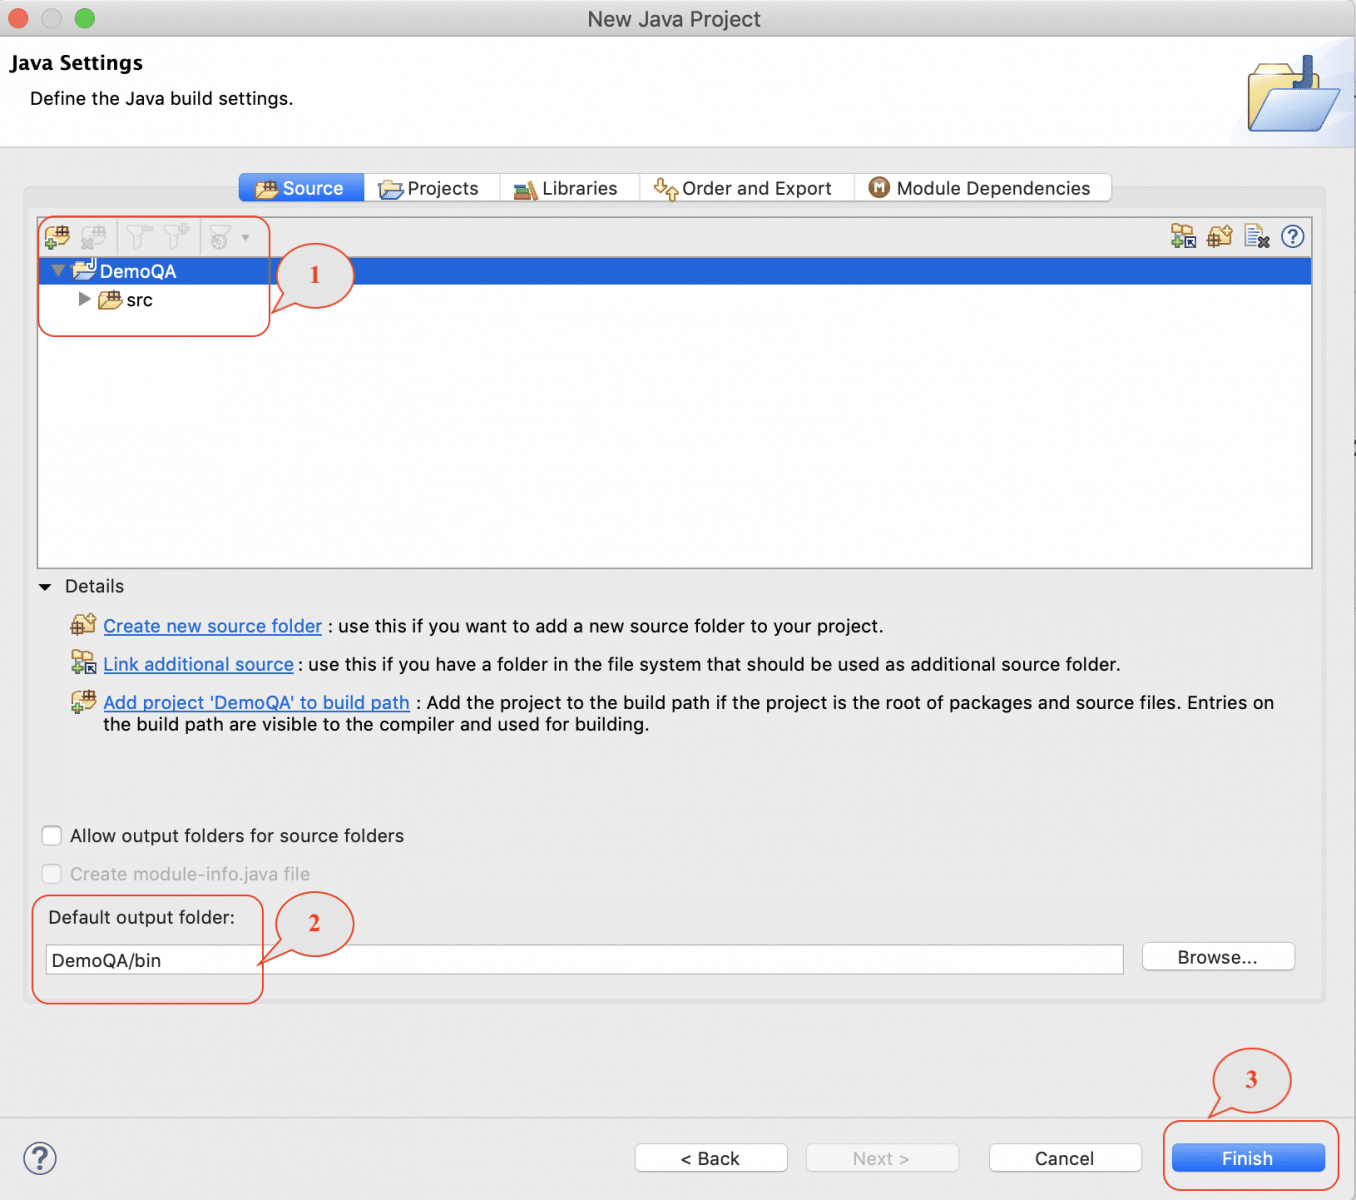
- As we can see in the above screenshot, Eclipse created a folder "src" (highlighted as 1). It will store all the source files and created a folder "bin" (highlighted as 2), which will store all the compiled class files. Click on the "Finish" button (highlighted as 3) to close the dialogue box.
- Clicking on the "Finish " button will show a pop-up to select the Java perspective, which is more around aligning the different components of a Java project in the left Explorer box of Eclipse. A sample perspective pop-up will look as below:

Note: The above dialogue-box will only appear for the "Eclipse enterprise version", as this version can be used for the development of other types of the project also(apart from Java), and every kind of project has its perspective.
Once we finish creating a Java project in Eclipse, the next step if to create a package under the Project. Let's see how to create a package under the project in Eclipse:
Create a new package under the project
To create a new package under the newly created project "DemoQA", follow the steps as mentioned below:
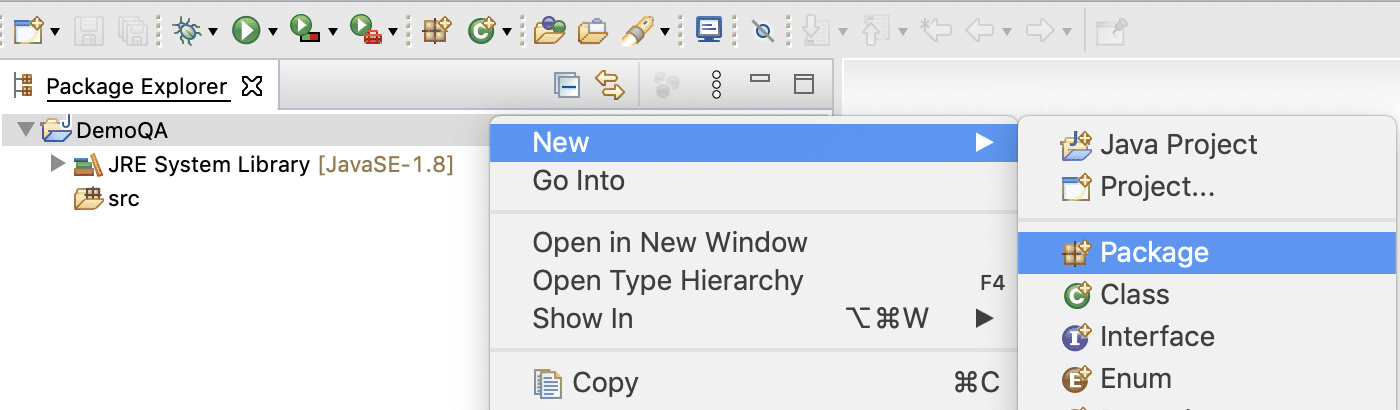
- Right-click on your project name 'DemoQA' and navigate to New > Package.
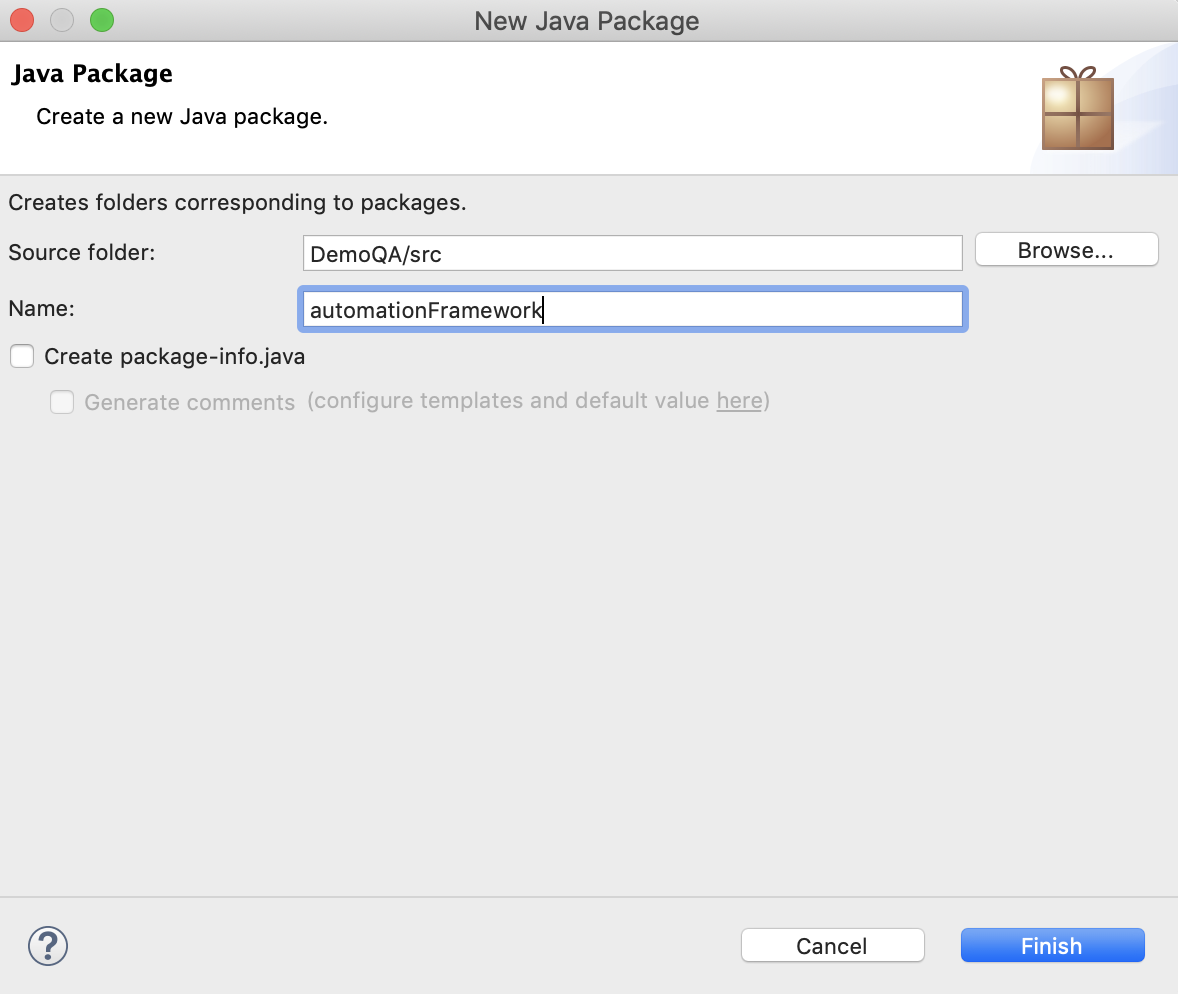
- Give a name to your package, say, 'automationFramework ' and click on the Finish button.
- Once the package creation is successful, it will reflect under the src folder of the project in the Eclipse Project Explorer windows, as shown below:

Once you finish creating a package under the project, the next step is to create a Java class under the package, which will write the test cases using Selenium WebDriver.
Create a new class under the package
Now that we have the project & the package created, we will require class(es) to write the code. To create a new class, follow the steps as mentioned below:
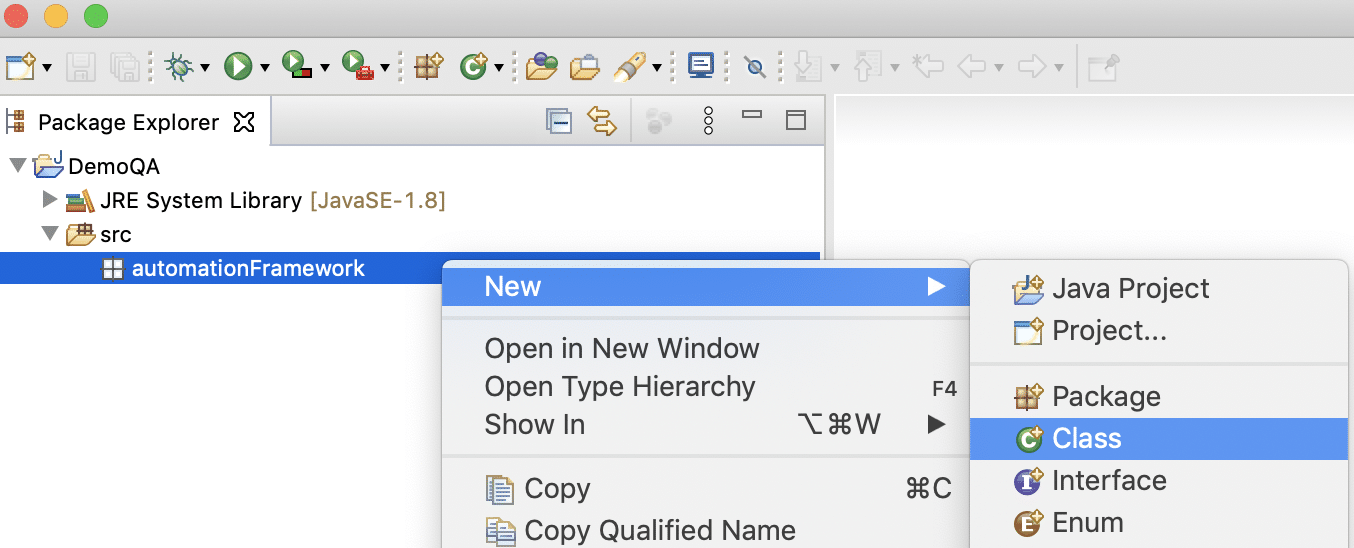
- Right-click on the package 'automationFramework ' and navigate to New > Class.
- Once you click on the "Class " option, You will see a New Java Class wizard as shown below:
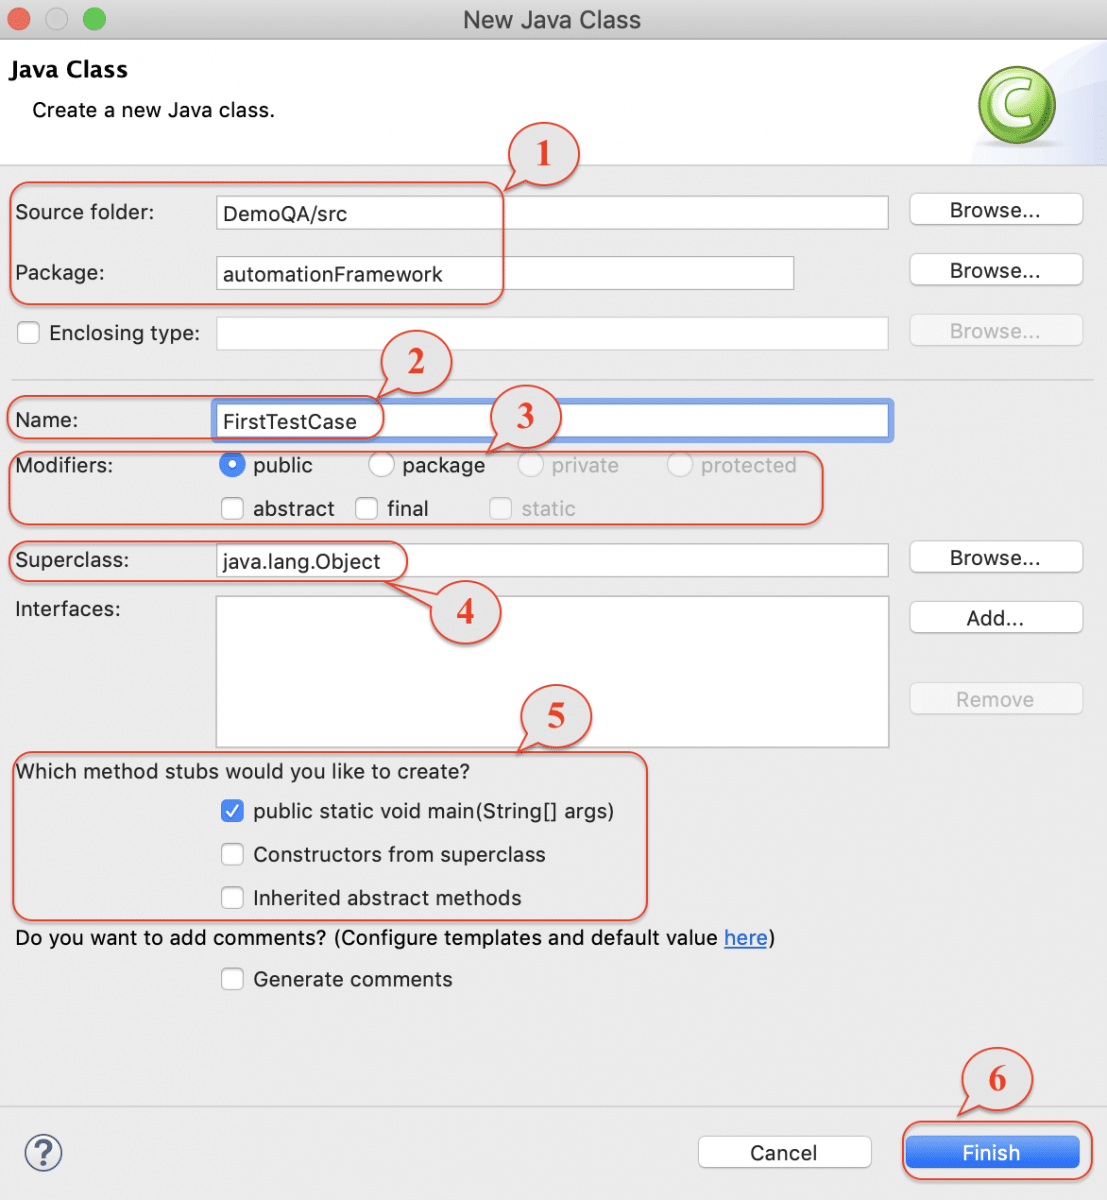
- As we can see from the above screenshot, the source folder "DemoQA/src" and the package folder "automation framework" (as marked 1) will be auto-populated by Eclipse. If you need to change any one of those, you can click on the corresponding "Browse" folder. After that, you can select the required folder.
- After that, you need to specify the name of the class in the field marked 2. As in our case, we have defined the name of the class as "FirstTestCase".
- Next, you need to select the modifiers (as marked 3) for the class.
- The next option is to select a super/ parent class(as marked 4) for your class as we know that in java "Object" class is the parent of all the classes.Therefore, Eclipse has auto-populated the "java.lang.Object" class by default.
- Then you need to select the options(as marked 5) if you want to auto-create any methods in your class. As we want to create a "Main" method in our class, so we have just selected the first option.
- Click on the "Finish" button to close the dialogue box.
- Once we create the Java class successfully. It will reflect under the "Project Explorer " window of Eclipse as shown below:
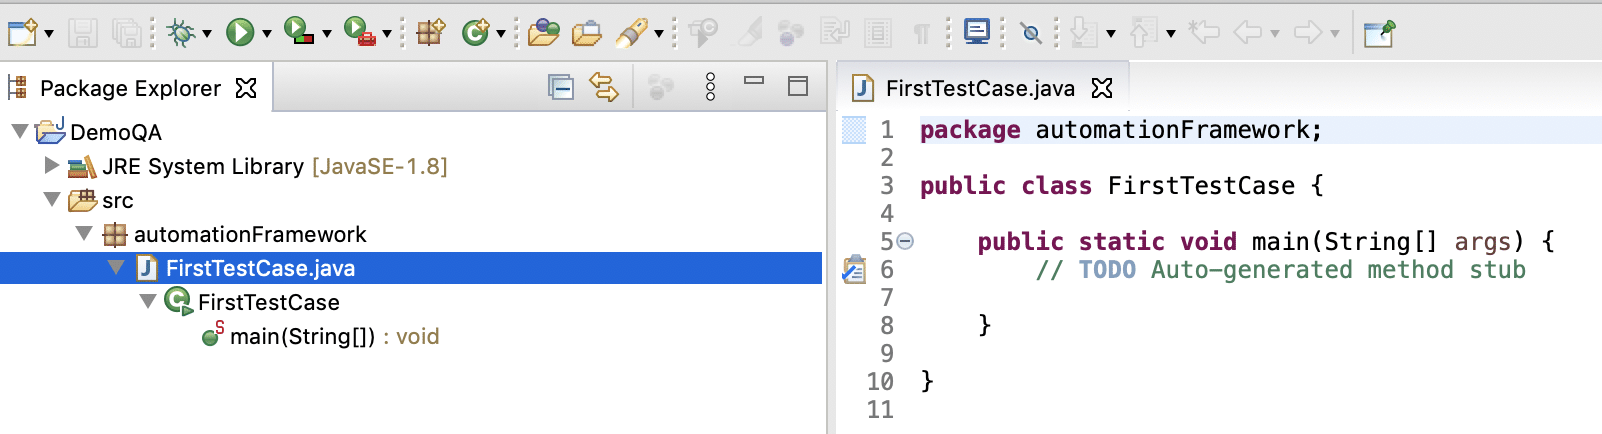
As we can see in the above screenshot, a new file named "FirstTestCase.java " creates under the package "automationFramework ". It contains one class named "FirstTestCase", as shown in the right pane of the above screenshot.
Conclusively, now we have a placeholder available where we can write our Selenium test cases. The next step is to include the various libraries provided by "Selenium WebDriver " in the newly created project. Let's how we can consist of the Selenium WebDriver libraries in a project in Eclipse?
How to add Selenium WebDriver Jars to the project?
To include any of the Java libraries in the Eclipse projects, the same need to have in the *Build Path of Eclipse. Following the same, the Selenium WebDriver libraries also need to be included in the "Build Path " of Eclipse. As we have already downloaded the Selenium WebDriver, We can include those Selenium WebDriver Jar files into the Eclipse project by following the steps as mentioned below:
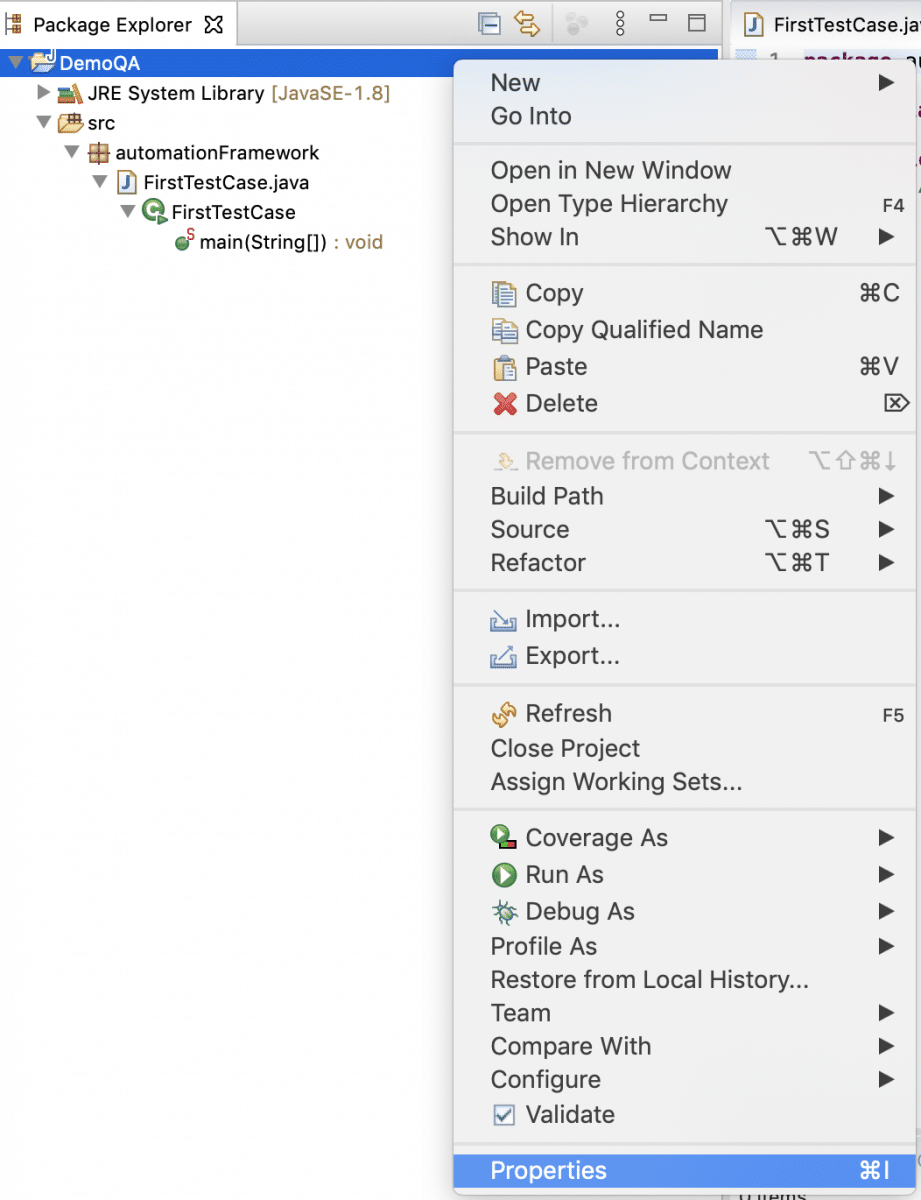
- Firstly, either Right-click on the project 'DemoQA' > Build Path > Configure Build Path

OR
Right-click on the project "DemoQA" and click on the "Properties " option to open the "Project Properties Wizard " of Eclipse:
- Secondly, as "Selenium WebDriver " is an external library for the project, so we need to add the "Selenium WebDriver " dependencies as "External JARs".

- First, select the "Java Build Path" (as shown by marker 1) in the left panel, if it is not auto-selected.
- After that, click on the "Libraries" tab, as shown by marker 2.
- Finally, click on the "Add External JARs" button, as shown by marker 3.
- Thirdly, browse to the folder where you have extracted all the Selenium WebDriver jar files. As we are using "Selenium -4 ", so we will be adding all the jar files provided by "Selenium 4.0.0 -alpha ". Consequently, it is as shown below:
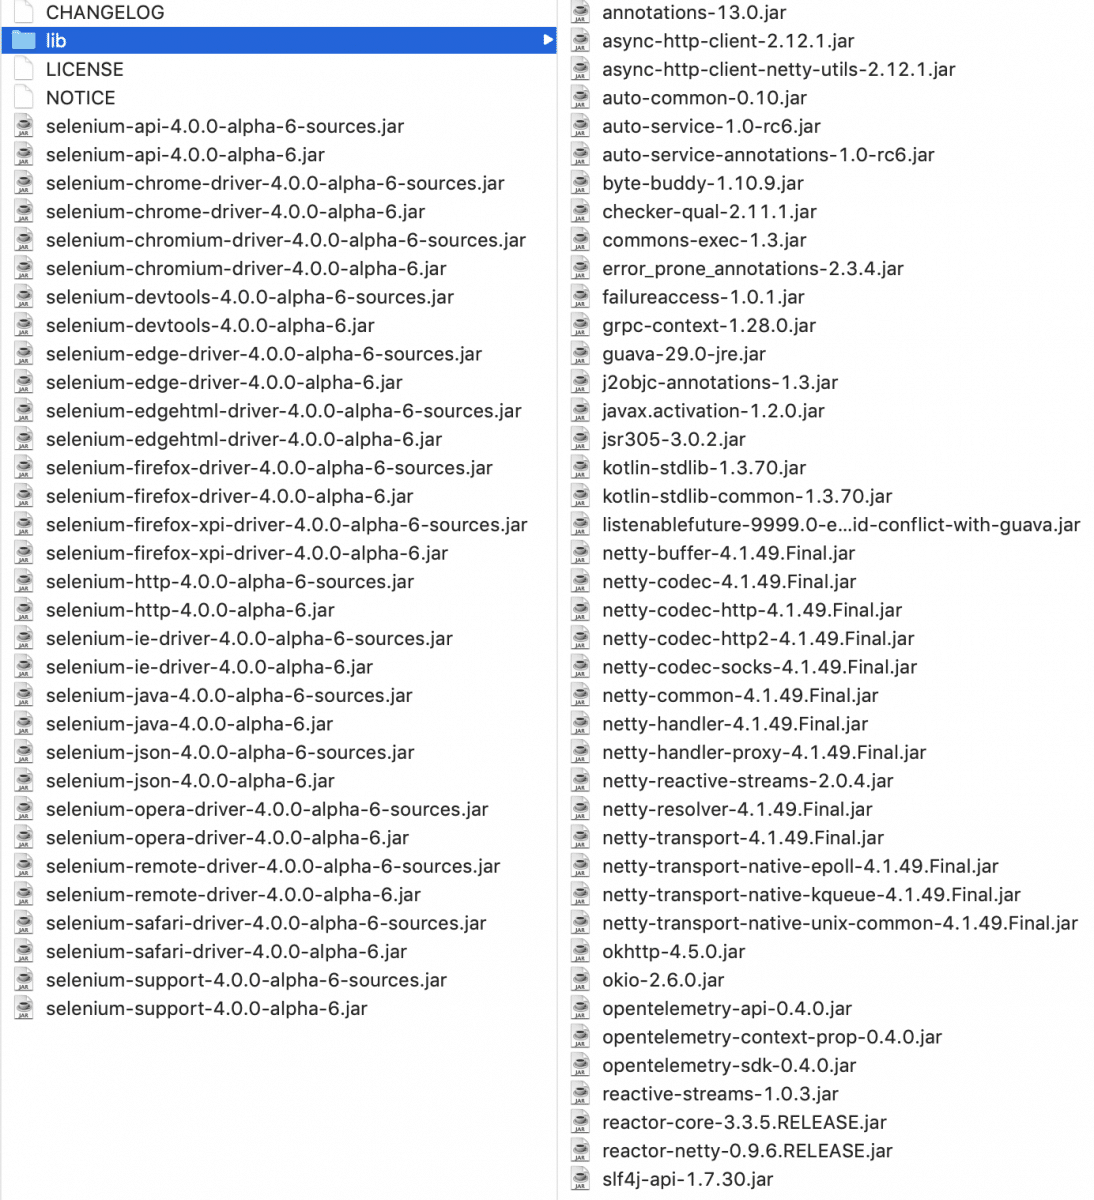
As we can see in the above screenshot, few Selenium WebDriver jar files are directly under the "selenium-java-4.0.0-alpha " folder. Similarly, a few of them are under the "libs " folder inside "selenium-java-4.0.0-alpha ". Moreover, we need to add all of them using the option of "Add External JARs".
- Lastly, once you finish adding all the "JAR " files, click on the button "Apply and Close". It will show all the JAR files in the "Project Explorer " window under the "Referenced Libraries " folder as shown below:
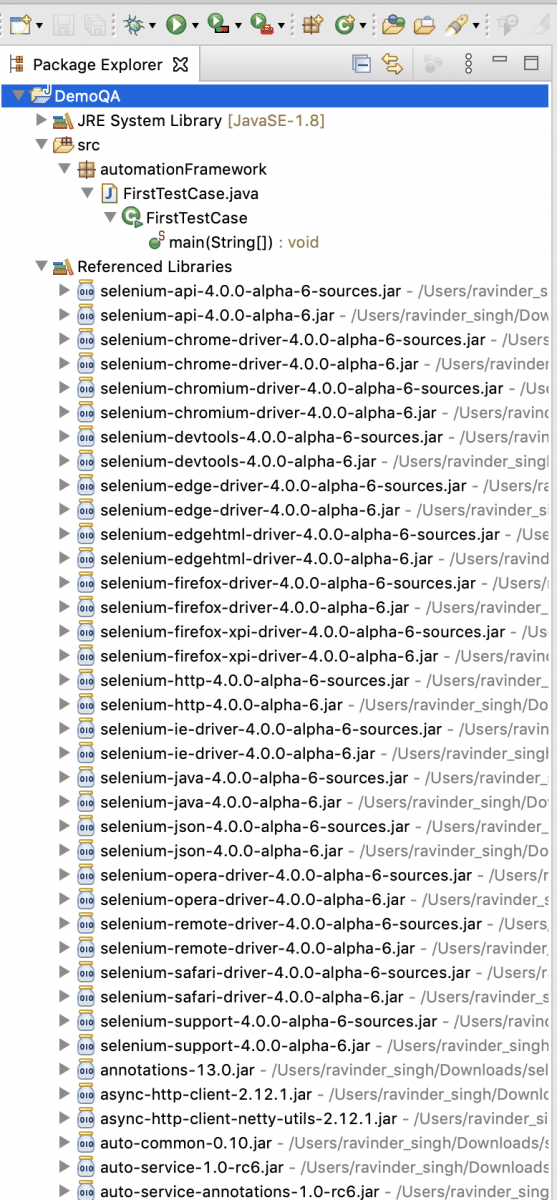
The configuration of the Selenium WebDriver jars is now complete. Conclusively, you are all set to write your first test script using Selenium WebDriver in Eclipse.
Key Takeaways
- For writing a test script in Eclipse, we will need to create a Project, package, and a class in Eclipse.
- Also, all the third-party libraries should be present in the Build Path of Eclipse to access their functionality in the current project.
- Additionally, Selenium WebDriver provides a set of jar files that need to include in the Build Path of Eclipse.
- Moreover, once the Selenium WebDriver libraries are available in the Build Path, you can access all the functionalities of Selenium WebDriver in your current Project.