In the last tutorial, we learnt about how we can save collections and send POST requests. The requests that we used in the previous tutorial had just a single request. In the real world, when we work we get a huge amount of different requests and responses. Using Postman tests helps in building up efficient requests and collections. For example, if we work as a centralized library for many other libraries at different locations, we need to keep track of every book everywhere. We need to have a list of every book in our system then how do we know if we have a particular book or not and at which library it is available?
When we work in collections, we run many requests together, these can be as large as around 200 requests running simultaneously. How do we manage to see that every request run successfully? Or which one did not give a response? These all things we will learn in this tutorial. In this tutorial, we will focus on the two most important things in postman
- Test
- Collection Runner
TEST in Postman
A TEST in Postman is similar to the definition of the test in general. In Postman, we test our request for whatever we need to know about the request. For example, if I need to know whether my request gave a status code of 201 or not. This can be managed in Postman. Also, there is no bound on running the test in Postman on one request. One request can be passed through multiple tests and all of them can be seen simultaneously.
There is one thing to remember though. A test does not run always. A test in Postman runs only when the request was successful. If there has been no response to the fact that your request was not correct, we cannot run tests through it. Also, you need to know that tests are written in Javascript in Postman. Although you don't need to be an expert but you should be slightly familiar with Javascript so that it helps. In this tutorial, we will try to explain everything so that you don't feel the need to know the Javascript and can write tests yourselves.
TEST in postman can be written in two ways namely
- Javascript method
- Functional method
Both the methods are used in Postman to write test today and both the methods use javascript as the base language. JavaScript method is the older method whereas the functional method is the new method. Although the Postman does not indicate that the support will end for the older method, it recommends to use the functional one and as it says on the official website of Postman, "Functional method is the more powerful method among the two". But since you need to know both, we will introduce you to the functional method.
So now, we are good to perform our first test.
How to set a Test in Postman with JavaScript Method?
- Use the API for creating the entry in customer register that we used in the POST Request tutorial (with body parameters), don't worry about the entry being created or not.

- Open the Tests tab.

- Write the following Javascript code as written in below
tests["Status Code is 200"] = responseCode.code === 200

Now we will go through the above line to know the meaning.
- tests: The first word we see is "tests", which is a variable of type array. This array can contain any data types like string and int or even Boolean values.
- Status Code is 20: Status code is 200 is just a name or a simple string. We define this name to know what was the test performed by us therefore this name should be meaningful. If I write tests["Passed"], then I would not be able to know what kind of test has passed and this will also become more and more complicated if we run more than one tests, say 20 and one test fails. You could also write 'Status Code OK'.
- responseCode.code: response code refers to the response status code that we have received in the response box. We can run multiple test in Postman on response code such as knowing whether status code has a string or not. The second is an object which is called to know the status code (not the complete information but just the code) of the test. Once we call the responseCode.code, first all the information of the status code is saved temporarily and then object is called to check the status code. If the status code is equal to 200, tests save the value True in it.
In the response box under the tests tab, those tests that have TRUE value shows PASS with the array name written or else FAIL is shown.
- Click on send and look at the test results tab in the response box.

The result says that our test passed. This means that we were checking if we get 200 as status code and in this request, we got it.
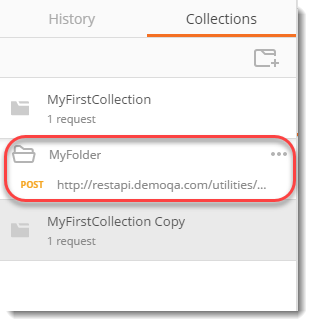
- Save the request in MyFirstCollection inside Myfolder
By this, you have executed your first Request with Test successfully.
How to set Multiple Tests for a Request in Postman with JavaScript Method?
As we learnt earlier, we can use multiple tests on a single request and all those tests are displayed in the response box simultaneously. We will perform multiple tests on the same request that we used above. Write the following code inside the text editor.
tests["Status Code is 200"] = responseCode.code === 200;
tests["Body contains Fault"] = responseBody.has("ToolsQA");
tests["Response time less than 500ms"] = responseTime <1500;
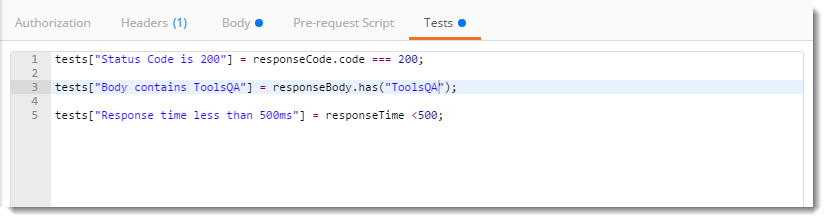
NOTE: The second test checks if there is a string ToolsQA in the body of the response and the third test checks if the response time is less than 500 ms or not.
Now look at the response box in Postman, we have three tests written, out of which one failed which is the second one. Because our response body does not contain ToolsQA. This way we can perform many test in Postman simultaneously on one request. Remember to save the request.
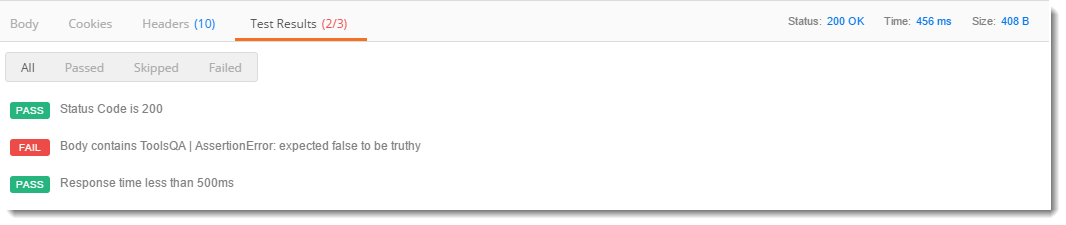
Our first test passed because we have a status code of 200 and our third test passed because our response time is 456 ms which is less than 500. Your response time may vary.
How to set Test in Postman using Functional Method?
A simple functional method of testing whether the status code is 200 is written below
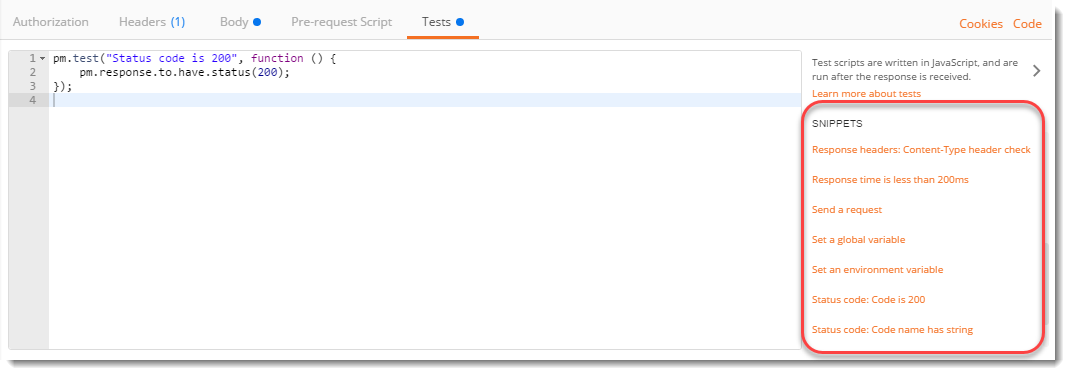
pm.test("Status code is 200", function () { pm.response.to.have.status(200); });

In the above image, the work is the same as we did in JavaScript Test. We are checking whether the status is 200 or not. We will look at the code above written test.
- pm.test : This is the function for writing test specifications, pm here refers to Postman api and test refers to the specification of the function which is testing purposes
- Status code is 200 : This line is just a string which is the test name. When your test is performed this String will be written in front of the result. It is same as was in JS to know what the test was about
- function(){}: The next parameter is the function which is passed to perform the test
- pm.response : This is used to capture the response received and perform assertions on it such as status code, headers etc. This is same as responseCode in JS format.
Snippets in Postman to add Quick Test
Since there are many times that a test is used on different requests and there are many requests present in one collection there arise a need to write some predefined test code which is used again and again or most frequently. In Postman, this section is called snippets. Snippets are the predefined test code in Postman that are written beforehand to use without writing the whole code. Snippets save a lot of time and prevent errors that can happen while writing the code manually.
Snippets are located just beside the test editor.
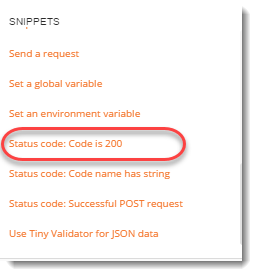
Click on Status Code: code is 200
Now, look at the editor
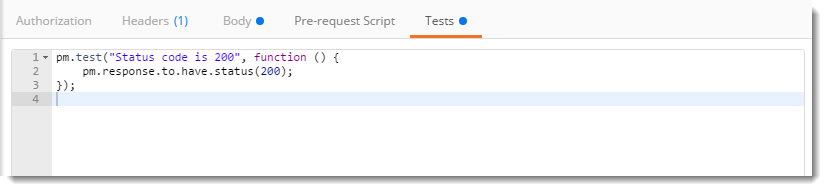
This code is exactly the same as that we have written in a functional method to test the status code.
Note: Since Postman prefers functional method, these snippets are available in functional methods only.
You can explore different snippets to better understand test codes of different assertions.
Collection Runner in Postman
A collection runner in Postman as previously introduced is used for running a whole collection together. A collection runner runs all the requests in the collection or folder (whatever you choose) at once. Collection runner in Postman does not show any response, it is used to check the test cases whether they passed or not. A collection runner console shows all the tests at one location and their result. To run collection runner first make sure you have at least two requests in the folder MyFolder inside MyFirstCollection as shown.
These two requests are the weather api (we used it in GET Request chapter) and customer register api (we used it in POST Request chapter). Remember the customer API is a Post request so it contains body parameters also.
NOTE: In weather API we have used the snippet named Response Time is less than 200ms which is self-descriptive.
How to run Collection Runner in Postman?
Now we will look at How to run multiple requests together in Postman using Collection Runner.
- Click on Runner

- Click on MyFirstCollection and then MyFolder

Note: I hope you have saved the requests in your collection which is shown above.
In the console you see two options:
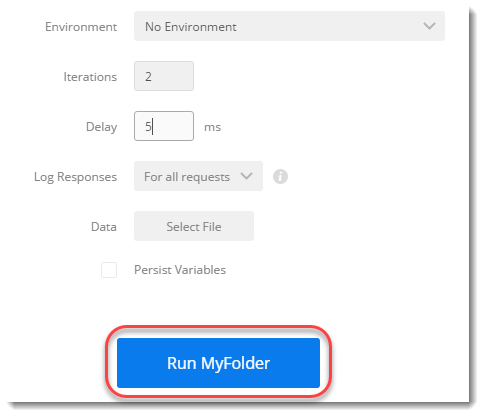
- Iterations: An iteration number is the number of times the same requests will run. For example, iteration set as 3 will run all the requests 3 times. Set it as 2.
- Delay: A delay time is a time to wait between any two iterations. A delay time of 10ms will mean that Postman will wait 10ms after running one iteration before the second iteration. Set it as 5ms.
- Click on Run MyFolder
- As you can see, all the tests with their results are available.
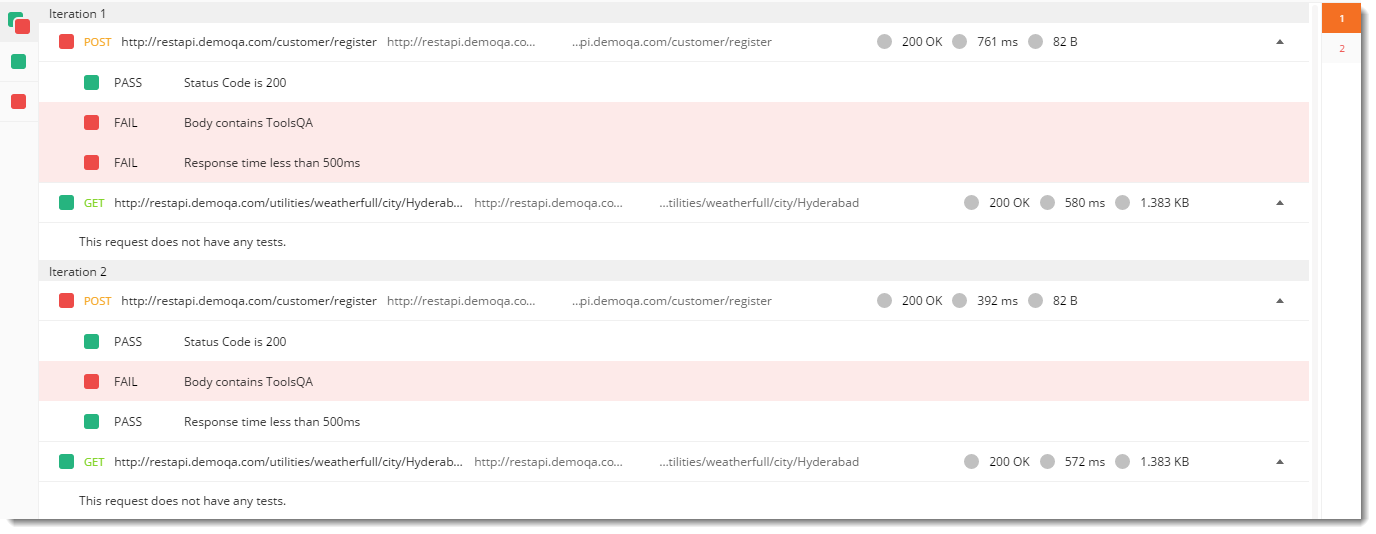
- There are two iterations of each request. In the first iteration, I got the response time as 761ms which is greater than 500 ms but in the second iteration I got the response time as 392ms which is less, this caused one failure in that respective test. Your test result may vary.
- Since we did not perform any test on the weather API request, the console says The request does not have any test.
Go on to perform multiple tests on weather API and then try to run them in collection runner.
You can also choose the environment in which to run the requests but the environment should be valid against the request, so it should contain the same variables with the same values that are used in the requests. You can learn more about it in the environment and variables chapter.

This way you can run all the requests saved in Postman in one collection or one folder. In the next chapter, we will learn about the environment and variables in Postman.
Practice exercise
- Create two tests for the weather api.
- One test in the JS method which will test if the method requested was POST or not.
- Second test in the functional method which will check if the response body contains string INVALID in it.
- Save the request in the Myfolder folder inside MyFirstCollection.
- Run MyFolder in Collection Runner.