In the previous tutorials, we have had our hands on Postman and learned how to use it in real life. We discussed the pre request script and how we can dynamically change the values of variables before sending the requests. In postman navigation we learned that we need Authorization for accessing secured servers. Authorization is the most important part while working with secured servers, which is most likely to happen. We will learn about
- Authorization and Authentication
- Authorization vs Authentication
- Need for Authorization
- Basic Authentication in Postman
You may also go through the recording of the Postman Tutorial where our experts have explained the concepts in depth. What is Basic Authentication?
Basic Auth in Postman: https://youtu.be/vrGRThiZ9cw
What is Authorization?
The meaning of authorization can be seen as a question which is, are we eligible to access a secured resource on the Server? If the answer is yes, then in technical terms we can say that we are Authorized to access the resource. If the answer is No, we can say that we are not Authorized to access the resource. For example, let us say you have added your and your sister's fingerprint to your phone. You and your sister can open the same mobile phone, which means only you and your sister are authorized to open the phone and see the data. Similarly, while there could be many APIs in a company or a project. It is not necessary that everyone will have access to all the APIs. Only authorized people can access the secured APIs.
Authorization Vs Authentication
Authorization and Authentication are two closely related terms. These two terms can also be confusing at first. In this section, we will clear the confusion about these two terms.
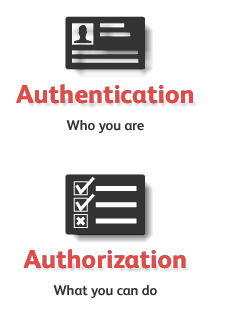
Authentication is a process of presenting your credentials to the system and the system validating your credentials. These credentials tell the system about who you are. This enables the system to ensure and confirm a user’s identity. Here system can be anything, it can be a computer, phone, bank or any physical office premises.
Whereas Authorization is a process of allowing or denying someone from accessing something, once Authentication is done. So in layman terms Authentication tells who you are while Authorization tells what you can do.
When a person accesses the server with the key/password, the server checks whether the person is available in the directory and is also associated with the same key/password. If it is, you are good to go (Authentication). If you have access to the resource, then you will be granted access to the resource (Authorized).
We will see the following short example to tell you how does a server rejects an unauthorized person.
Authorization using Postman
Checking Authorization
For this chapter, we will be using the endpoint https://postman-echo.com/basic-auth
- Create a GET request and enter the endpoint as https://postman-echo.com/basic-auth

Press send and look at the response
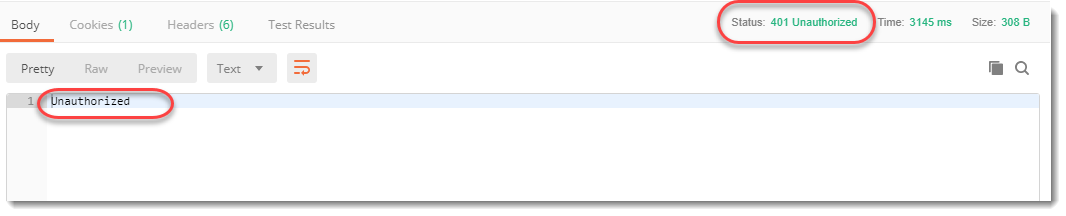
Note: The status code is 401 which corresponds to unauthorized access and the response message says Unauthorized.
The status code and response from the server indicate that we are not authorized to access the API we are trying to access(See Responses tutorial to learn more**). Later in the tutorial, we will try to access the same API using the credentials as we discussed in the last section.
Need for Authorization
In the last section, we discussed that a resource owner does not allow access to the resources to everyone in the company. This is because it can lead to possible security breaches. If I allow an intern to access my database APIs then inadvertently he can change the data and that data can be lost forever which can come as a cost to the company. There are numerous reasons possible for the same. Maybe a person changes the data for money or a person can leak the data to another company. Authorization plays a very important role in deciding the accesses and tightening the security. Let us see the different types of Authentication available to us.
Basic Access Authentication / HTTP Basic Authentication
A Basic Access Authentication is the most simple and basic type of authorization available. It requires just a username and password for checking the authorization of any person (That is why we say basic access authentication). The username and password are sent as header values in the Authorization header. While using basic authentication we add the word Basic before entering the username and password. These username and password values should be encoded with Base64 otherwise the server won't be able to recognize it. We will follow these steps to check whether we can access the same API we used above or not
Checking authorization using credentials
1.Enter the endpoint https://postman-echo.com/basic-auth in GET request.
- Go to Headers

- Enter the following key-value pairs in Header
Authorization: Basic postman: password

Note: We are using the username as postman and password as password
- Press Send and see the response box and status code.
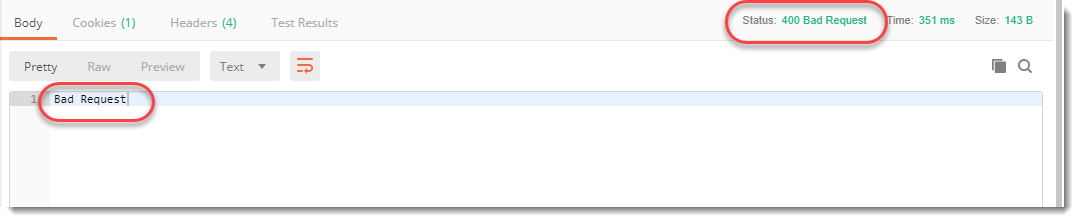
It still says 400, Bad Request.(This part we have already covered in the Responses Chapter under Status codes and their meaning). Can you guess why?*** If you remember what we learned in the last section, a basic access authentication requires a username and password to be encoded in Base64 but here we just sent the username and password in plain text. As a result, the server returned a 400, Bad Request status code. Before we move forward it will be beneficial to understand what Base64 encoding is.
What is Base64 encoding?
Encoding is used in authentication because we don't want our data to be transmitted directly over the network. There are numerous reasons for that. Network scanners can read your Request and retrieve the Username and Password sent without encoding. Also, bits and bytes transmitted directly can be considered as inbuilt command bits by the modem or other equipment in the network chain. For example, if there is an inbuilt command of 0101101010 which means reset to the modem then while transmitting we have may want to get a data sequence of 001101010010110101011020. Here the modem might interpret it as a reset command and will reset itself. In order to avoid such problems, it is beneficial to encode the data.
We use base64 particularly because it transmits the data into a textual form and sends it in an easier form such as HTML form data. We use Base64 particularly because we can rely on the same 64 characters in any encoding language that we use. Although we can use higher base encoding methods also but they are very hard to convert and transmit which wastes time unnecessarily.
Coming back to the original problem of sending a Base64 encoded string in Authorization header. We have two ways in front of us for creating a Base64 encoded string:
- Through third party website
- Through Postman
We will see both of the options one by one. For now, follow the steps for accessing the API by decoding from a third-party website.
Authenticating by encoding through a third party website
- Go to https://www.base64encode.org/

Note: There are thousands of websites available for the same purpose. You can use anyone just make sure you encode to the same value as us. Also, we are using Microsoft Edge as the browser, though it should not make any difference.
- Paste in the box the following values
postman: password

3.Press Encode.

- Copy the encoded text.

Note: Do not use space in between any two texts or symbols. postman: password will encode to a different value while postman: password will encode to a different one. Needless to say, both will be considered wrong. Use postman:password only.
- Go to the postman app and instead of postman: password, paste the encoded value

- Press send and see the value of the response box and the status code.
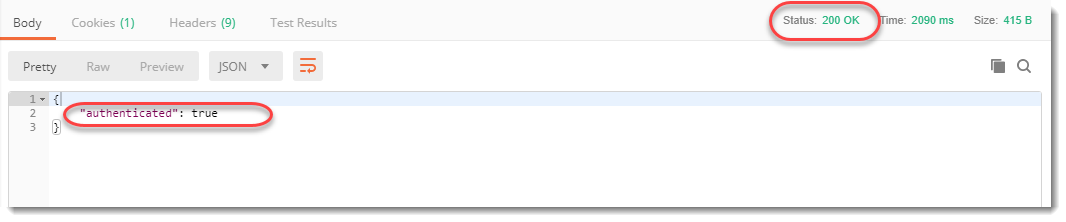
200 OK, authenticated means we have provided correct credentials and now we are authorized to access the data.
Authenticating by encoding through Postman
Instead of going to a third-party website, we will try to encode using Postman.
- Erase the key-value pair that we entered earlier so that it now has no values.

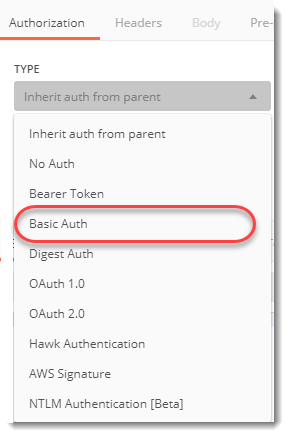
- Go to the authorization tab

3.Select Basic Auth in the Type dropdown
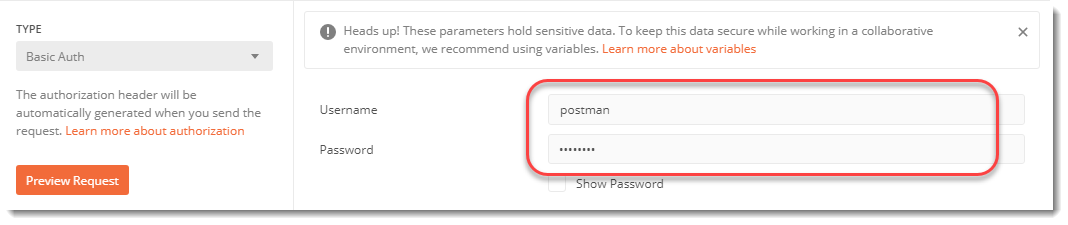
4.Enter username as postman and password as password
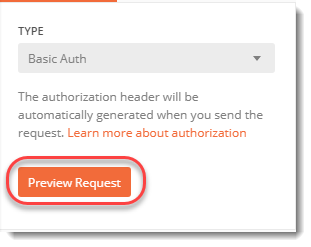
5.Press Preview Request
- Go to Header and see that Postman has converted the username and password for you.

7.Press send and voila! we are authenticated.

Here we conclude our tutorial. I hope you must have learned a good deal about basic Authorization in Postman. It is not that hard but it never hurts to just go through the tutorial once again to have a good hand on Authorization. Authorization and Authentication will be some of the most important topics that you will learn, so please internalize all the concepts taught here. We will move on to our next tutorial now.
There are other types of Authorizations possible as well in Postman, if you like to learn more about it please refer to the below videos:
Bearer Token Authorization in Postman