In the last tutorial, we discussed what are branches in Git. It gave us a general overview of the concepts of branches. Branches can create through remote GitHub repository directly or through Git on our local system. Although in the real-world scenarios, creating branches directly through GitHub is not the primary choice for creating the branches. The foremost choice of the developers is to Create Branch in Git through the console/terminal on the local machine and pushing those changes to the remote repository on GitHub. In this tutorial, we will learn about:
- Fetching branches in Git
- View local branches
- View remote branches
- How to create a local branch in Git?
- How to push a local branch to the remote repository?
- Switching branches
- Creating and Switching a branch in the single git command
View branches in Git
Before we go ahead to create the branches on our local system, we need to learn how to view existing branches locally and over the remote repository.
How To View Local Branches In Git?
Viewing the branches helps us keep a check on the synchronization between the remote and the local repositories. We can view all the local branches by a simple command:
git branch
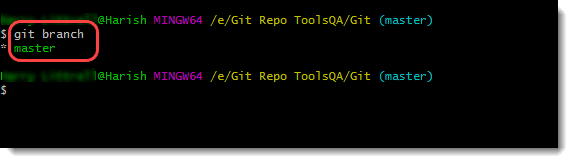
Once you clone the repository to your local machine, all the branches will be visible through this command.
How To View Remote Branches In Git?
Executing the git branch without any flag shows only those branches that are available locally. Since we have the master branch, only the master branch displays in the output. To check all the branches (including remote branches), type the following commands:
git branch -a
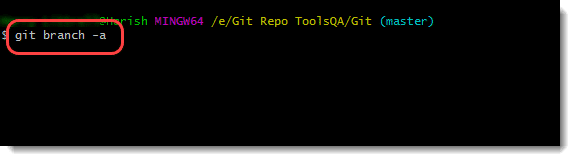
Executing the command lists all the branches, as shown below:
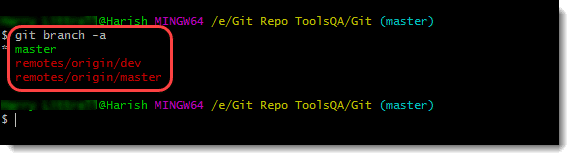
In the highlighted red color, one more branch can be seen, which is the "dev" branch. As we create more branches in the next section, we will reflect them here. We will keep checking from time to time to show the user all the available branches.
How to Create a Local Branch in Git?
Creating branches in Git is a simple step-by-step process. But, before starting, ensure you have a clean working directory (nothing to commit) by running the git status command.
Open Git Bash and navigate to the local working repository. Type the following command to view all of your branches.
git branch
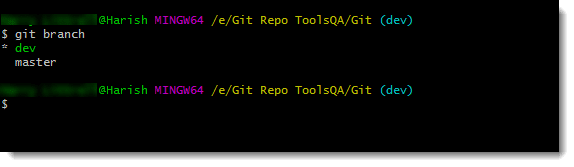
The local branches are the same as shown in the previous section, i.e., "master".
Let's create a new branch now in our local working repository. Type the following command to create a new branch named "prod" (short for production).
git branch <branch_name>
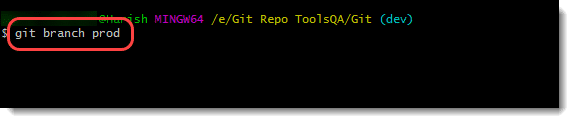
It is the initial and simpler way to create a branch in Git. We will see an alternate way later in this tutorial.
Now check the branches on the local system by typing the git branch command again:
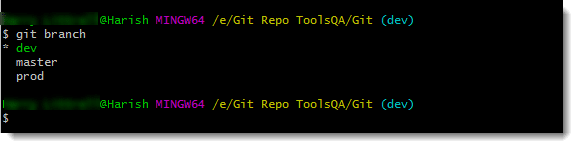
Note: The creation of our branch in the local working directory is now complete. Notice the "*" in front of the "dev" branch. The star means the current branch on which we are currently on. Check that out on the previous image where "master" owns the star.
As we might assume, the new branch must also reflect on our GitHub account with a new branch added to the list of the branches. Let's check that out.
I navigate to my account and check the number of branches in the "Branch" dropdown.
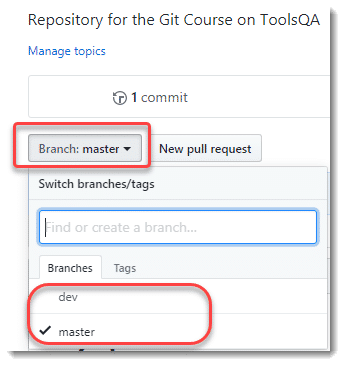
Damn! I still have the previously created branches, and the new branch that I created locally (prod) is yet not synced here.
By this, I assume that creating a new branch is a change made to the repository like any other change, so I need to push our changes to the remote repository through git push command. So, let's try the same thing here and see if it works or not.
How to Push Local Branch To Remote Repository?
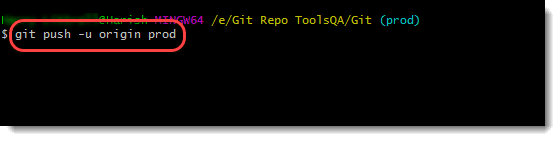
Now that we have created the branch on the local machine, we need to reflect the same on the remote repository. Use the following command to update the local branch on the GitHub repository.
git push -u origin prod
Note: The -u flag adds the tracking reference for the prod branch so that your upcoming pushes do not require any extra arguments, and the local branch links to the remote branch.
Press enter and execute the command.
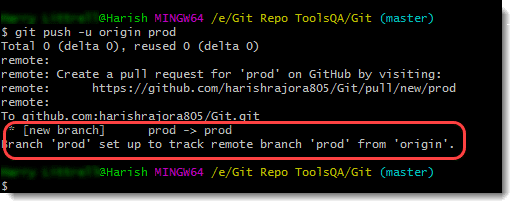
This message shows that our branch is all set up and tracked. Let's confirm it once again on our GitHub account.
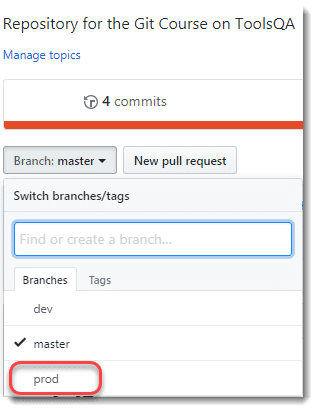
The Branch dropdown shows that the new branch is added and synced in the GitHub remote repository successfully.
How to Switch Branch in Git?
Since we are dealing with multiple branches, it is essential to know how to switch between these branches. Moreover, we should know how to work on each of them separately. Switching the branches is a very frequent operation, so it stands quite essential for us too.
In the following steps, we will try to switch the branch from master to prod.
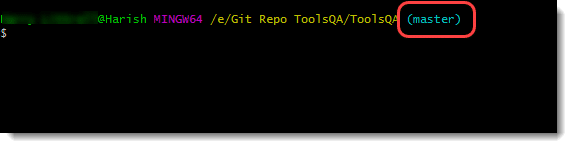
Check the branch you are currently on, which is visible alongside the directory name.
Switch to the "prod" by executing the command:
git checkout prod
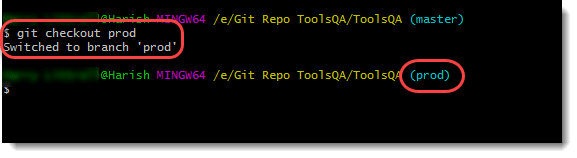
And here you go. We have successfully switched the branch from master to prod. Now, whatever operations you do, they will log inside the prod branch since now you have separated yourself from the master. More often, while working in Git, we create a branch and start working on it from that point in time. It would typically require two commands:
git branchcommand to create the branchgit checkoutcommand to switch to the branch
Executing both of these branches takes some time, and fortunately, Git has a solution for it. Let's see how.
How to Create and Switch a branch with a single Git command?
Git provides us with an option to create a branch and switch to that branch by executing a single command. Since it is a frequent requirement that we create a branch and switch to it at the same time, this command helps a lot to achieve the same. Execute this command and check the output:
git checkout -b <name_of_branch>
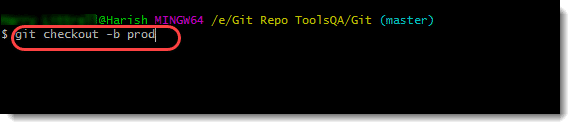
Note: The flag "b" here tells Git to create a new branch with the branch name succeeding in the flag. Git throws a "prod did not match any file" error if there is no specification of the flag for a new branch.
Execute this command, and you will automatically switch to the newly created branch.

Note: Git Branch command does not switch to the newly created branch automatically, as is done in git checkout command.
Once we finish these operations, we have a newly created branch to work. It is evident that if you know the creation, you should also know how to delete the Git branches. In the next tutorial, we will talk about the deletion of branches and why do we need to delete a branch.