Now that you've created an automation test using TestProject, we will need a reliable and easy execution strategy to get the most out of these assets. Test execution is one of the vital aspects of any test automation project. As we learned in the previous articles, TestProject makes test execution very easy, and it can complete in just a couple of clicks. TestProject also allows you to run your tests on multiple machines using TestProject Agents. Now, in addition to the manual executions, automation teams should also be able to run their tests on specific intervals, which are known as jobs, and we can quickly achieve via Schedule jobs in TestProject UI.
It allows the team to keep a check on their product's health. In agile development, there will always be frequent changes in the product, requiring the tests to be run at regular intervals to validate and ensure the product quality on defined frequencies. Generally, people use tools such as Jenkins for scheduling of jobs/tasks, which TestProject does integrate. However, TestProject provides a similar feature out of the box as well, for those that might be unfamiliar with Jenkins.
In the previous article, we learned how to write a test in TestProject and how to run a stand-alone test. To run an entire test-suite, TestProject offers the feature to create a job, which we can schedule for execution. Here is an outline of this article, How to Create and Schedule Jobs in TestProject, where we are going to learn advanced test execution and scheduling jobs in TestProject.
- How to create and schedule a job for test execution?
- How to create a job in TestProject?
- Also, how to add tests to a job?
- How to manage email notification on a scheduled job?
- And, how to schedule a job in TestProject?
- How to view the reports for the scheduled job?
How to create and schedule a job for test execution?
One of the significant aspects of scheduling jobs in TestProject platform is its ability to run tests regularly. Test execution at a specific time or date will ensure product health and quality. It also frees QA engineers from manually running and monitoring the automation suite. For example, job scheduling can run tests overnight, while developers are not working on the code. It leaves office time open for productive work and coding. Let's see how TestProject enables Jobs creation as well as notifications of these job completion.
How to create a Job in TestProject?
To create a new job, follow the steps mentioned below:
-
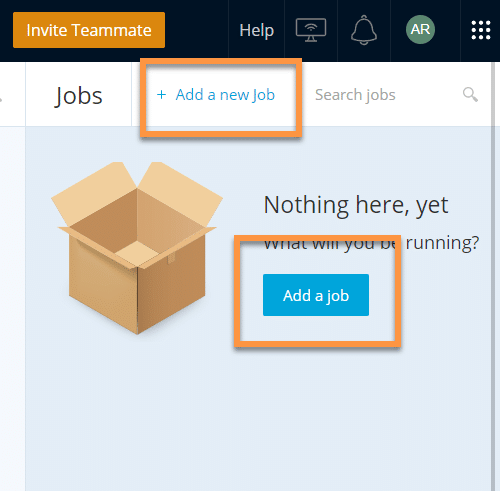
Navigate to your project page where you want to add a job. On the project page, you will find the Job section on the right side, as shown below:
-
In the job section, you will find the "Add a Job" button and "+ Add a new job" link as marked in the image above. Click on the "Add a job" button to start job creation.
-
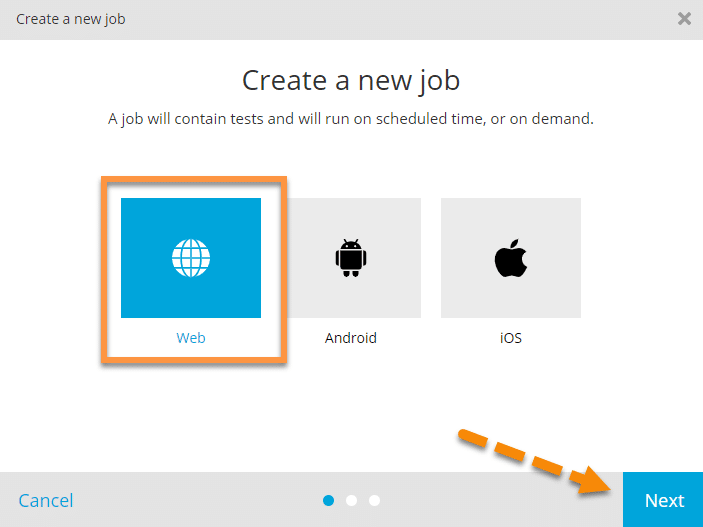
It will open the "Job creation wizard", as shown below:
-
On the wizard, select the type of test you want to run. Here we have a web test so, we have selected "Web", as shown in the image above. Once selected, click on the "Next" button.
-
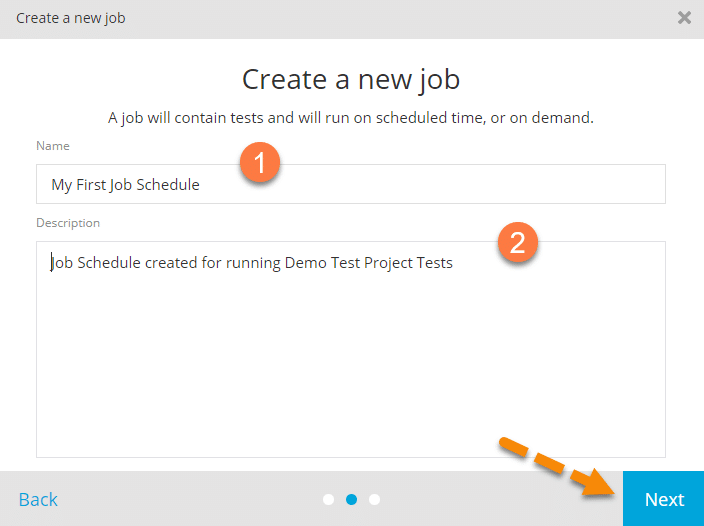
Now, Create a new job wizard will open. Enter your job name and job description. We have entered the job and description as per our requirement marked by steps 1 and 2. Once you finish, click on the "Next" button to proceed.

-
On the next wizard screen, select the options as mentioned below:
- Select Agent: choose the agent on which we want to perform the execution.
- Select the Browser: choose the browser on which you want your tests to execute. Here, we have selected two browser types, i.e., Chrome and Headless Chrome. You can select from any browser available on your system. You can also select a single browser for execution.
- Restart Browser Before each test: We also have an option to restart the browser after every test, as marked in the image. It is quite useful in specific scenarios where you need to close your browser to reset the browser state (e.g., needing to log in a fresh user).
- Once done, click on the "Create" button to create the job.
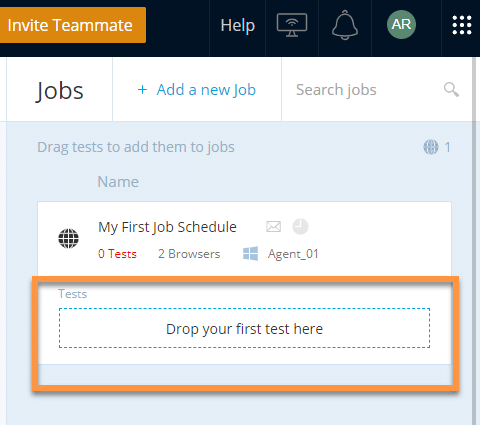
As you can see in the above image, job creation is complete. Now the next step will be to add tests to the job.
How to add tests to a job?
To add a test, you will need to drag the tests from the project and drop it into the job. You can see the option for the same in the above image marked with the rectangle.
If you want to run multiple tests with your job, you can select all and drag them in one go. Also, the same test can add numerous times. It is quite useful if you want to run some specific tests just after or before some of the tests in the job. Execution of a job also allows the user to decide the order of implementation by arranging the tests in the execution sequence.
Now, to add the test "Fill form in DemoQA",we just need to drag the same and drop on the jobs page, as shown below:
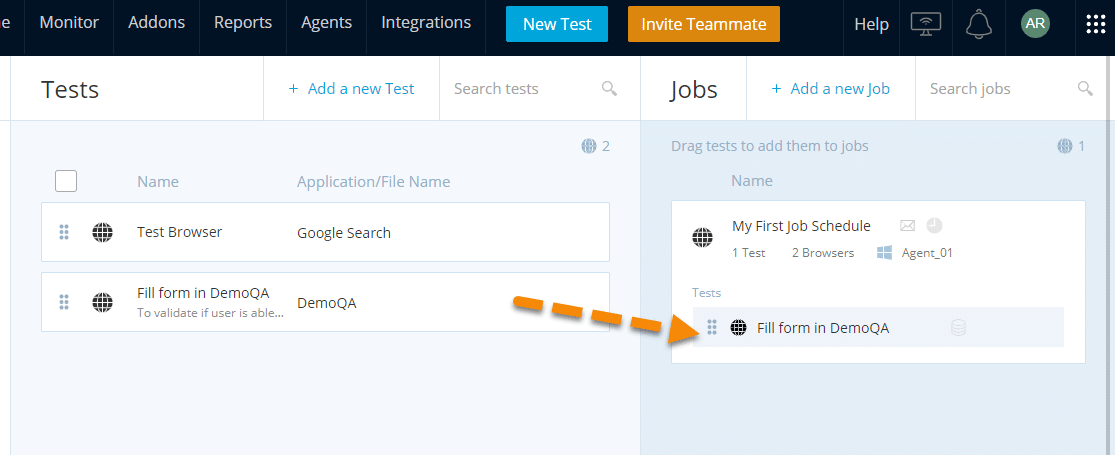
As you can see in the above image, we have dragged and dropped the test from the project on the job. It now adds to the job. Same way, using this drag and drop method, you can add multiple tests to a job.
How to manage email notification for a scheduled job?
Many development teams are required to send test execution results to the stakeholders regularly via email. This email report should contain essential information about the tests executed. TestProject provides a built-in email notification feature to allow users to send an email. We can also set up email notification criteria and regulate when emails should get triggered.
To set up email notifications, follow the steps as mentioned below:
-
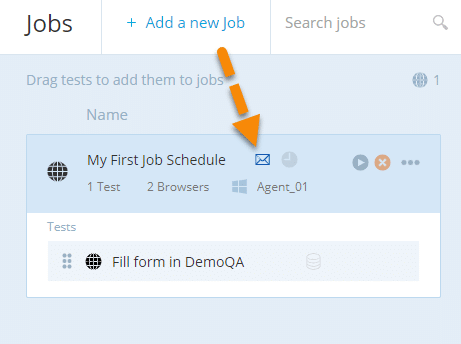
After creating the job, on the jobs page, click on the "Email Notification" icon as shown below:
-
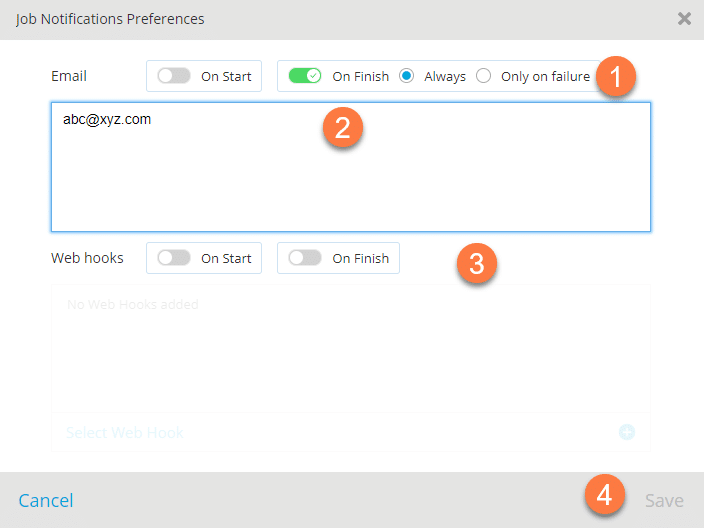
A new "Job Notification Preferences" wizard will open, as shown below:
-
You can select when you want to receive the mail, either at the start of execution or at the end of it. You can even choose to receive notification for both the beginning and end of execution.
-
As shown by marker 2, you can include a comma-separated list of emails for all of the people who need to receive the email. Ensure the addition of all the recipients to the project. Only emails that have been added to the project as team members will be able to receive the notification.
-
WebHooks are a reverse communication channel at TestProject. It allows TestProject to communicate with external entities when a specific event has occurred. For example, it can be used to interact with your test management tool like Jira and can open a bug for you when a test fails. We will discuss more on this in upcoming tutorials.
-
Once done, click on the "Save" button as marked by marker 4.
You are now all set to receive notifications for all of the scheduled executions of the job.
How to schedule a job in TestProject?
Scheduling a job enables a set of automated test cases to execute at a given time and date. It can have several benefits like saving time, monitoring the health of the application periodically, or taking a daily baseline of the code changes made by developers. Scheduling a job is one of the vital features of TestProject. Let's now see how to schedule a job in TestProject:
-
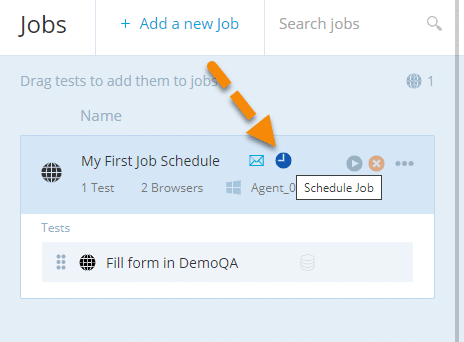
Click on the "Schedule Job" icon on the Jobs page, as shown below:
-
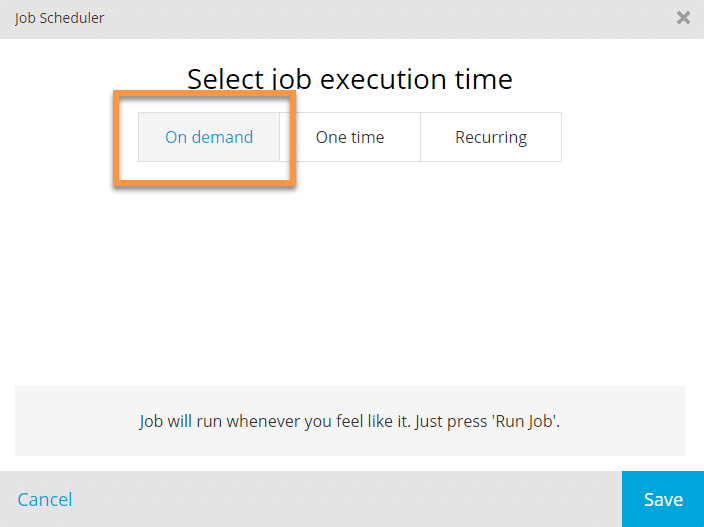
Once clicked, it will open the "Job Scheduler" wizard. The job can be executed in three different ways depending upon the requirement.
-
On-demand means we can execute the job whenever we want. We can simply navigate to the job in the UI and click on the play icon beside the schedule job icon. It will execute the job instantaneously. By default, all new jobs in TestProject set up to run On demand.
-
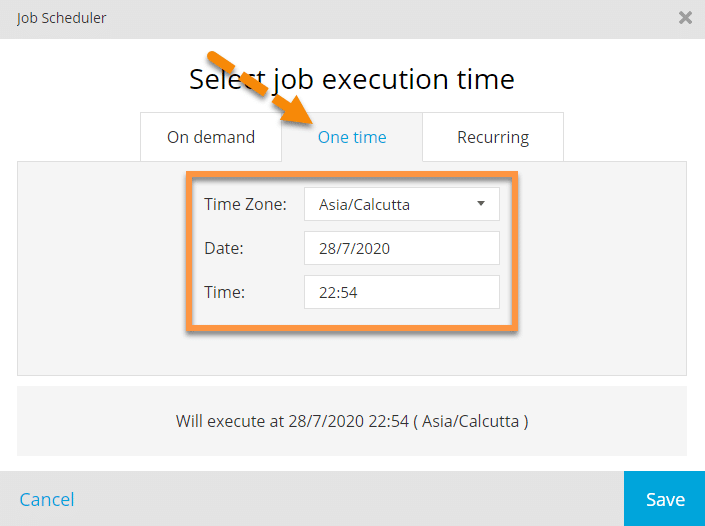
One time execution allows the user to execute the job once at any pre-defined date and time. You can set your custom date and time and wait for the scheduler to do its job.
-
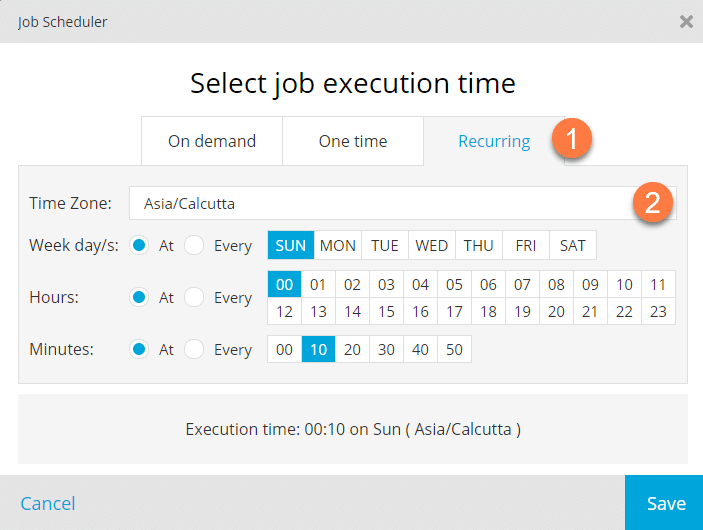
Recurring a job schedule can execute your test regularly or in a pre-defined repetitive format. It is instrumental if you want to run your test on a daily, weekly, or monthly basis.
For this tutorial, we will be using "One Time" job scheduling.
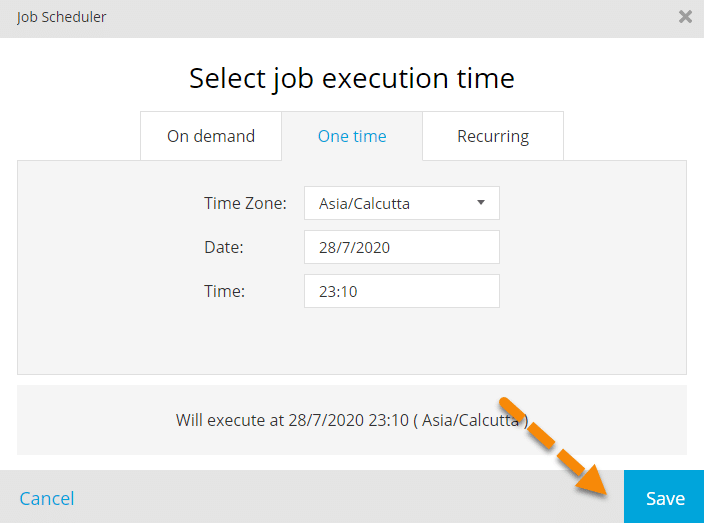
- Click on the "Save" button, and the job will schedule. Once the date and time arrive, the job will get executed. Make sure that the Test Agent is active and running on the system for uninterrupted execution.
How to view the Report of Schedule Jobs IN TestProject?
Any test execution or job schedule will not be useful to us without a report on the outcome. It is where TestProject's reports shine. These reports contain all the vital information about the test execution. They allow users to understand the overall health of the application quickly.
If you have successfully scheduled a TestProject job and have provided your email while enabling the email notification, you will get an email, similar to as shown below, after the execution of the job:

You should have received a mail from TestProject with execution details like Pass, Fail, and Stopped percentage. This email should also contain other information like start time, duration, overall result, started by platform, and agent. Overall the email has almost everything that anyone could require to get a complete understanding of the execution status. In case the user wants to know more details, he/she can click on the "FULL REPORT" button present in the email.
Clicking on the "FULL REPORT" button will open up a new tab in the browser with TestProject cloud as shown below:
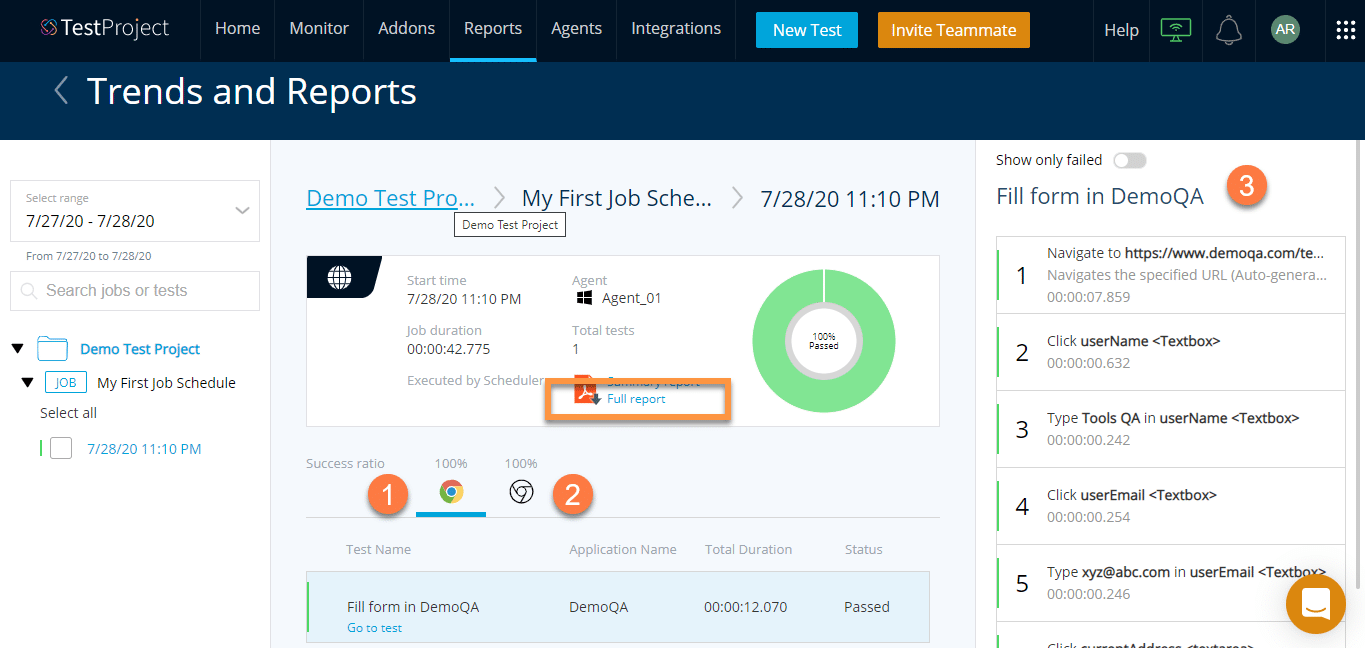
- In the above image, you can see as we have selected two browsers, i.e., Chrome and Headless Chrome.
- Step 1 and 2 allow us to verify the test execution status of each browser independently.
- Additionally, step 3 lists all the test steps details. GREEN marks all the passed test steps, and failed steps will mark as RED.
- Moreover, you can also download the whole report in the form of a PDF. Click on the "Full Report" link just above marker 2, and you will be able to download and share the complete test execution report.
So, this way, you can get the report directly in your inbox and can view the health of the application without having to log in to the TestProject platform. Also, the non-technical stakeholders, who don't have access to the TestProject platform, can be updated regularly by scheduling the automated test cases.
Key Takeaways
- The point of automation test development is to execute the test cases regularly, providing an understanding of the overall health and quality of the application.
- Additionally, tests can be executed directly from the project or by creating jobs, which contain a group of tests combined.
- Moreover, several tests can be combined to create a job, and then the job can be scheduled for execution at a given date and time.
- Also, the report of execution can be accessed either from email or from the reports section of the TestProject platform.
Conclusively, our tutorial on Creating and Scheduling Jobs in TestProject is complete. In the next tutorial, we will learn more about the "Locator strategies for web elements in TestProject".