Jenkins is one of the important CI/CD tools in the DevOps era. As we already know that we can integrate Jenkins with Version Control tools, Build Tools, continuous integration, configuration management tools, etc. So, now let's start the journey of Jenkins integration with one of the most popular version control tools i.e. Git. In this article, we will understand the details of Jenkins GitHub Integration, by covering the details in the following topics:
- What is Git and why it is necessary?
- How to Integrate Jenkins with GitHub?
- Why GitHub integration with Jenkins is needed?
- How does Jenkins integrate with GitHub?
- How do I trigger a build automatically in Jenkins?
What is Git and why it is necessary?
As we know, Git is an open-source and distributed version control system used for tracking and managing the source code during the development of projects. Git stores the changes in files differently as compared to other Version Control Systems like SVN and CVS. This is one of the important concepts of Git that you should internalize as early as possible. Version control systems store the difference between the two versions. For example, consider File A that got changed three times. The first version of the file will be stored as-is, in the sense complete file will be stored. As new versions are introduced only the difference from the previous version will be saved.
Git, on the other hand, stores the Snapshot of the changed file. For example, if you made a change to File A, a complete snapshot of the changed file is stored. If a file has not changed between two versions, Git will keep a reference of the original file instead of copying it again in the new version.
Git has a remote repository that is stored on a server and a local repository which is stored in the computer of each developer. This means that the code is not just stored on a central server, but the full copy of the code is present in all the developers’ computers as well. Because every node has a local copy, almost all the operations on Git are local. This means that you don’t have to be connected to the remote repository all the time to do your work.
Since the development and release of Git, it has gained huge popularity among the developers, and being open source has incorporated many features. Today, a staggering number of projects use Git for version control, both commercial and personal. Considering the popularity and usage, Jenkins has also provided a mechanism to hook-up with the code snippets on Git. Let's see what steps we can perform for a successful Jenkins GitHub Integration?
How to integrate Jenkins with GitHub?
In the previous section, we discussed the necessity of Git. So now it's time to understand the necessity of the Jenkins GitHub integration. Let's understand the details with the help of the below subsections:
Why GitHub integration with Jenkins is needed?
In the real IT world, everyone works on his local machine but at the end of the day, they need to push their complete code into some central repository, such as GitHub repository from where they can run the complete project. So, GitHub is a central repository where our complete code resides remotely. Kindly visit the ToolsQA website for more information about GitHub.
Now, we integrate our GitHub repository to Jenkins because the integration of GitHub with Jenkins automates the deployment process, testing process as well as improves the final product quality as it saves lots of significant time for developers as well as testers. Every time a new commit occurs into the GitHub repository, Jenkins can automatically trigger the build and gives us the build result. So, to automate the complete deployment process as well as the testing process, it is very important to integrate GitHub with Jenkins. Now let's see in the next section that how does Jenkins GitHub integration work?
How does Jenkins integrate with GitHub?
In the previous subsection, we discussed the necessity of the integration of GitHub with Jenkins. Now, in this section, let's start our journey with the practical implementation that how can we integrate Jenkins with GitHub. As a part of this, we need to install the Jenkins Git Plugin.
How to install the Git plugin in Jenkins?
Let's start with the installation of the Git Plugin in Jenkins. To do this, please follow the below steps:
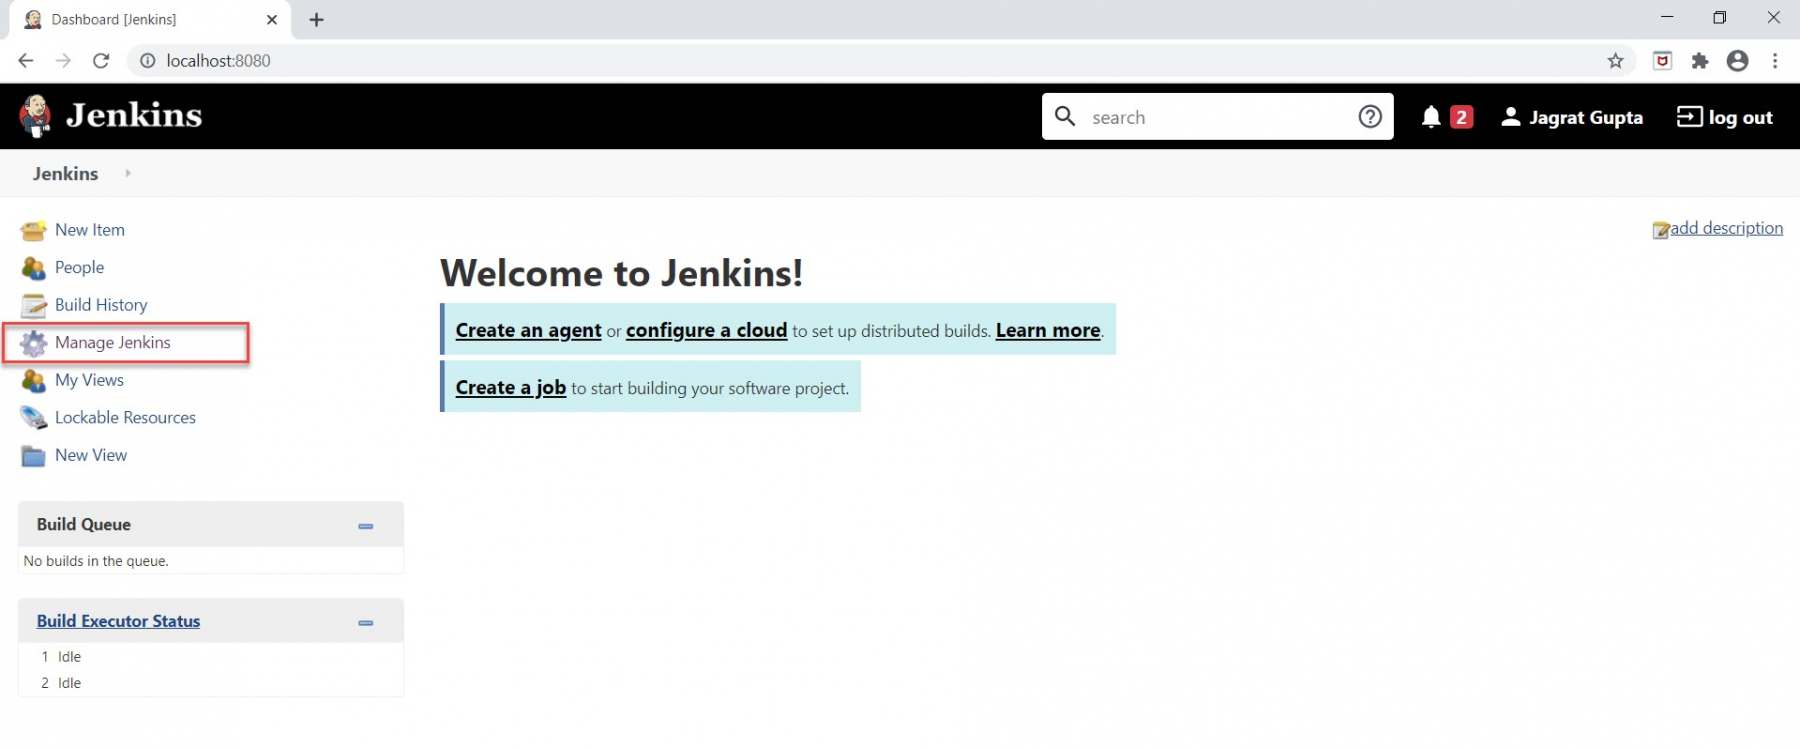
Step 1: Launch Jenkins and redirected to the Jenkins Dashboard. Now click on the "Manage Jenkins " link as highlighted below:
Note: To see details on how to install and run Jenkins, please refer to our article Install Jenkins
Step 2: As soon as we will click on the Manage Jenkins link we will be redirected to the Manage Jenkins page. Now click on the "Manage Plugins " link highlighted below:
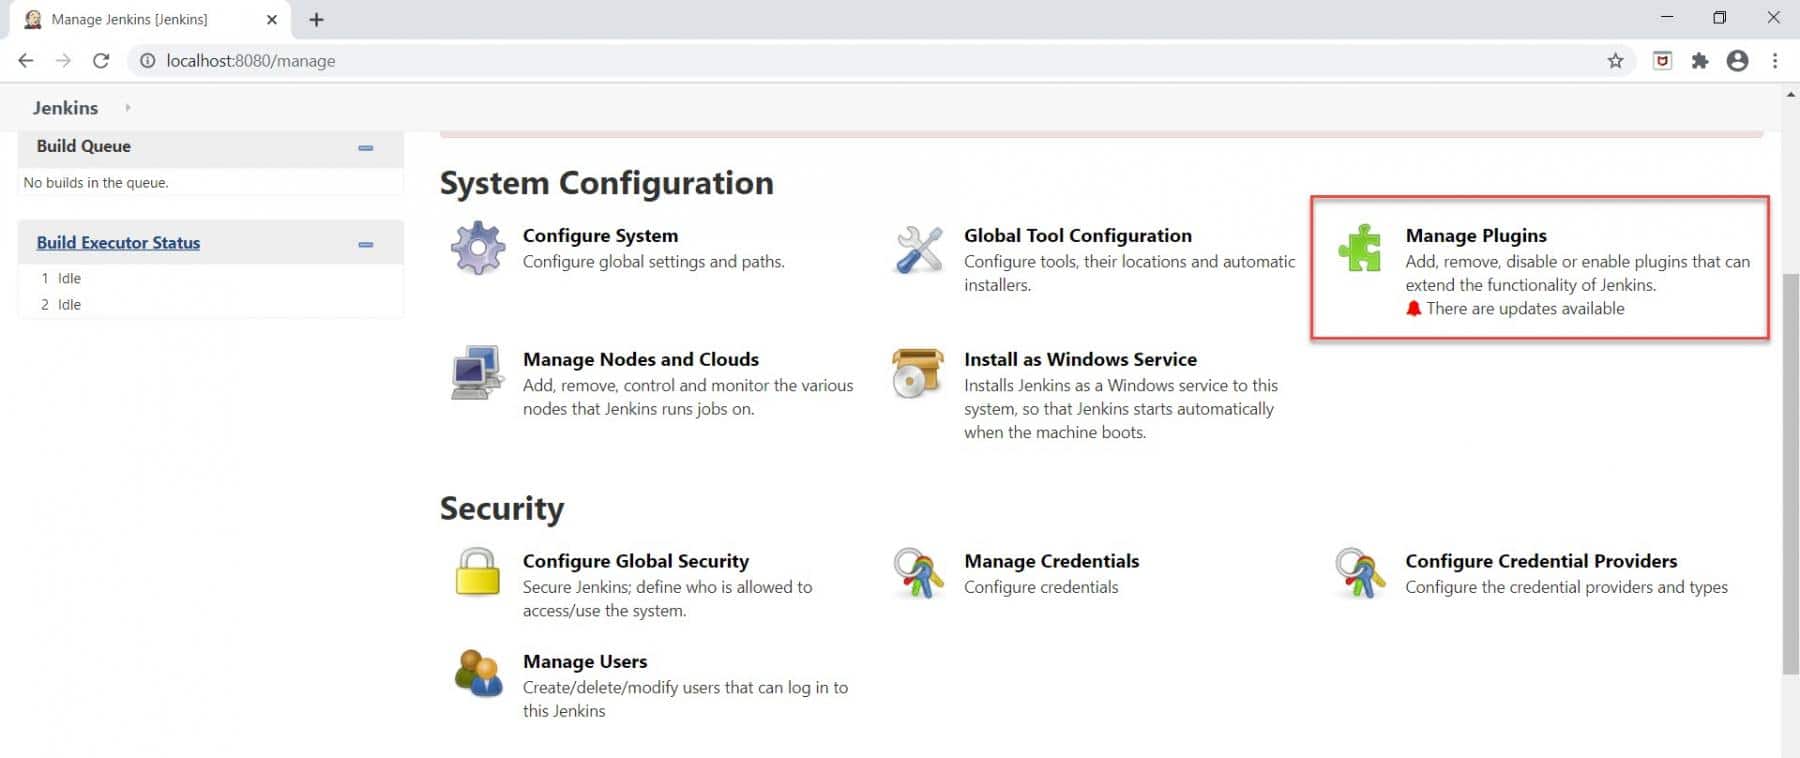
Step 3: As soon as we will click on the "Manage Plugins" link, we will be redirected to the "Plugin Manager" page.
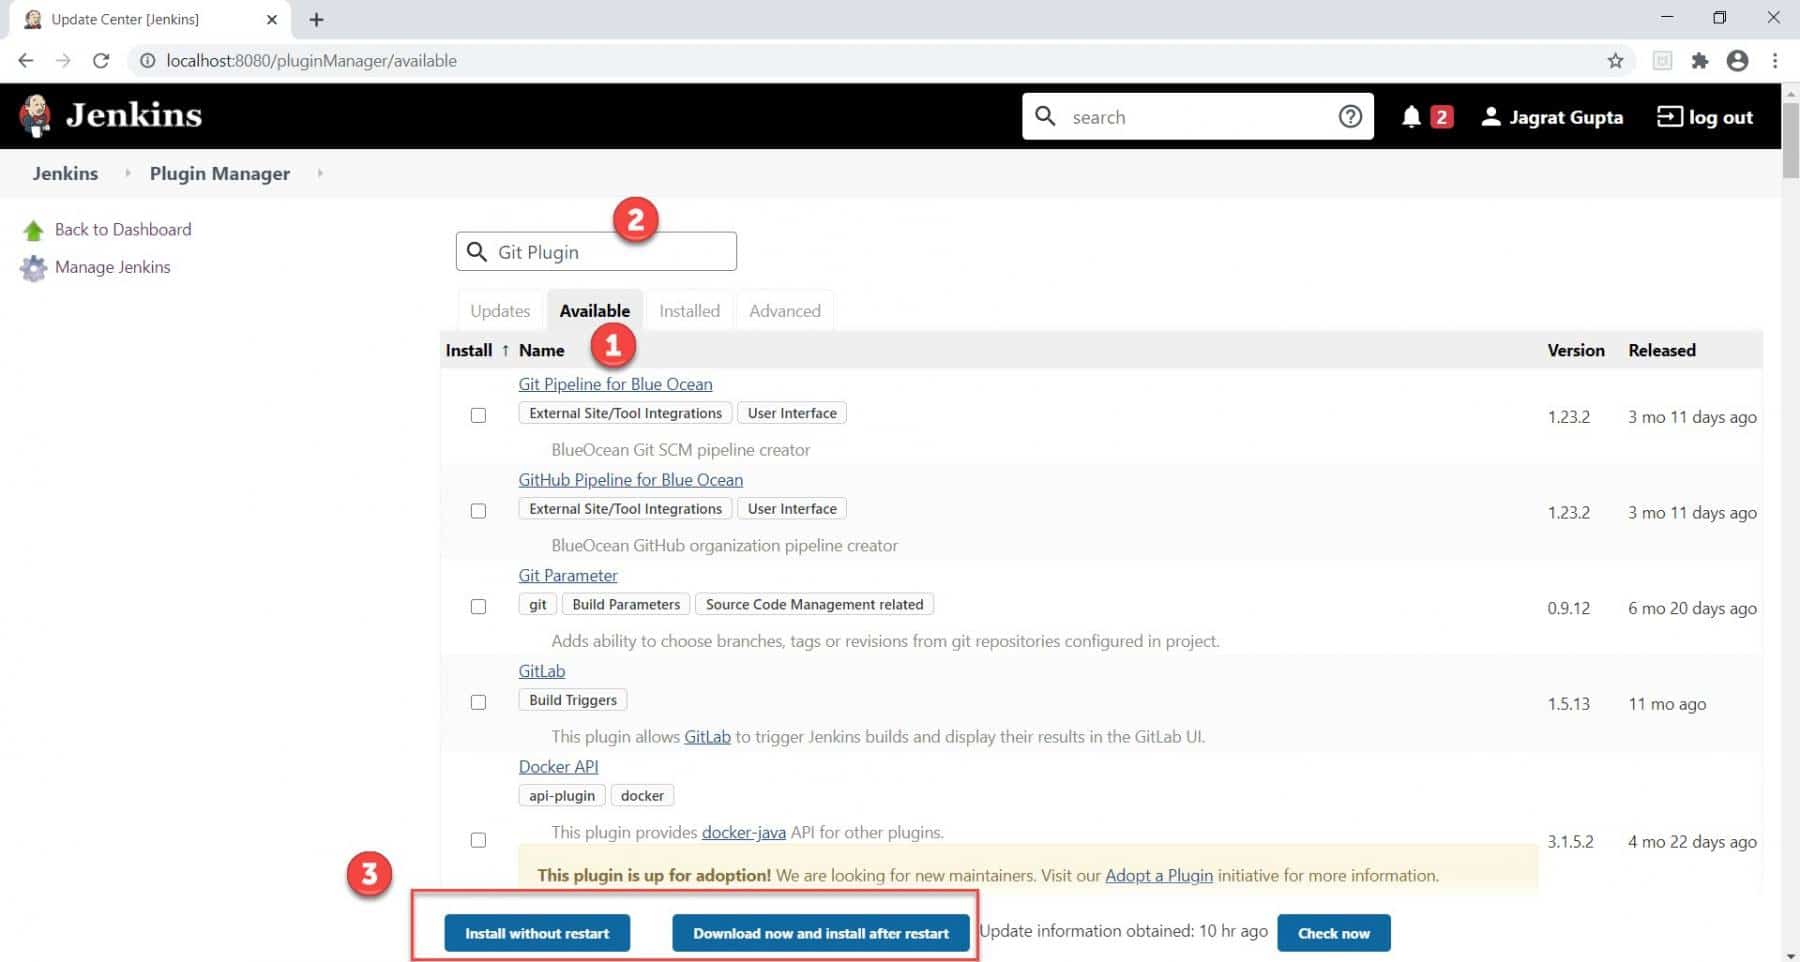
- If the git plugin is not already installed then click on the "Available " tab.
- Type "Git Plugin " in the Filter box and select the Git Plugin checkbox after its appearance.
- Choose either the "Install without restart " or "Download now and install after restart " button. If we will choose the "Install without restart" option then it will install the plugin without restarting Jenkins and if we choose "Download now and install after restart" then the Git plugin will be installed after restarting Jenkins.
Step 4: Now after installing Git Plugin, we need to verify it also. For verification, kindly follow the below steps:
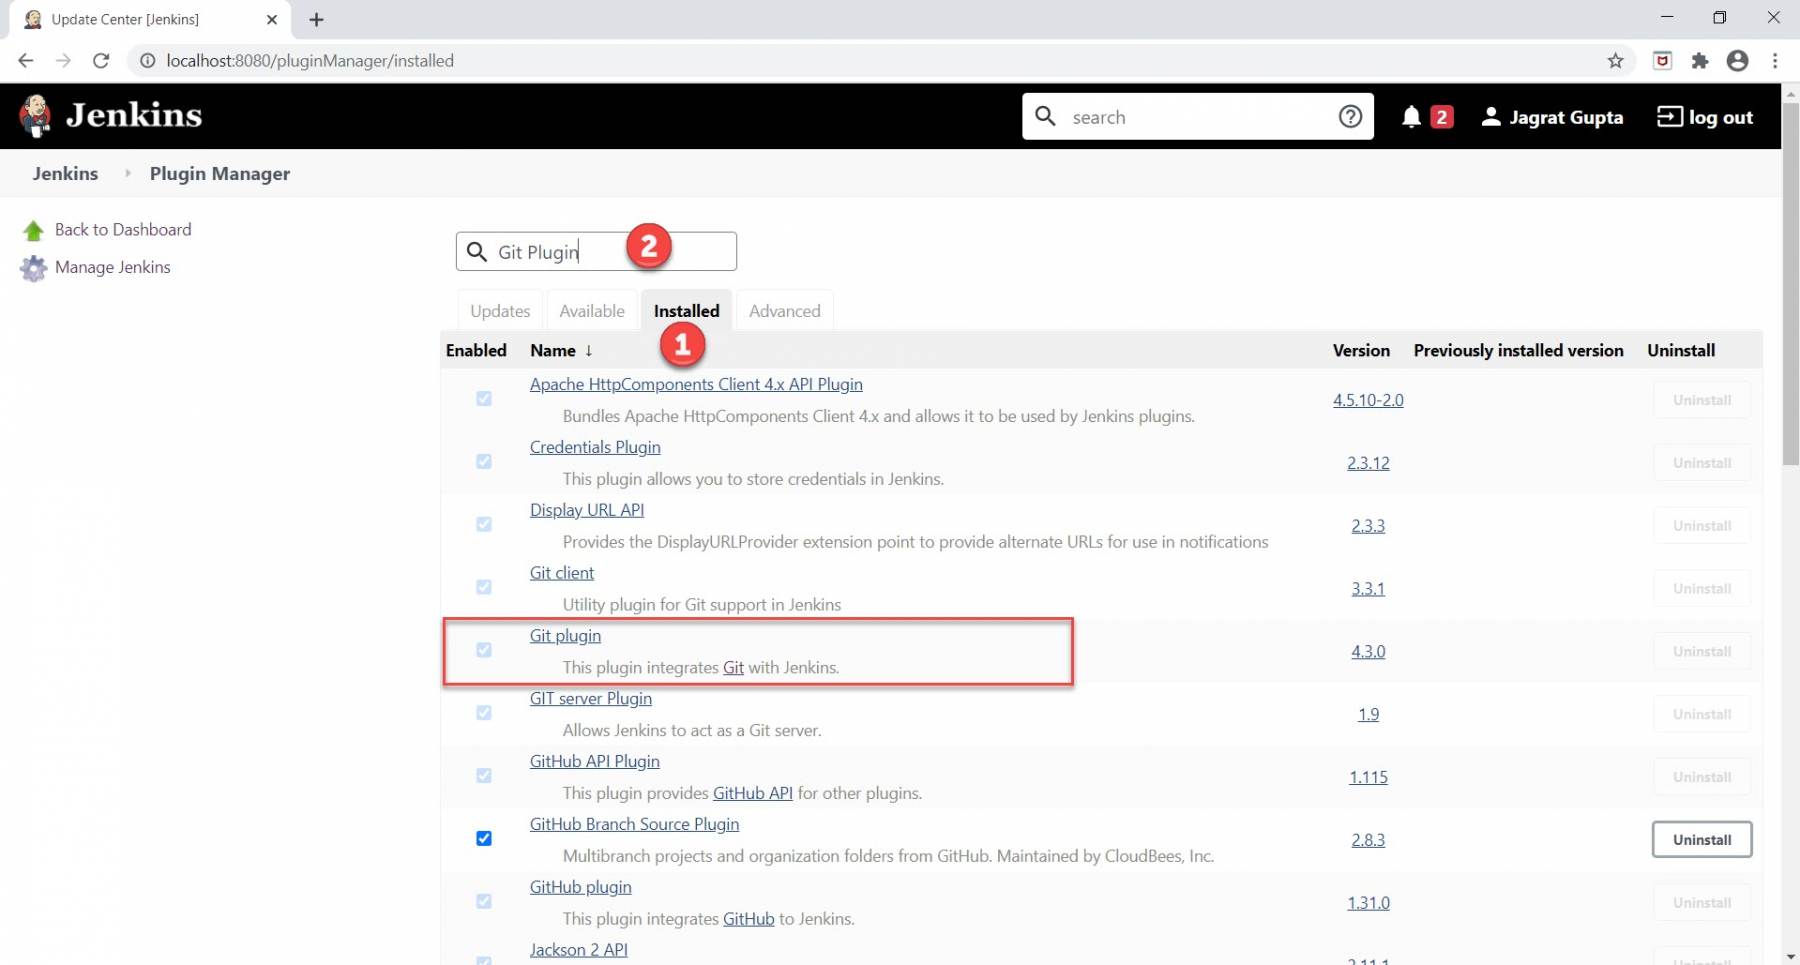
- Click on the "Installed" tab.
- Type "Git Plugin " in the Filter box.
Now after performing the above steps, if the Git plugin installs properly then it will appear under the Installed tab like highlighted in the above image by the red rectangle. So, now the Jenkins Git plugin is properly integrated with Jenkins. In the next section, we will see that how can we pull the GitHub repository in Jenkins?
How to pull a GitHub repository in Jenkins?
In the previous subsection, we already installed the Jenkins Git plugin. So, it's time to do configuration regarding GitHub repository in Jenkins so that Jenkins will automatically pull the code from GitHub repository, run it and give desired results. We have already pushed our code to the GitHub repository. Kindly follow the below steps to configure the GitHub repository in Jenkins:
Note: Kindly visit the Git Tutorials on the ToolsQA website for the installation of Git in our machine as well as pushing code into the repository.
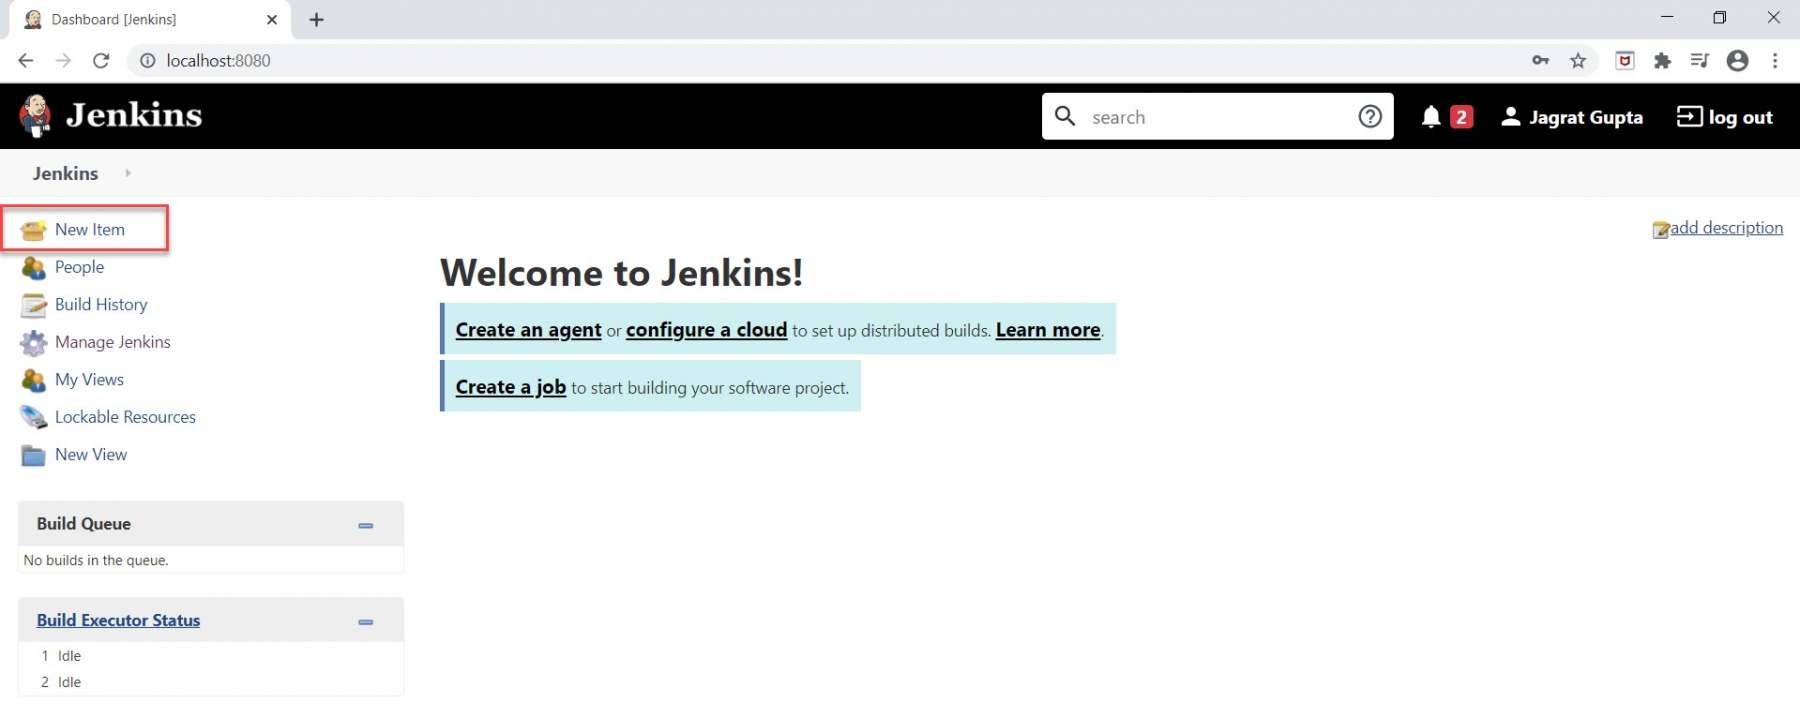
Step 1: Go to Jenkins Dashboard and click on the "New Item " link to create a new job highlighted in the red rectangle.
Step 2: Now do the following steps further for a selection of project:
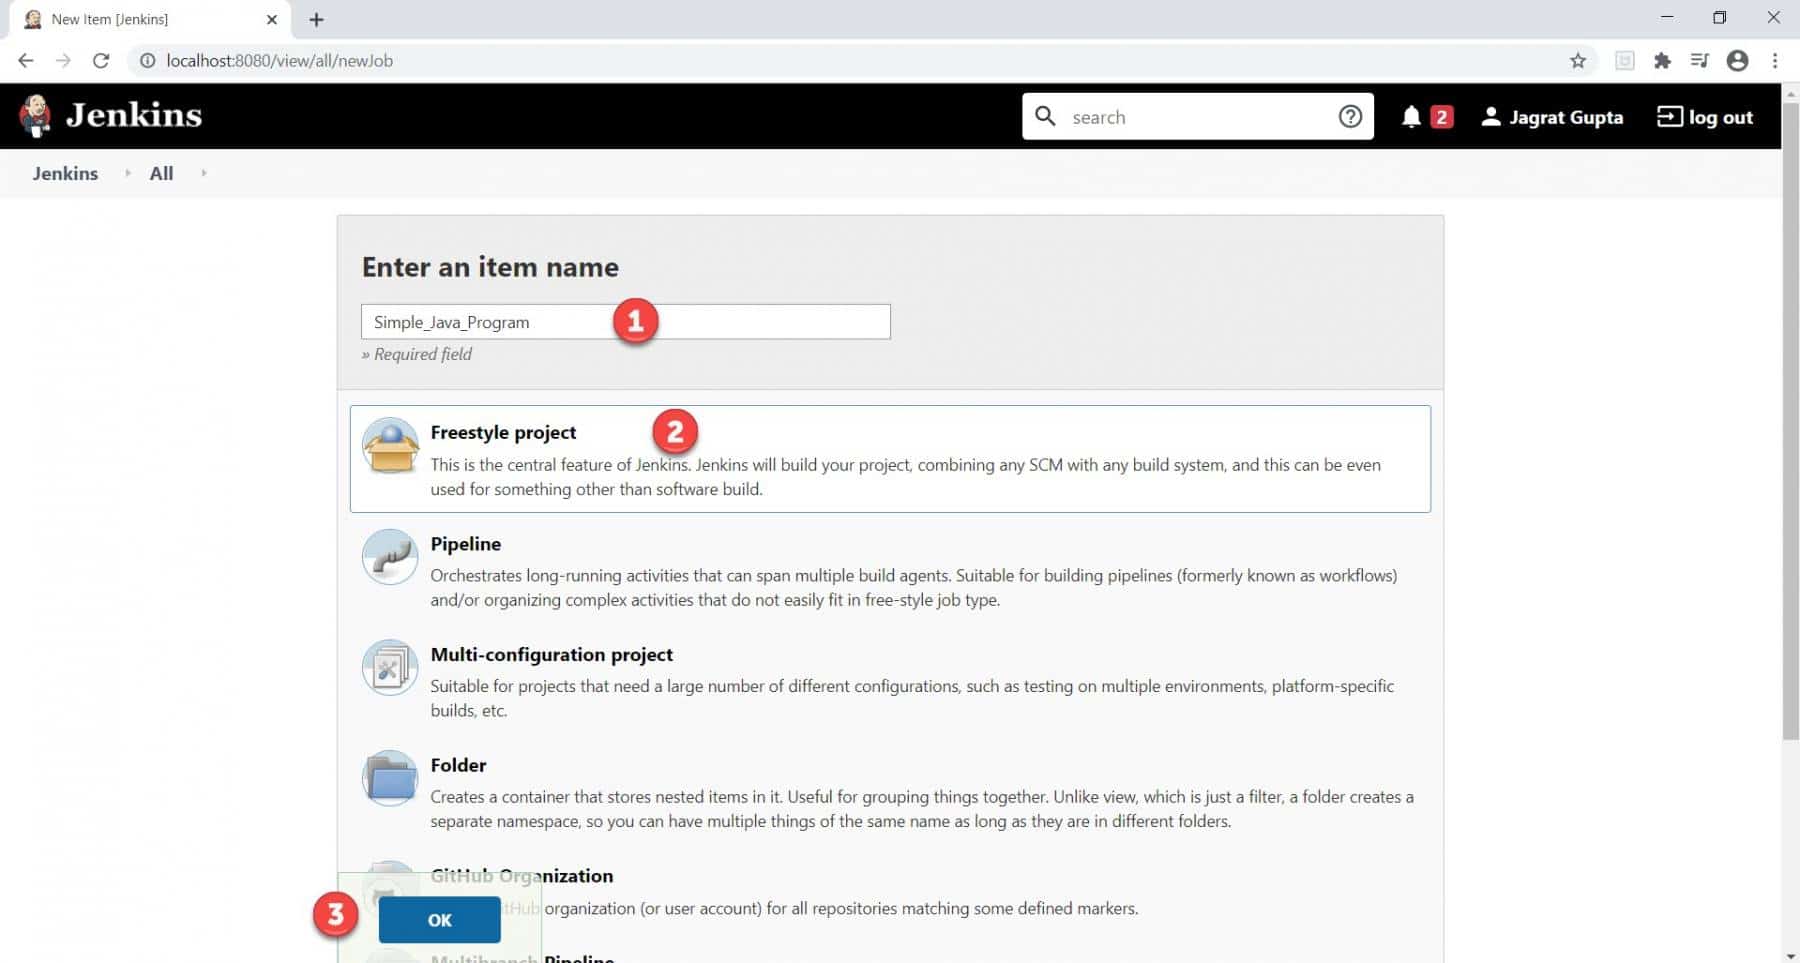
- Enter the Project Name.
- Select the Project type as we selected "Freestyle Project".
- Click on the OK button.
Step 3: As soon as we will click on the "OK " button then we will be redirected towards the Configuration page. Here we can put the description of our project.
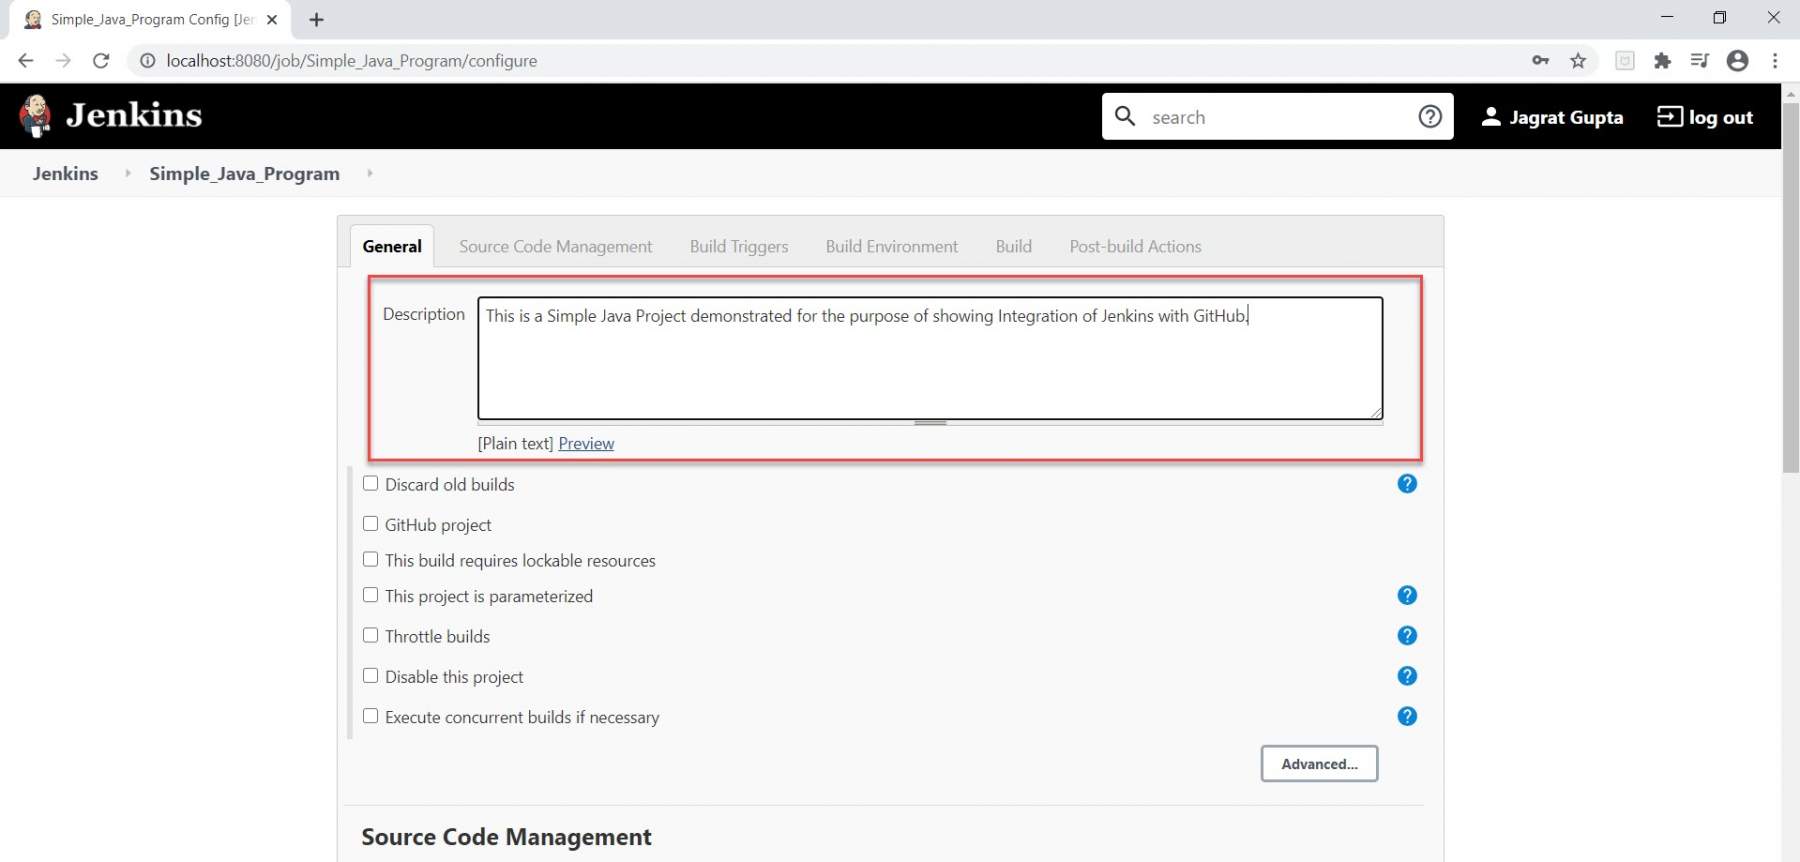
Step 4: Now just scroll down and go to the Source Code Management section. Now, select the "Git " option.
Note:* Here Git option is showing because we installed Git Plugin in Jenkins but if the Git option does not appear here then we need to check again whether Git Plugin is properly installed or not.*
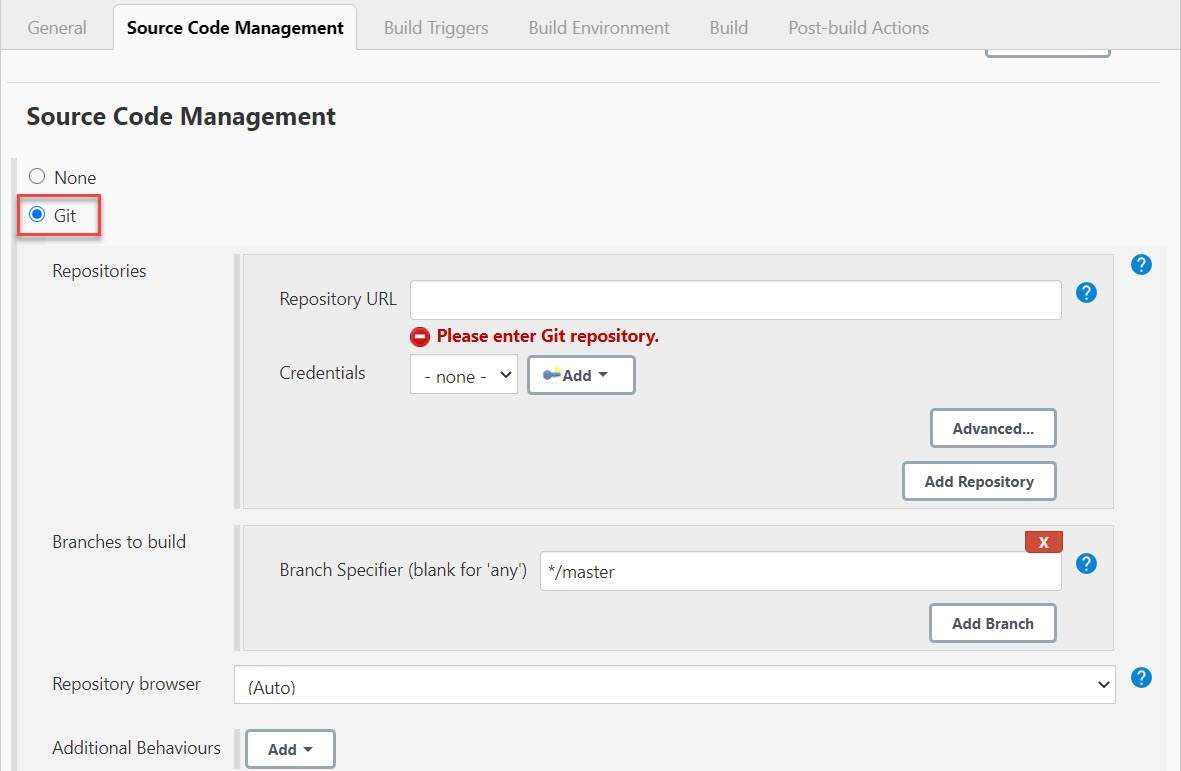
As soon as we will select the Git option, we can see the above dialogue box in which we will give the repository related information.
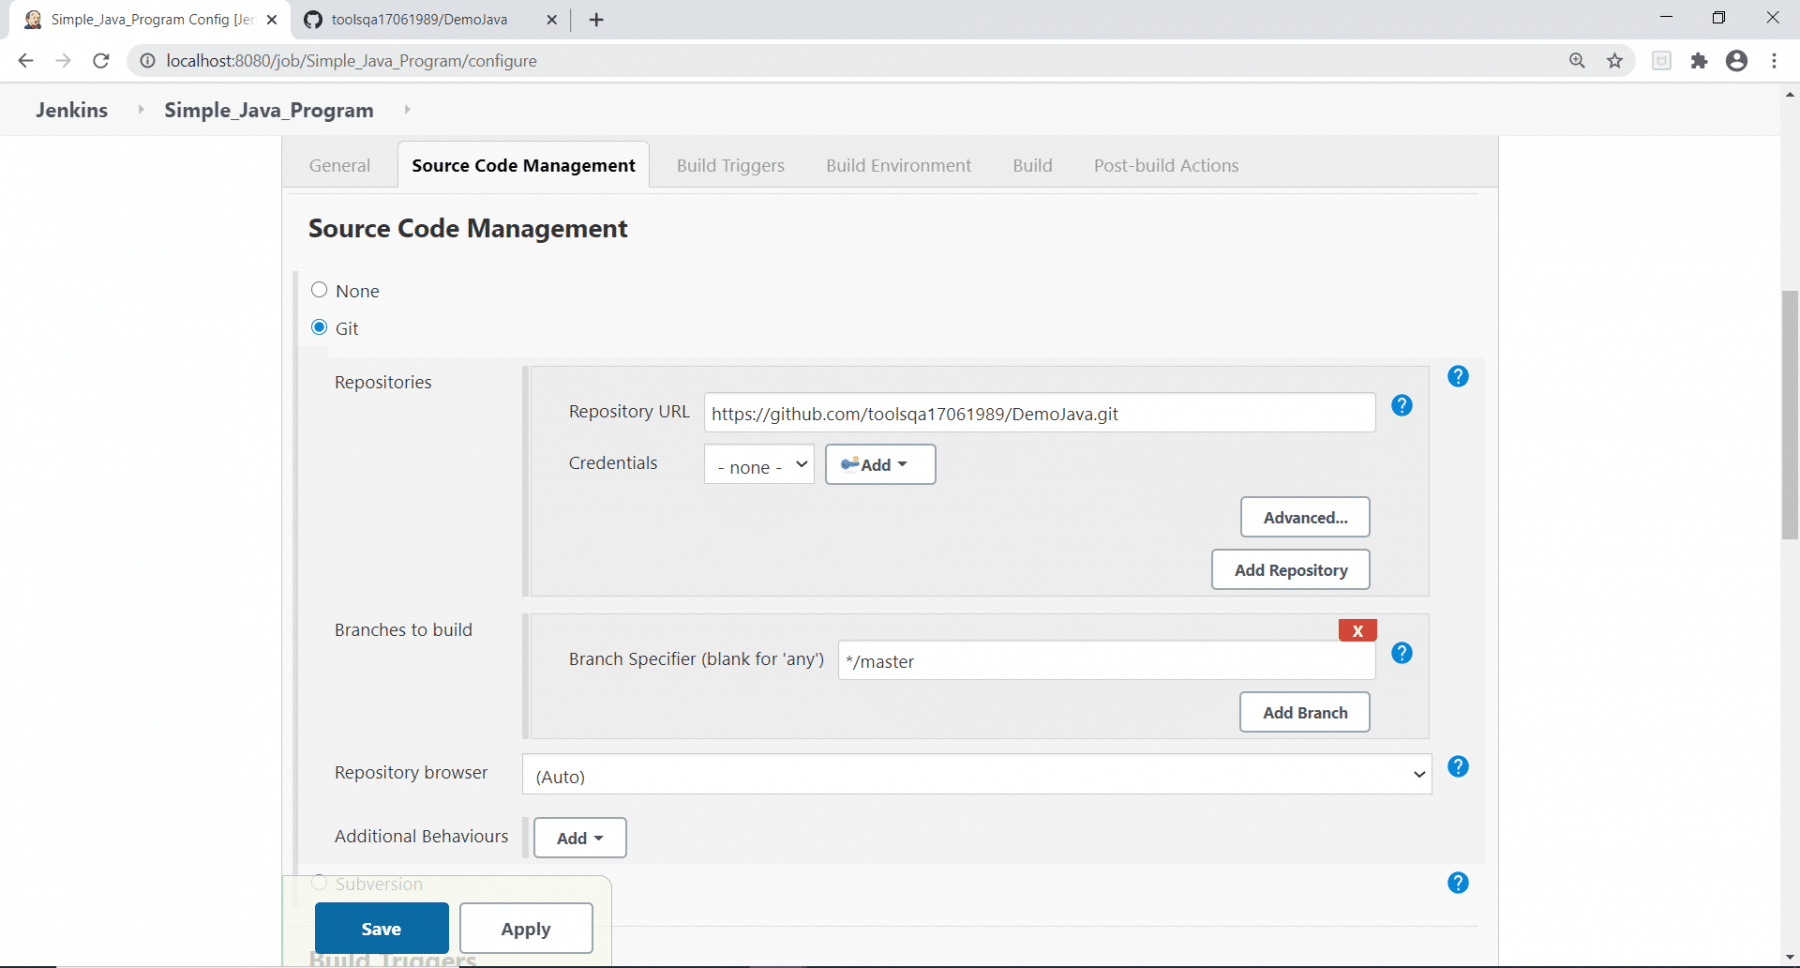
Step 5: Now enter the repository URL as shown in the below image:
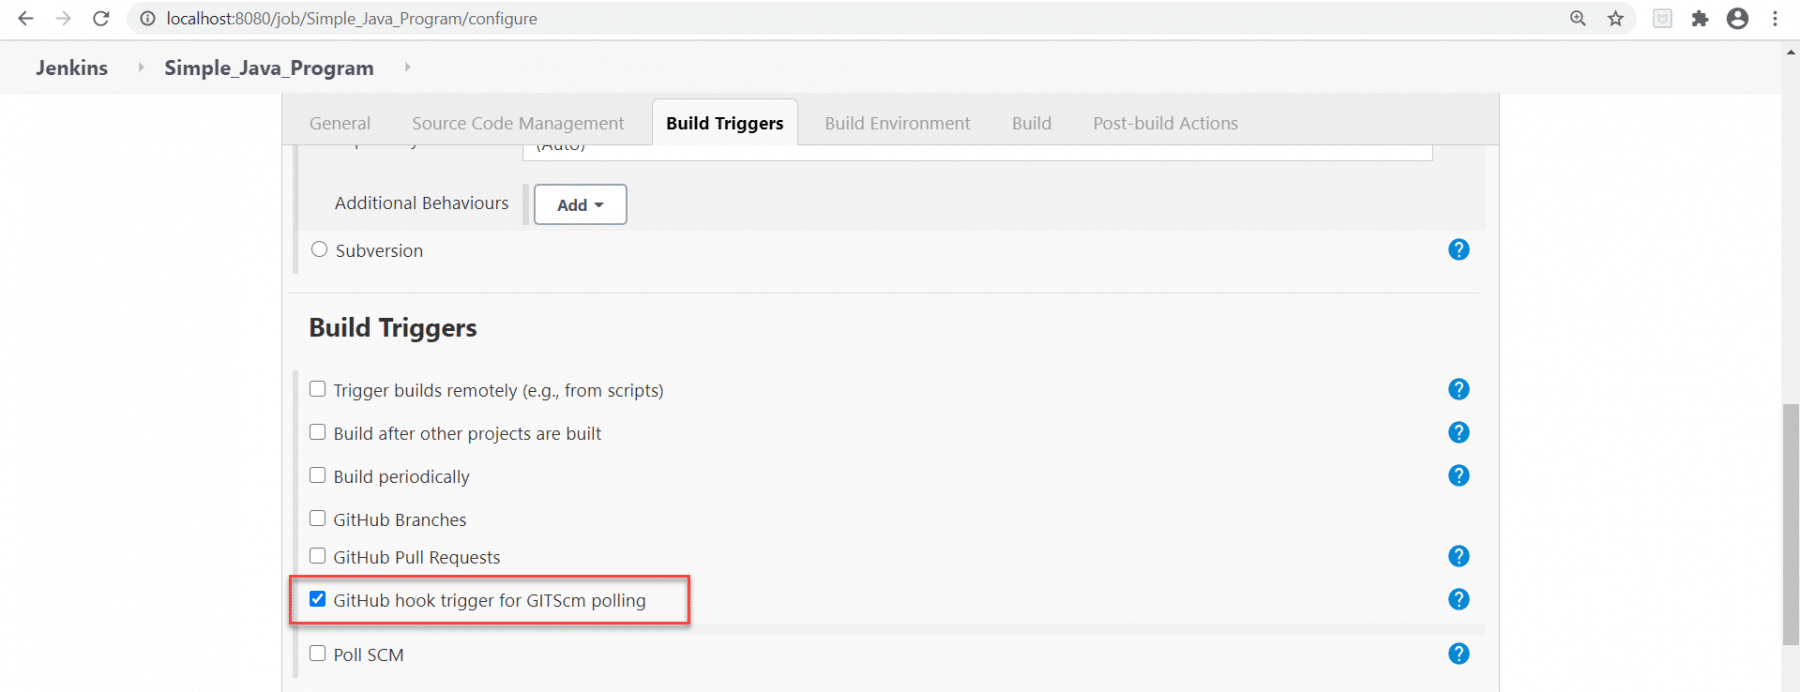
6th Step: Now, go to the Build triggers section and select the option "GitHub hook trigger for GITScm polling".
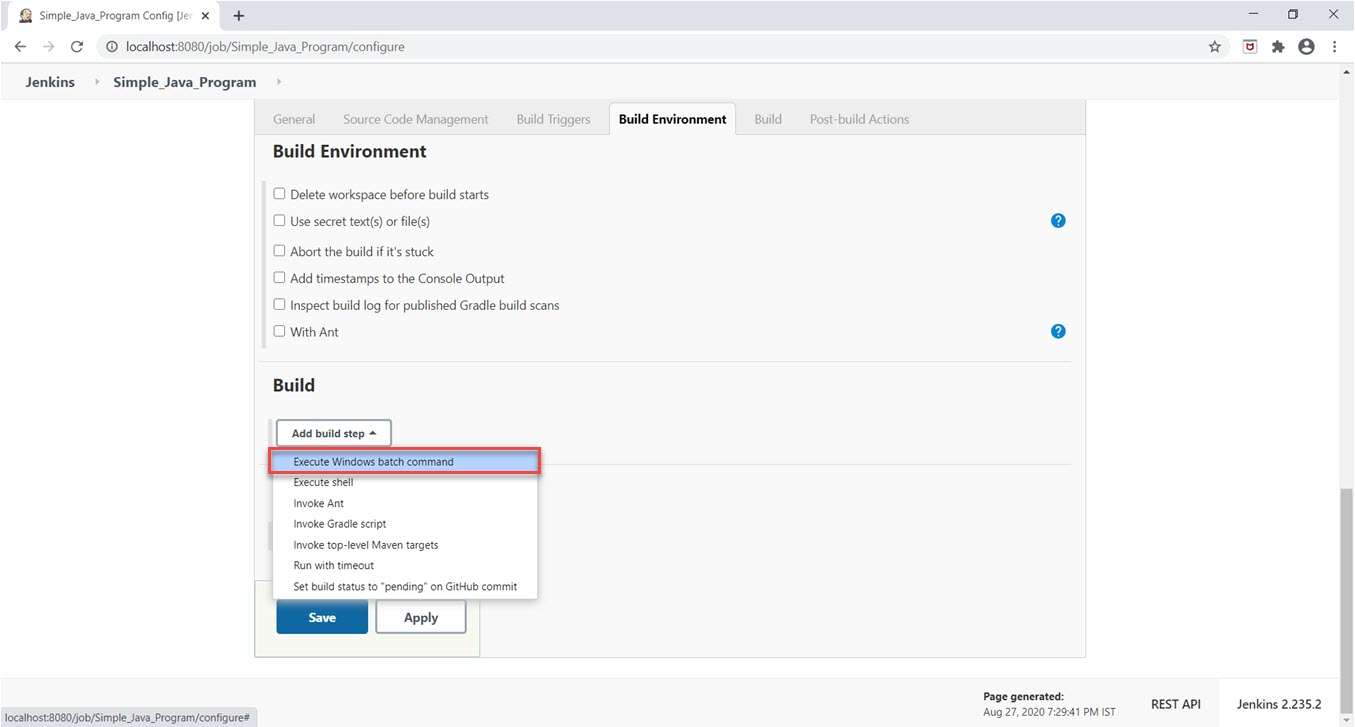
Step 7: Go to the Build section. Now click on "Execute Windows batch Command " after clicking on the Add build step dropdown. We are using the Execute Windows Batch Command option because we are running a simple Java program with the help of commands mentioned in step 8.
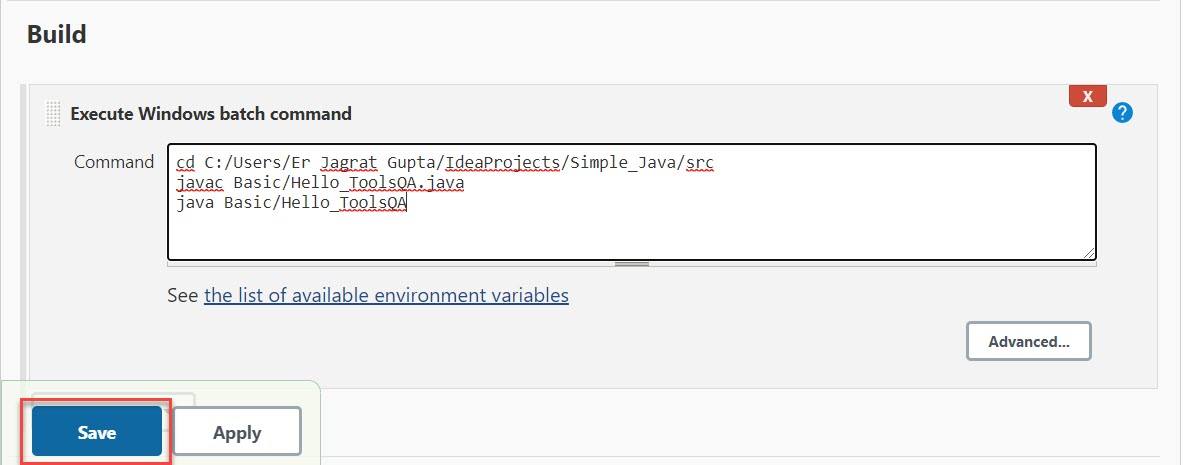
Step 8: Now here we will write batch commands to execute this Java Program.
cd <locate the package for source code>
javac Basic/Hello_ToolsQA.java
java Basic/Hello_ToolsQA
Let's understand every line of the above code:
- In the first line, we need to go to the src directory of our project.
- In the second line, we need to compile our class file with the help of the javac command. Kindly note that we need to give the path like package name/class name.
- The third line runs our class file and gives the output. here also, the path would be like package name/class name.
Now click on the Save button.
As soon as we will click on the Save button, our job is properly set up for execution.
How do I trigger a build automatically in Jenkins?
In the previous section, we saw that we have already set up a job. Now it's time to understand that how can we trigger a build automatically in Jenkins. Here, the concept of webhooks comes into the picture. So, in this section, we will see that how can we set up a webhook in GitHub and automatically trigger our job in Jenkins. Kindly follow the below steps to achieve this part:
Step 1: Go to the GitHub repository and click on the Settings link highlighted by the red rectangle.
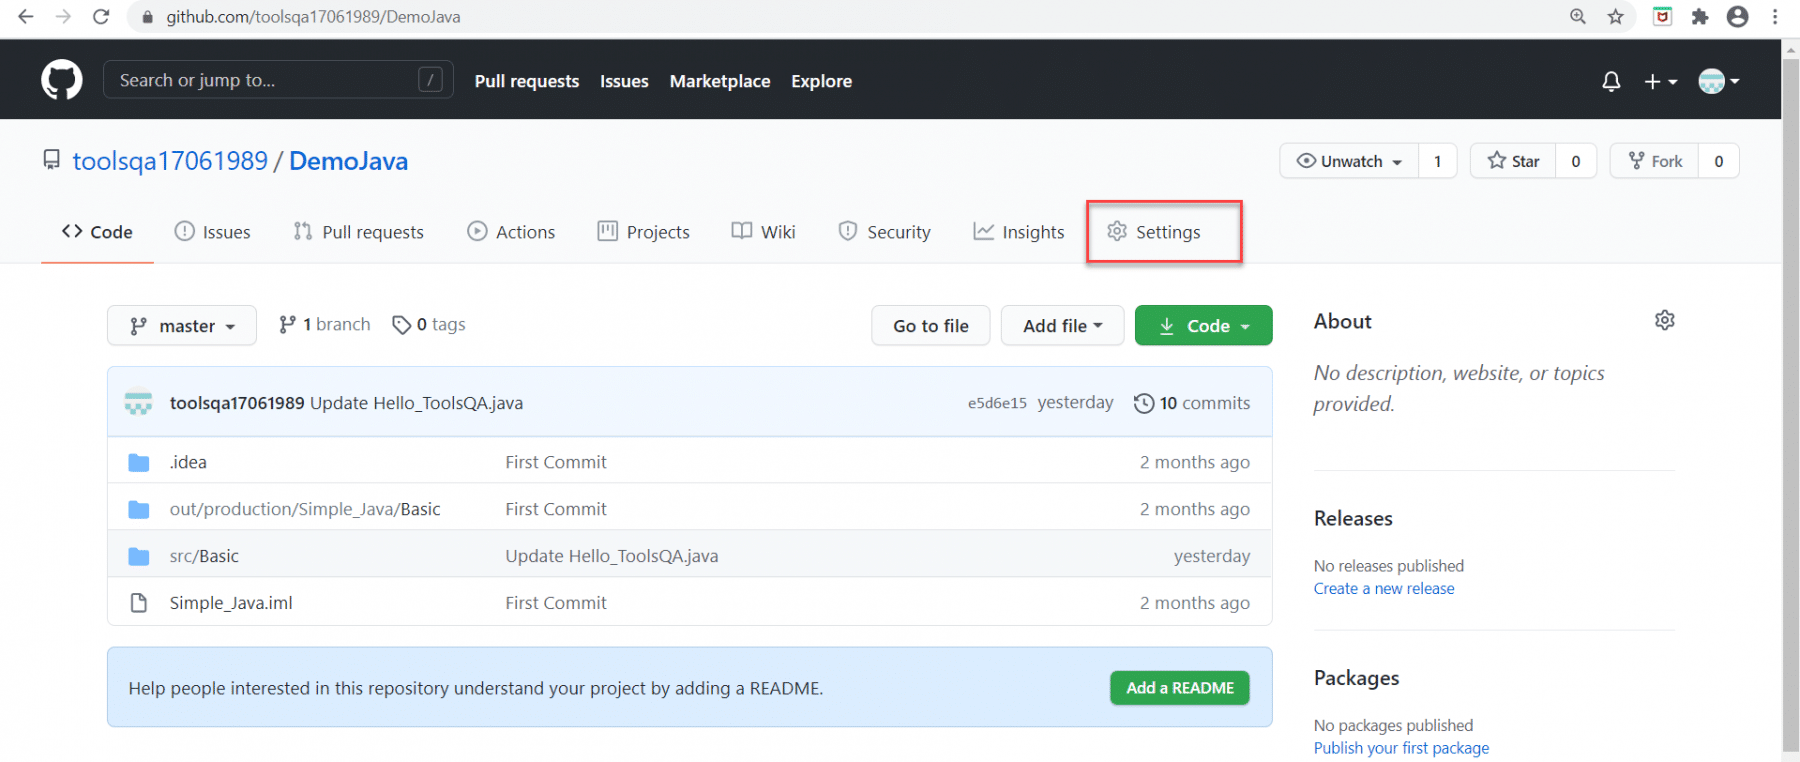
When we click on the Setting link then we will redirect to the Settings page.
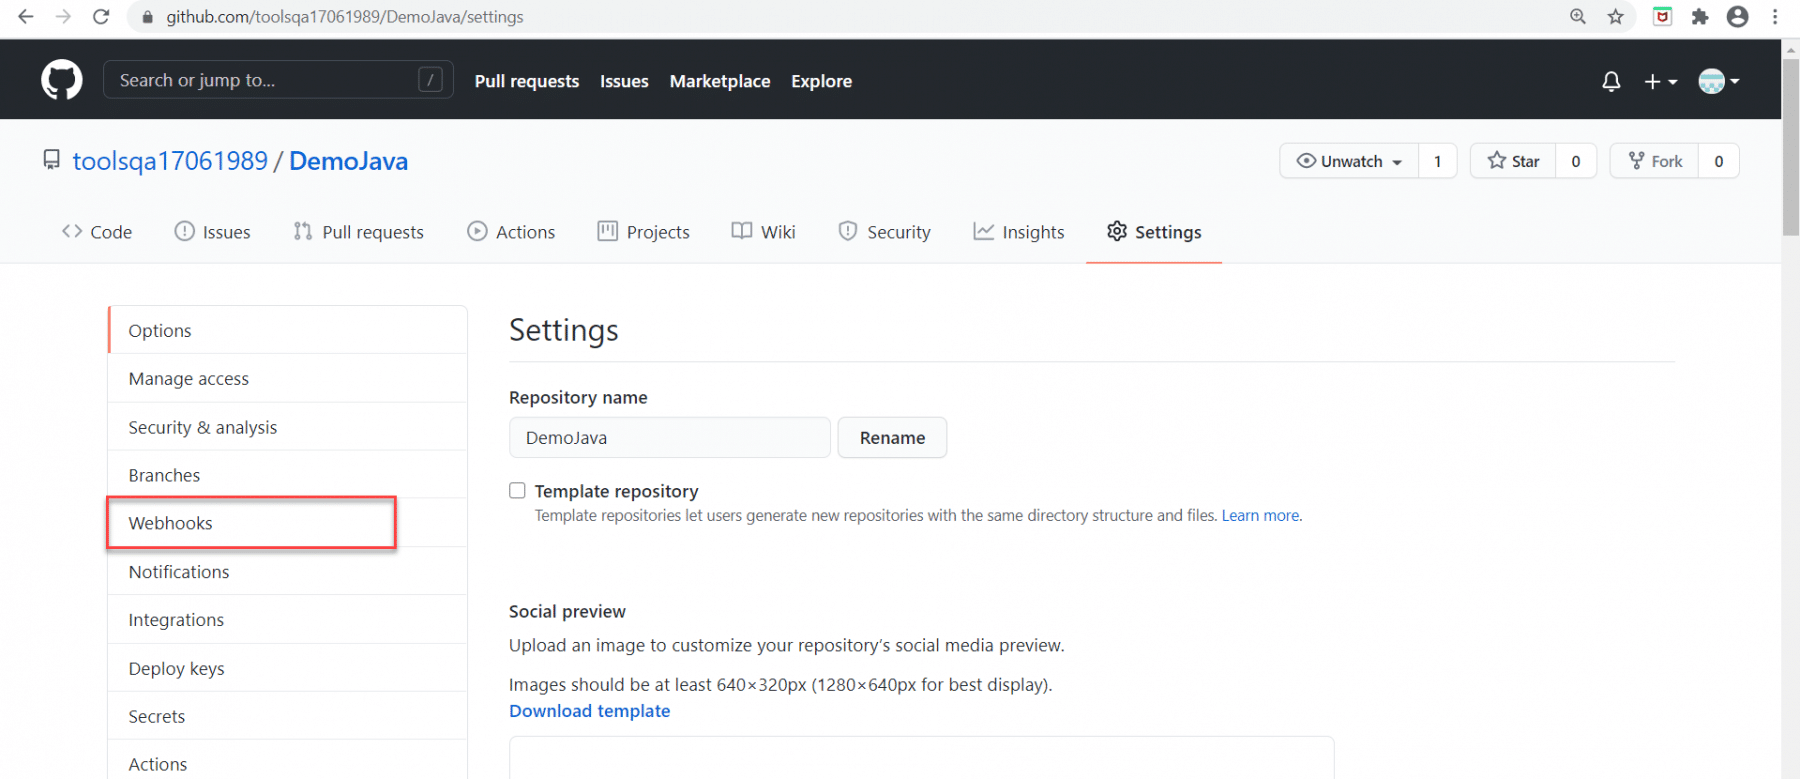
Step 2: Click on the Webhooks option listed and as highlighted below:
Step 3: As soon as we will click on Webhooks, we will redirect to the Webhooks page. Now, click on the "Add webhook" button highlighted in the below image.
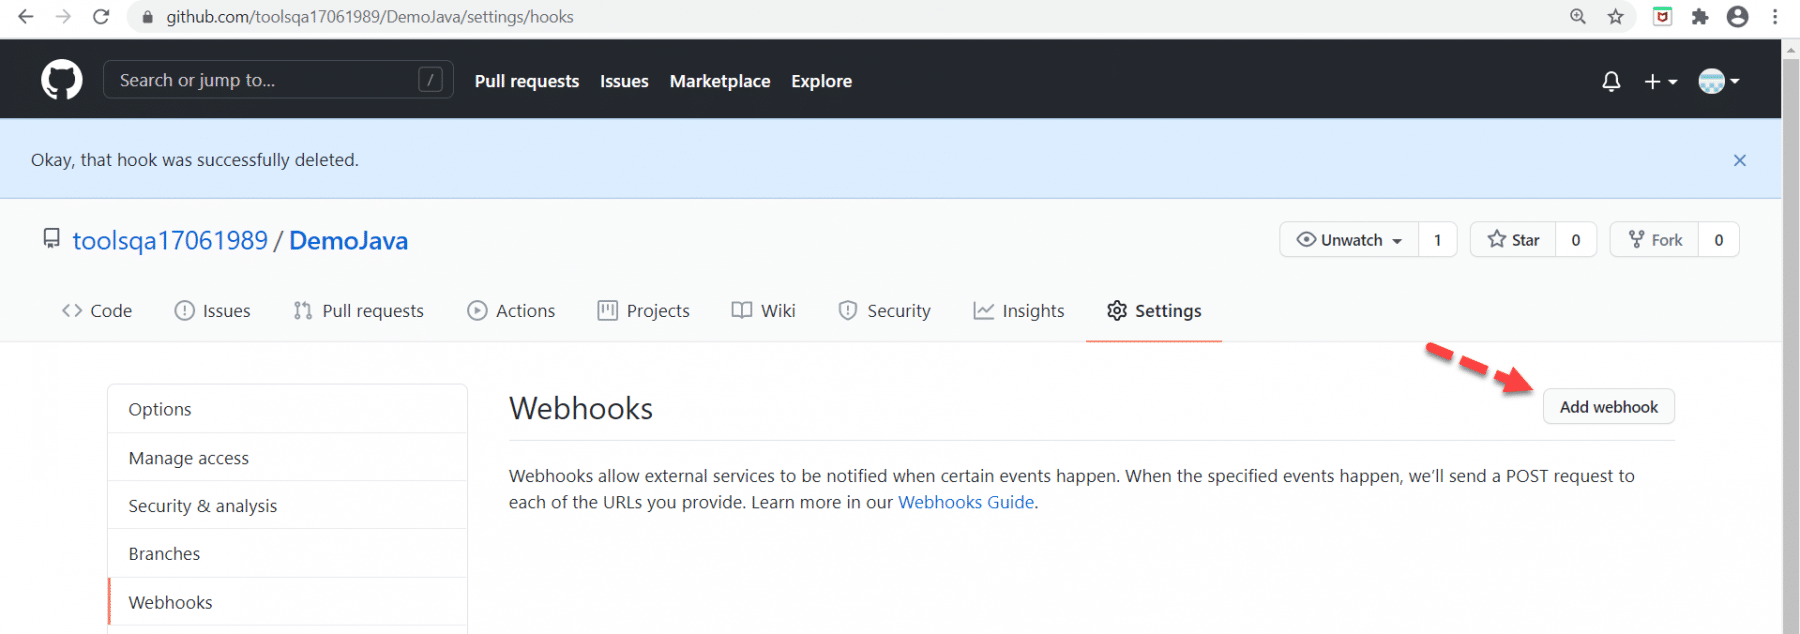
After clicking on the Add webhook button, we need to give information regarding webhooks.
Step 4: First information that we need to fill in is "Payload URL". Here, we need to give the Jenkins URL that we are using. The important thing regarding this aspect that we can not use the localhost URL of Jenkins because it is not on the internet. So, we need to give a URL that is on the internet. To achieve it, we need to install ngrok in our system according to our operating system.
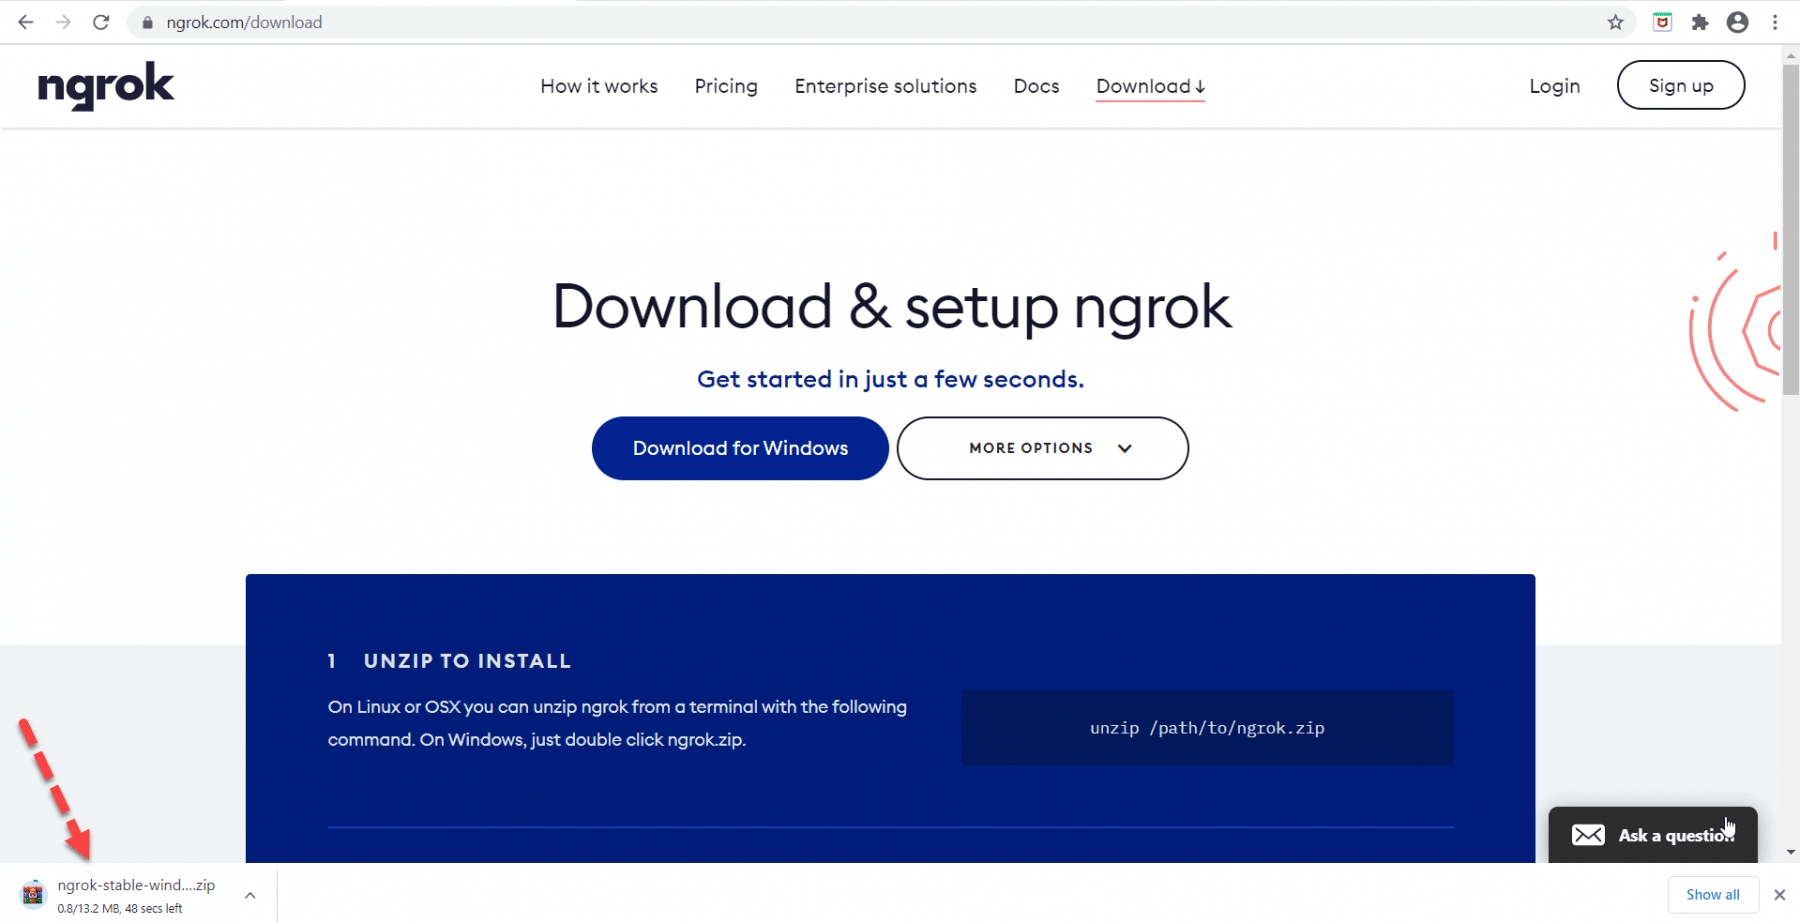
Step 5: Now save the downloaded zip file, store it in a directory, and unzip it. As soon as we will unzip it, we will see the ngrok.exe file. Click on ngrok.exe to launch the application.
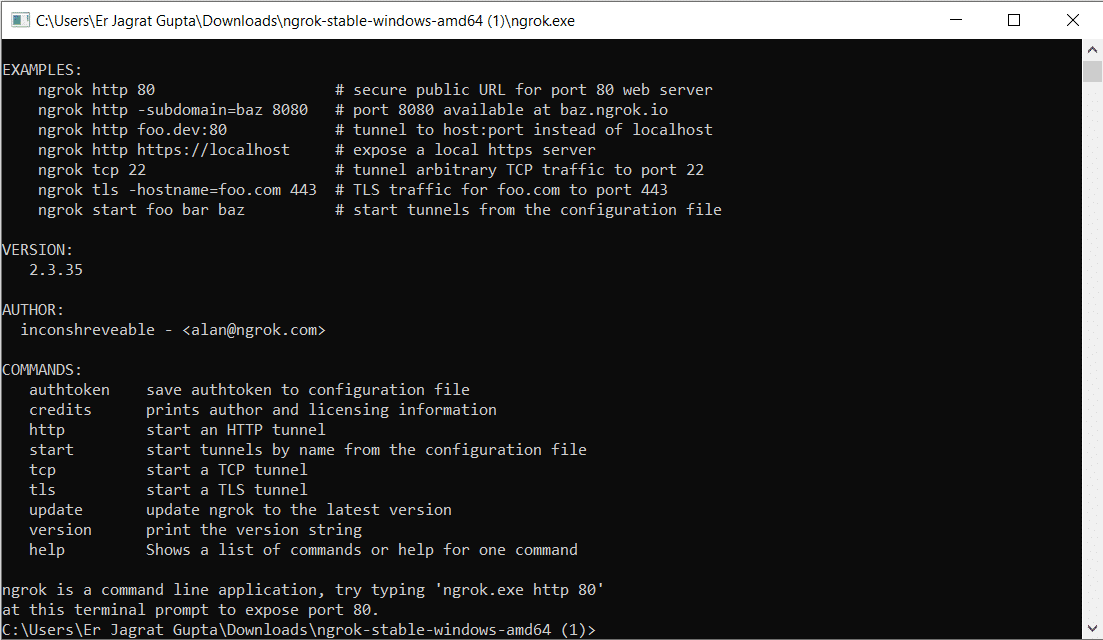
Step 6: Type the below command in the terminal window and press the ENTER key.
ngrok.exe http 8080
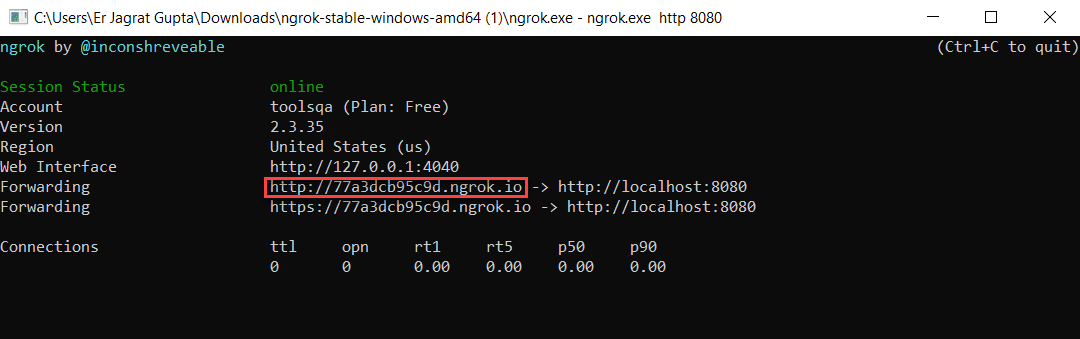
Here, see the highlighted URL in the above image. Additionally, we will use this part as a part of the Payload URL concerning port 8080 in further steps.
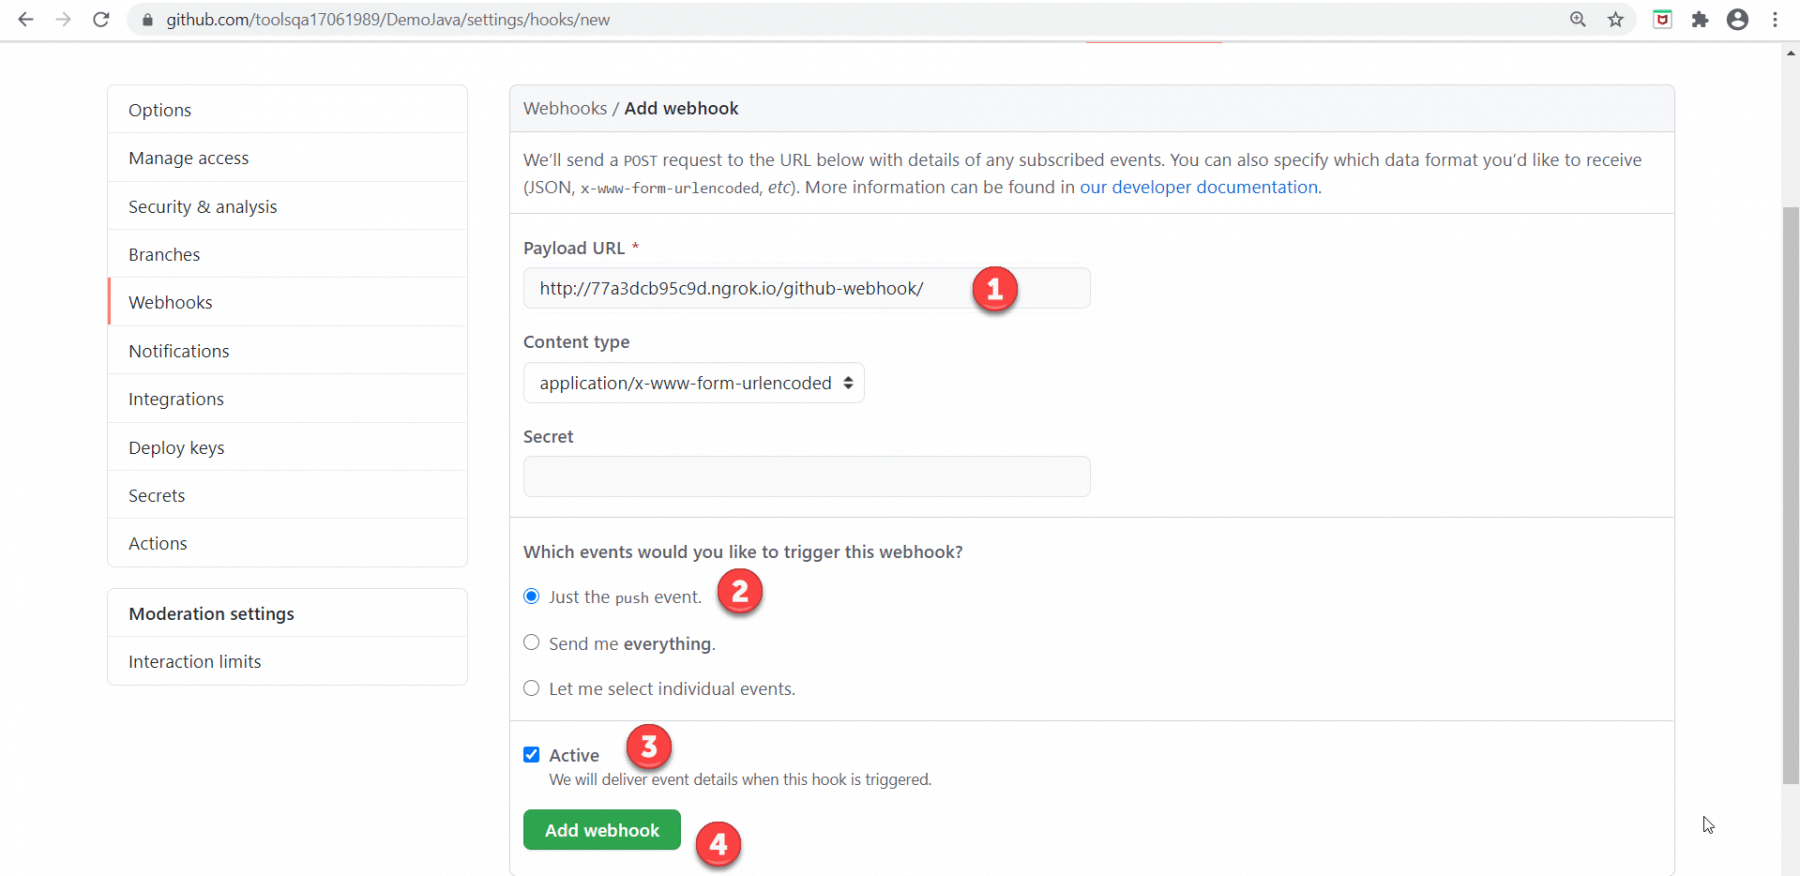
Step 7: Now perform the below steps to setup webhooks in GitHub.
- Put the Payload URL in the textbox. Kindly note that doesn't forget to append text github-webhook/ at the last.
- Click on the "Just the push event" option.
- Please make sure that you check the "Active" checkbox.
- Click on the "Add webhook" button.
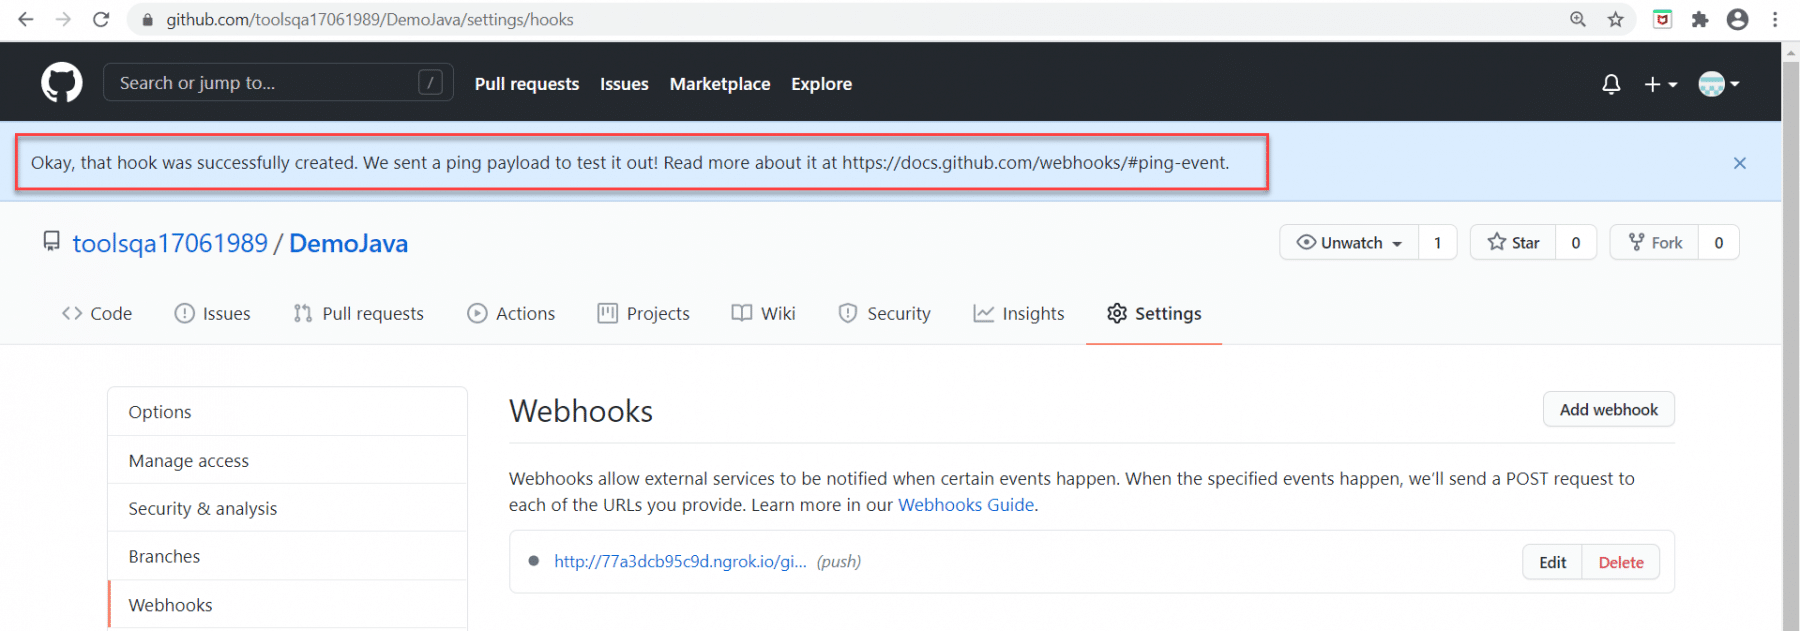
After clicking on the Add webhook button, we will see a successful message.
Step 8: Now go to code, make some changes, and commit our code again. As soon as we will commit out changes, webhook sent the notification to Jenkins, and automatically build will be triggered.

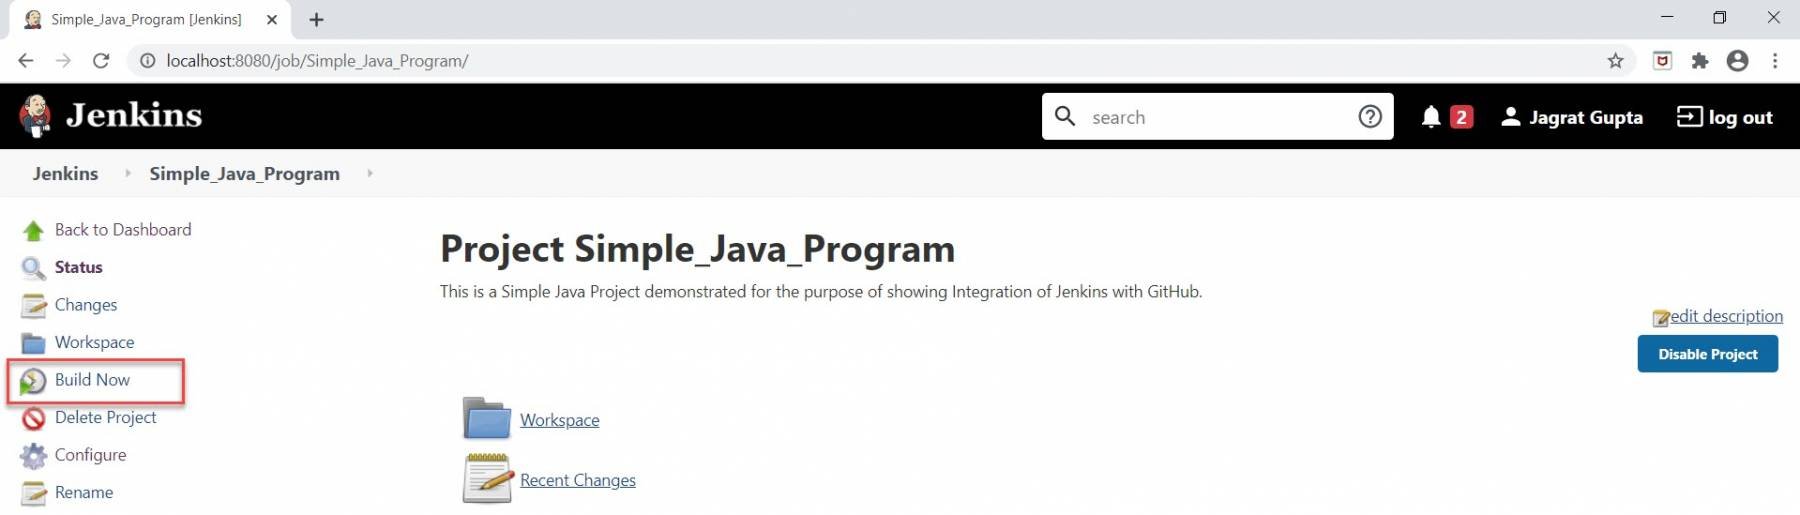
Step 9: After successfully running the build, we can see results in the console output.
Now click on Build Now link highlighted in the red rectangle.
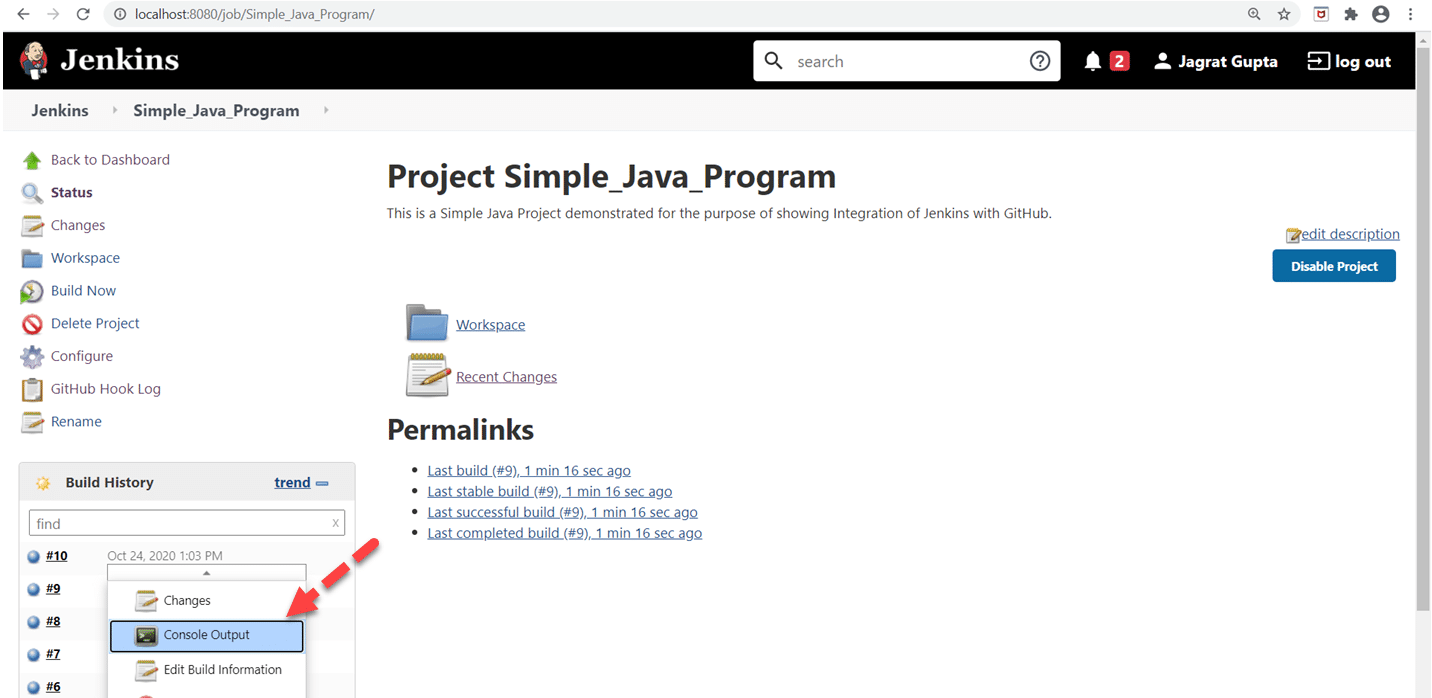
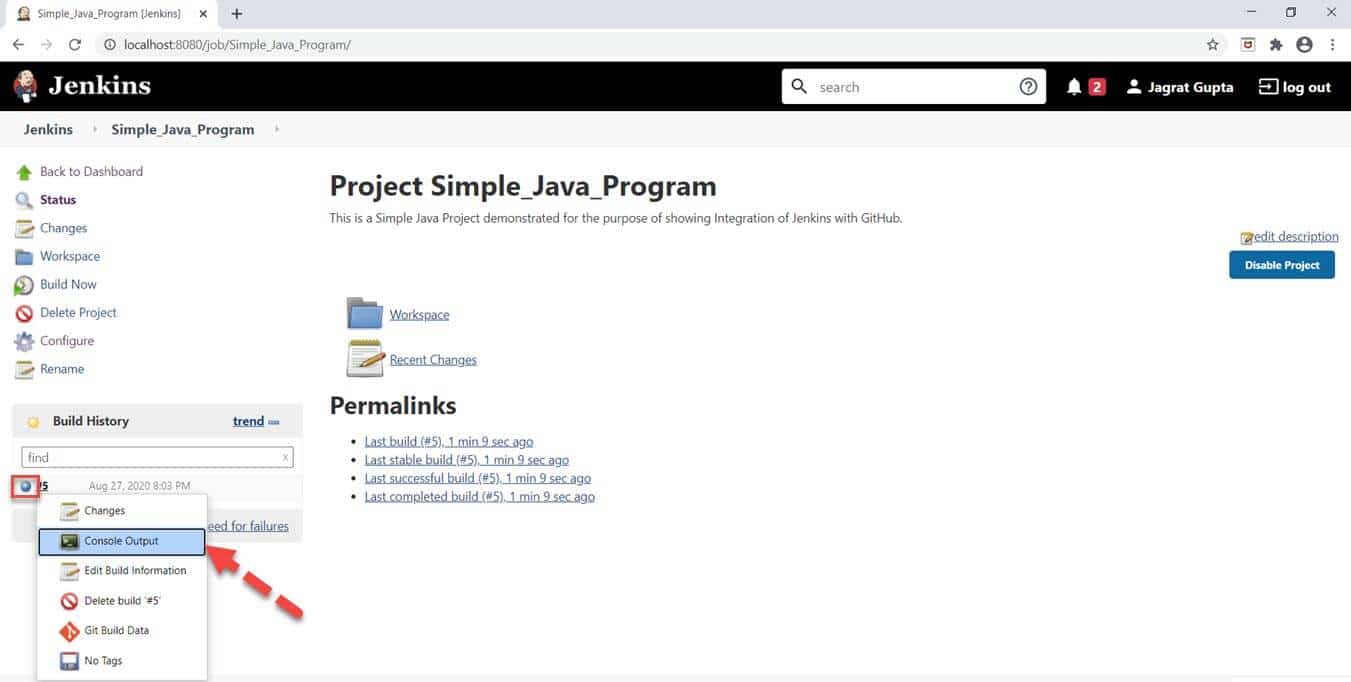
Step 10: After a successful run, we can see the blue sign under the Build History section highlighted inside the red rectangle in the below image. After that, click on "Console Output " to see the actual output.
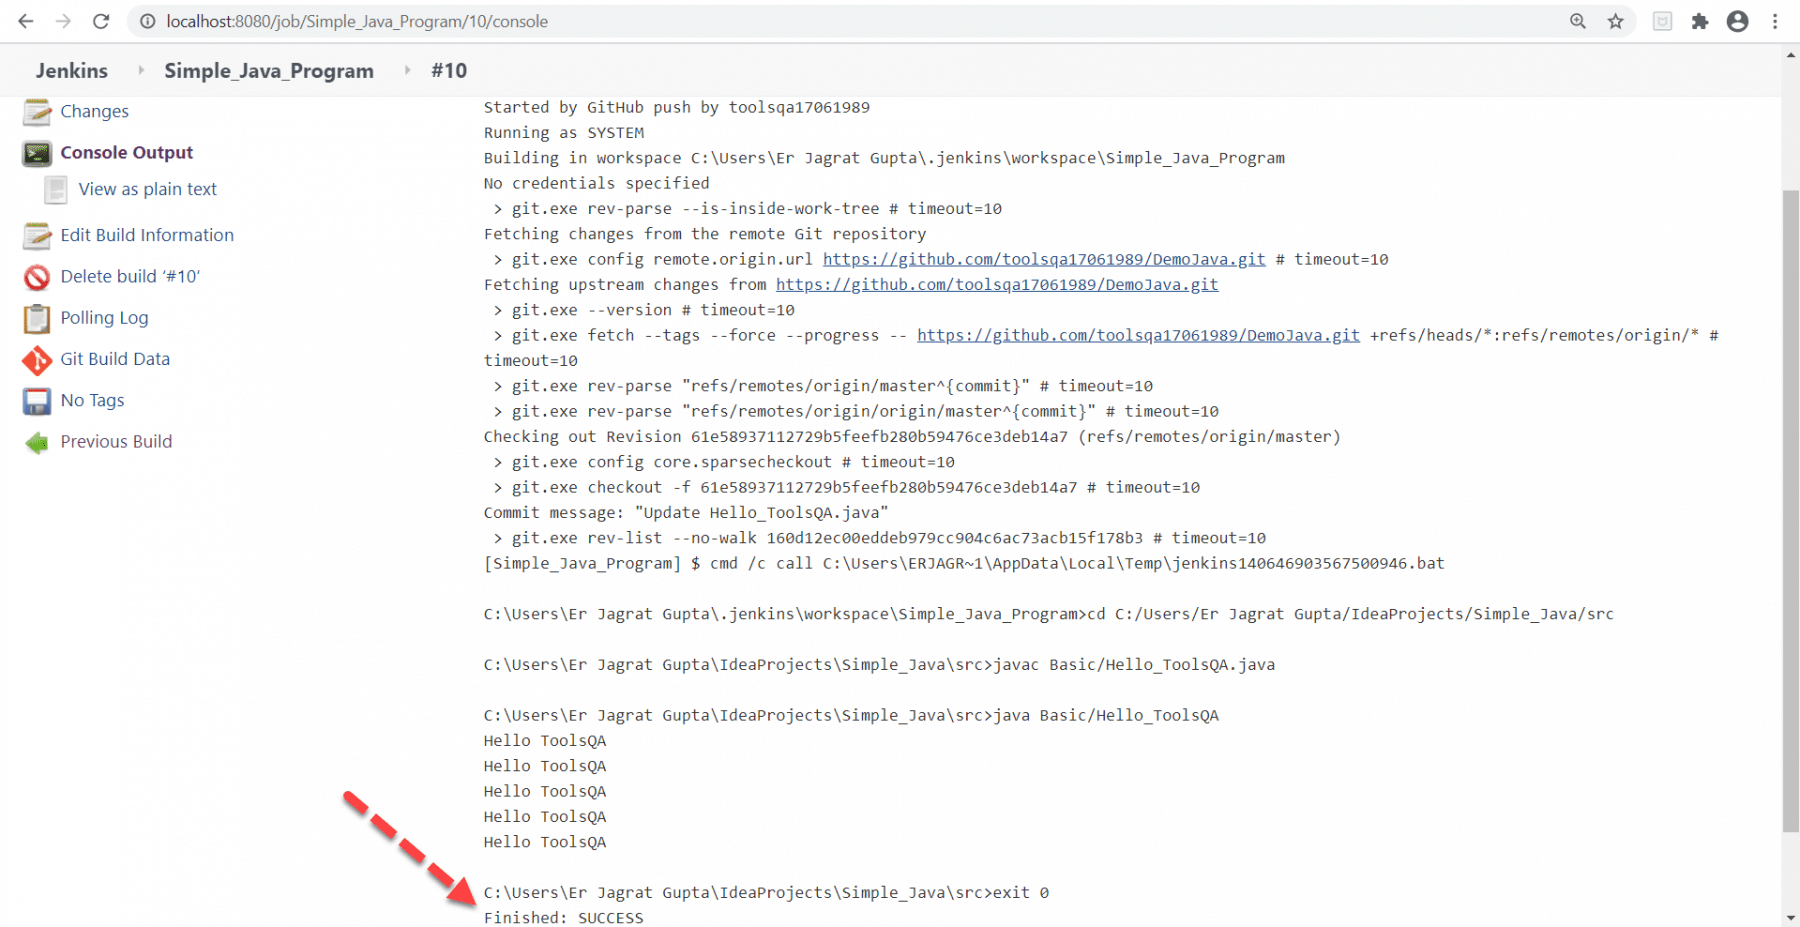
If the build will be successful, we can see a success message in console output.
So, this way we were successfully able to integrate Jenkins and GitHub both ways, by pulling the code using the Git Plugin and by triggering the jobs using WebHooks.
Key Takeaways:
- Git is an open-source and distributed version control system used for tracking and managing the source code during the development of projects.
- Integration of GitHub with Jenkins automates the deployment process, testing process as well as improves the final product quality as it saves lots of significant time for developers as well as testers.
- We require the Git plugin to enable Git functionality in Jenkins.
- Additionally, we push our code to the GitHub repository so that Jenkins can pull the code from the repository and execute it.
- We can trigger build automatically in Jenkins with the help of Webhooks in GitHub.