In the current IT world, a large number of people work in the organization as well as use tools authorized by the organization. These people are generally called users concerning those tools. As far as Jenkins is concerned, a large number of users use this tool for running the jobs daily but for security as well as authorization purpose, Jenkins admin can not provide all the roles to all the users. So it is highly recommended to manage these users based on their roles. Here, User Management comes into the picture in Jenkins, where Jenkins provides capabilities to add users, edit users, provide different roles to each user. Jenkins uses various plugins to provide these capabilities for role-based strategies. Let's understand all these strategies, and corresponding plugins needed for this user management by covering the details under the following topics:
- What is the Role Strategy in Jenkins?
- How to install the Role-based strategy plugin in Jenkins?
- And, how to enable the Role-based Strategy on Jenkins?
- How to Create a User in Jenkins?
- How to manage user roles in Jenkins?
- And, how to assign roles to a user in Jenkins?
- What is a Project-based Matrix Authorization strategy in Jenkins?
- How to assign job-specific permissions in Jenkins?
What is the Role Strategy in Jenkins?
The role-based strategy helps in defining what different access types can be assigned to individual users. As we discussed, not all the users can be provided administrative privileges, So Jenkins provides the capability to provide different roles to individual users. This capability is achieved using the "Role-based strategy plugin".
The Role-based strategy plugin is a special kind of plugin in Jenkins that is based on the role-based mechanism and allows us to manage users' permission. A few of the major features provided by this plugin are:
- Global roles such as admin, anonymous, job creator that allows setting permission like job, view, agent, run and SCM, etc.
- Project roles that allow us to access particular projects with jobs and run permissions.
- Agent roles that are used to set node related permissions.
- Roles can be assigned to users and user groups with the help of this plugin.
So, let's understand how we can install this plugin in Jenkins and start using its capabilities for managing the user roles?
How to install the Role-based strategy plugin in Jenkins?
The Role-based Strategy plugin gives us permission to assign roles as well as give privileges to users. For installing this plugin in Jenkins, follow the below steps:
Step1: Go to the Manage Jenkins page and click on "Manage Plugin" under the System Configuration section, as highlighted below:
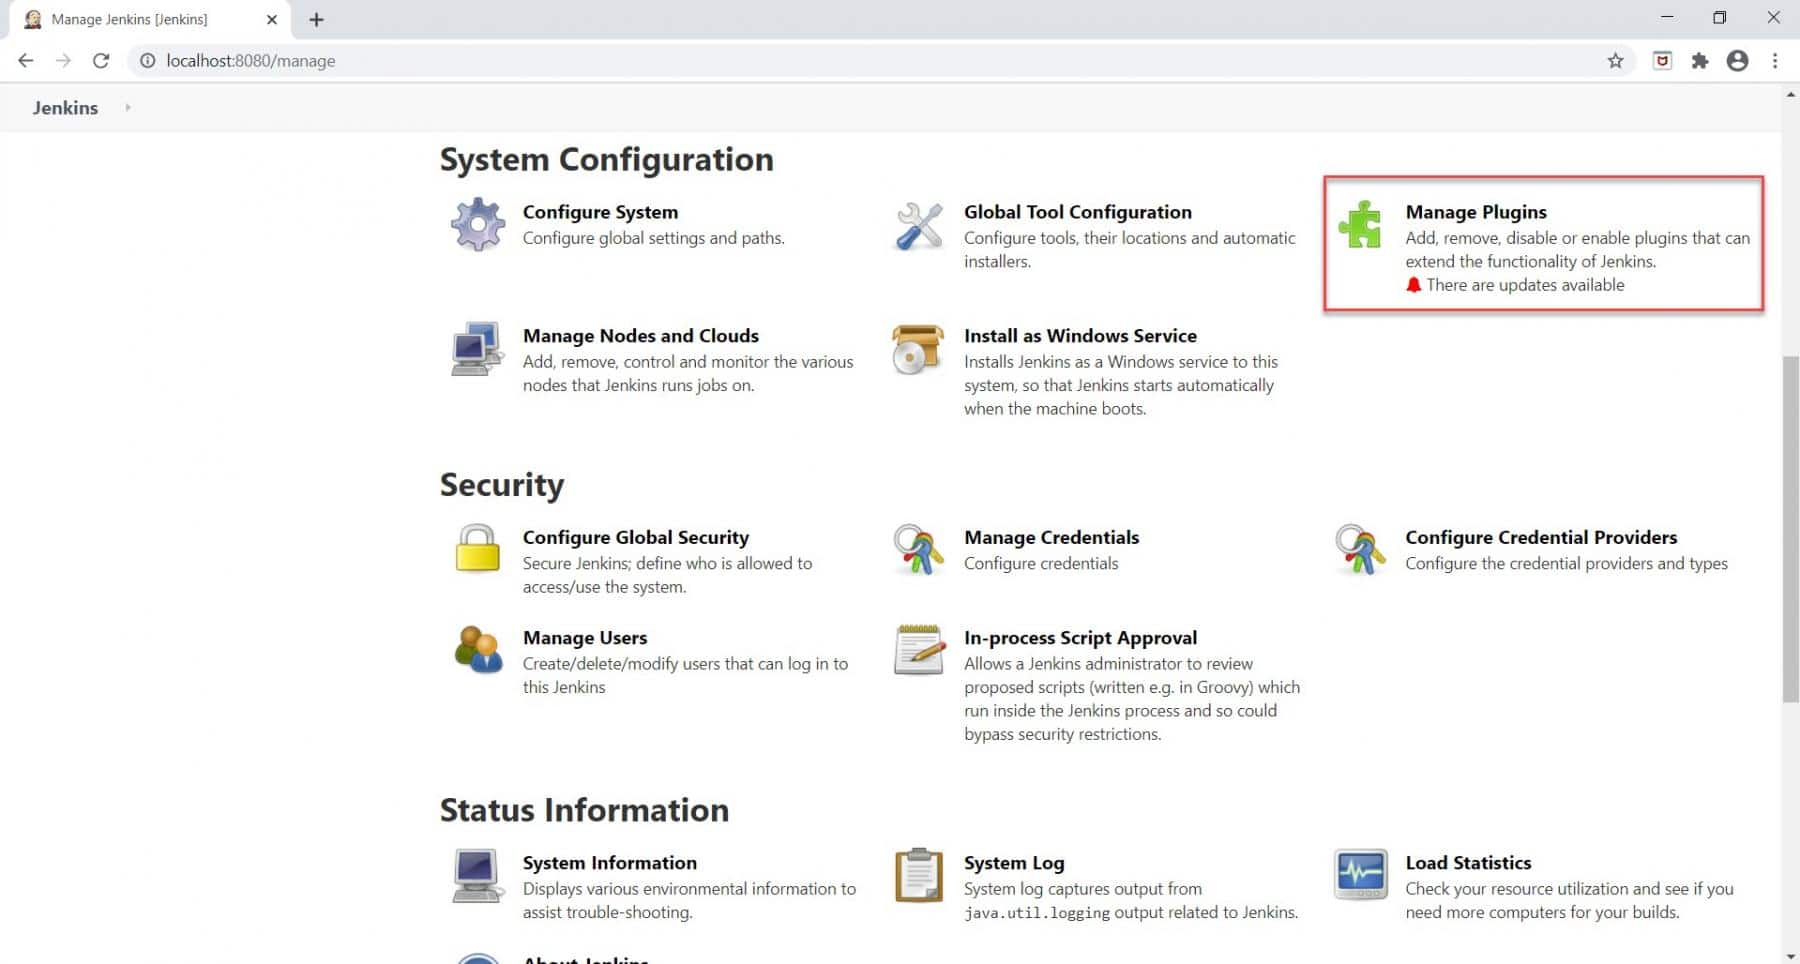
As soon as we click on the Manage Plugin section, we will redirect towards the Plugin Manager page.
Step 2: For installing the plugin, kindly follow the below steps as highlighted below:
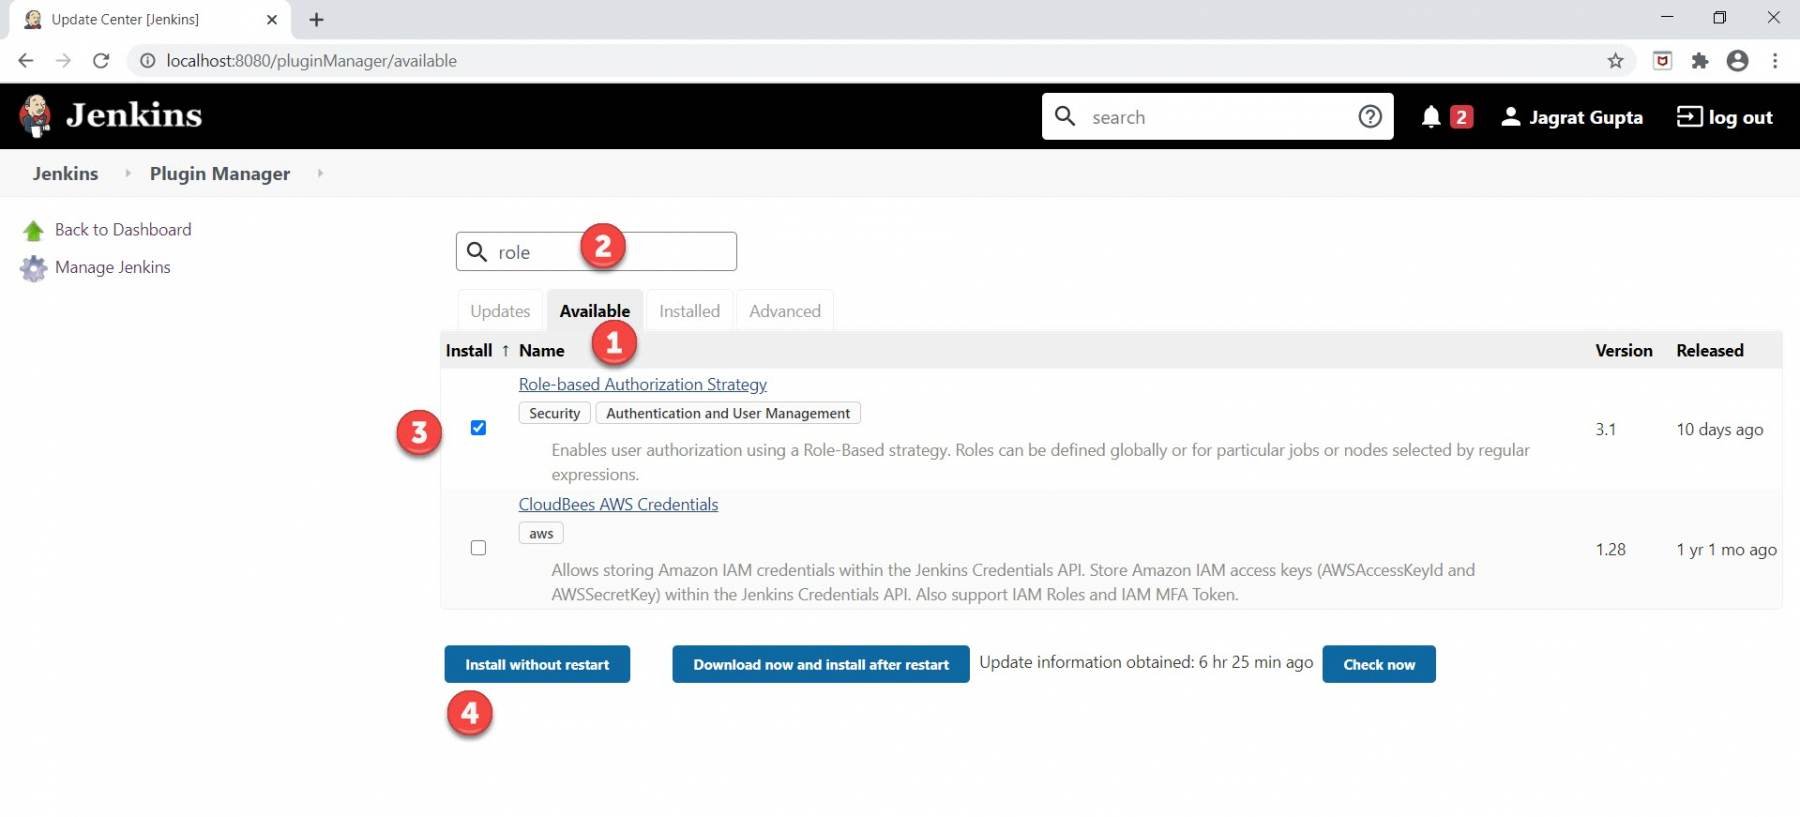
- Click on the Available tab.
- Search the text "role" in the search box.
- As soon as the "Role-based Authorization Strategy" plugin will appear, click on the checkbox against it.
- Click on the "Install without restart" button. We can also choose/ select the "Download now and install after restart" button.
Step 3: As soon as we completed the below steps and installed the plugin successfully, we will see the below screen.
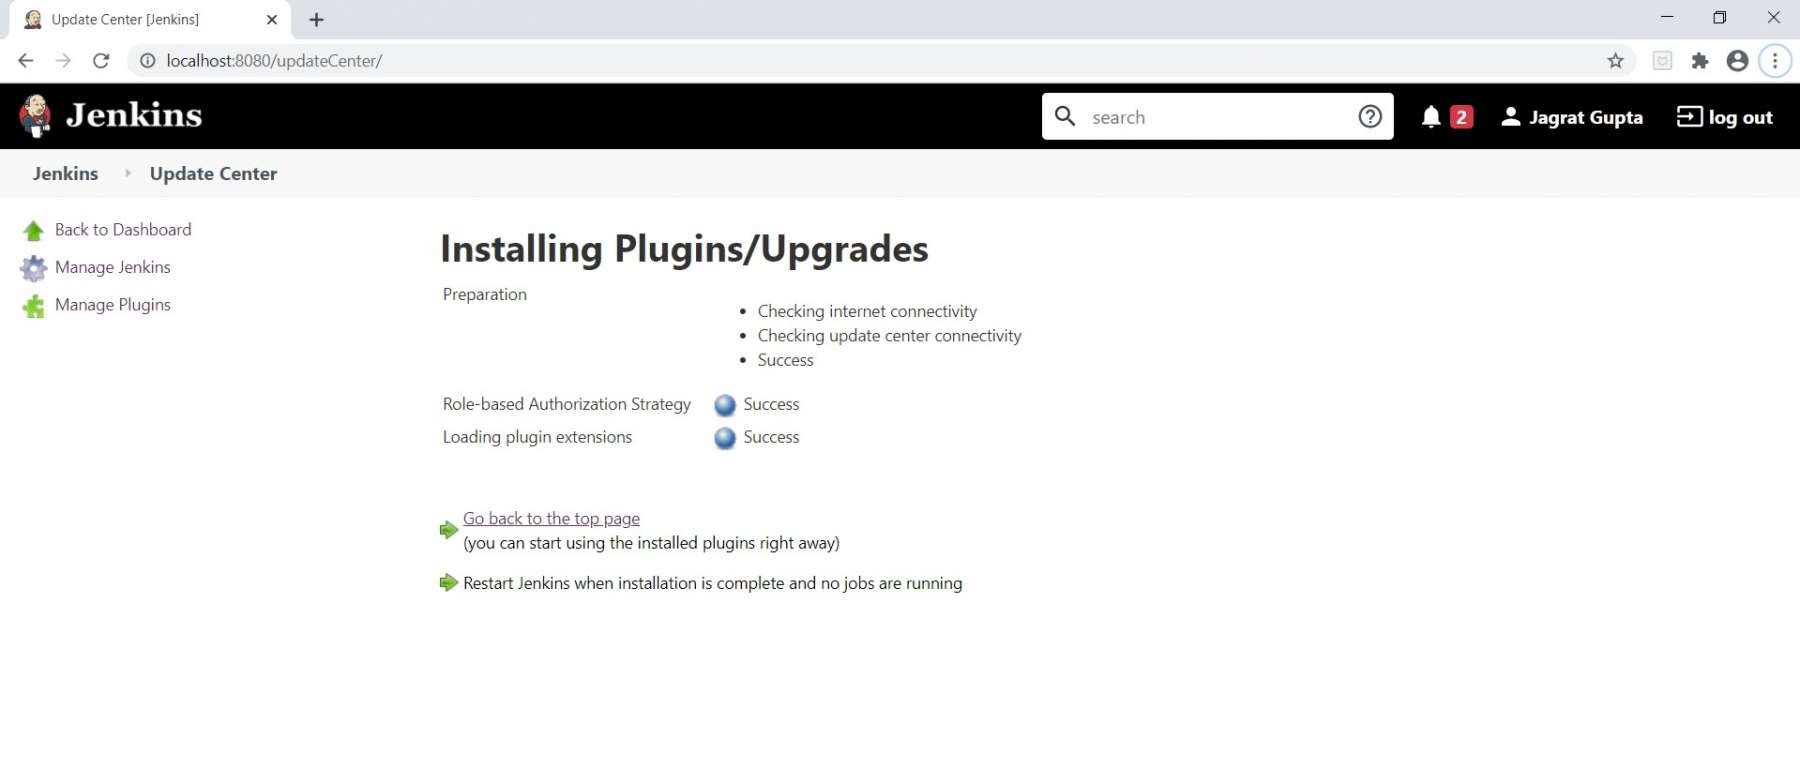
So, in this way, we can install the Role-based strategy plugin. Now, let's see how we can use the capabilities of this plugin?
How to enable the Role-based strategy on Jenkins?
After installing the Role-based Strategy plugin on Jenkins, the next step is to enable it on Jenkins. To do this, follow the below steps:
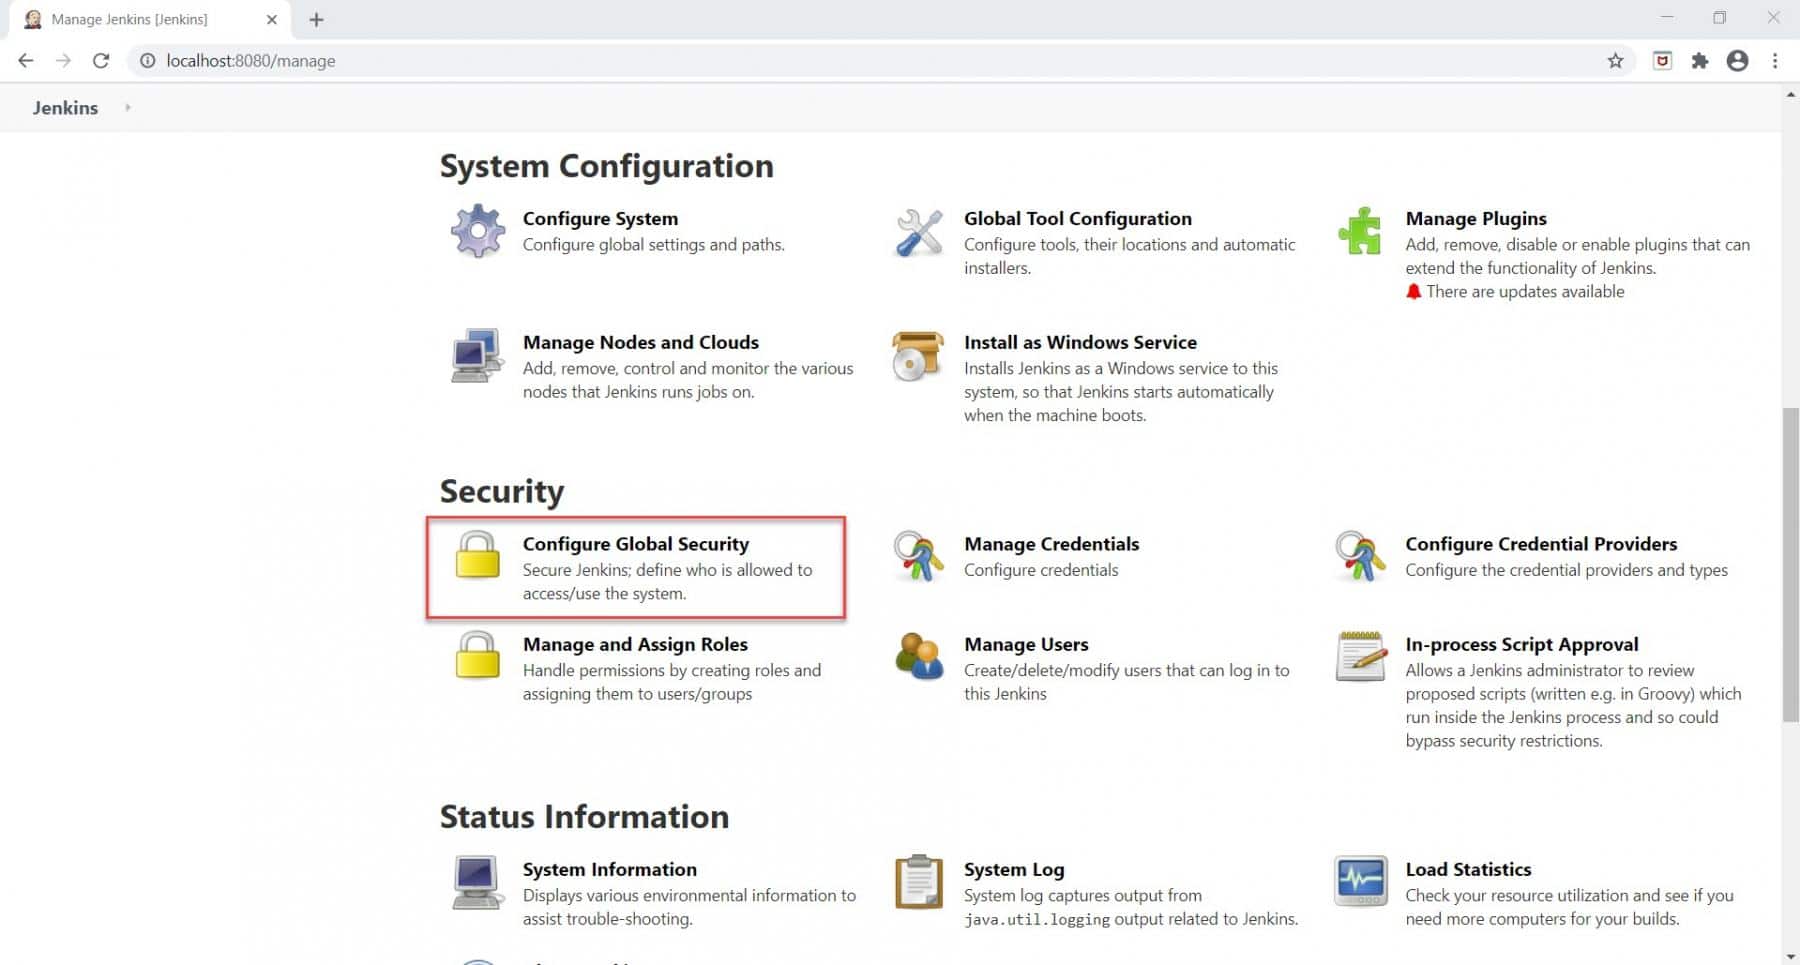
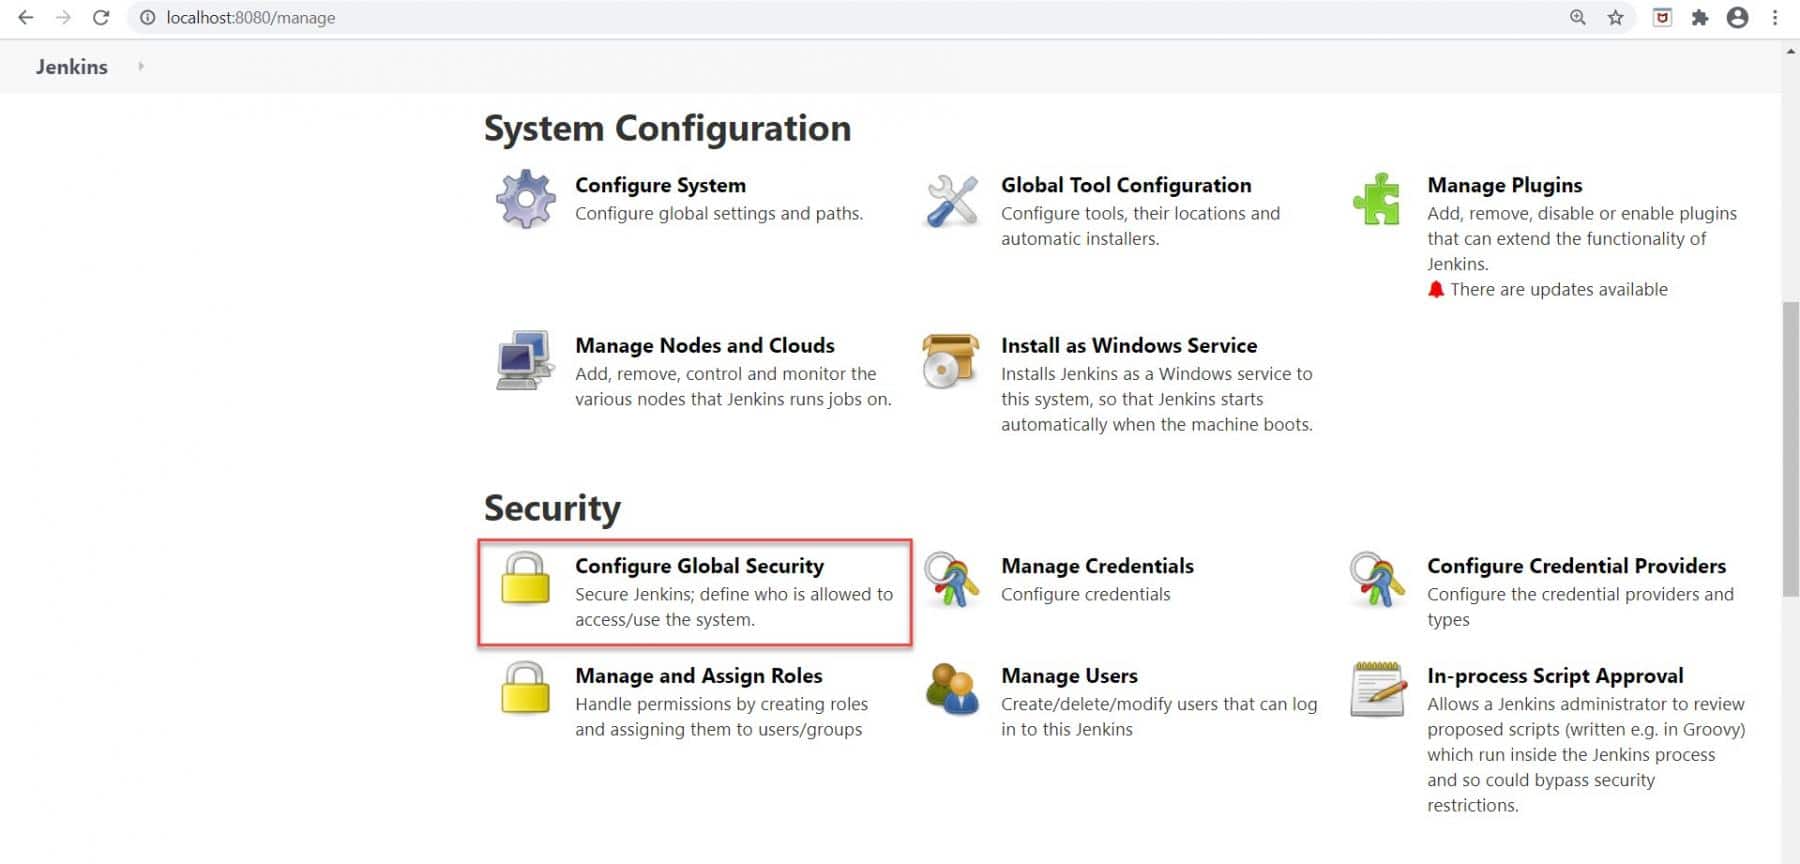
Step 1: Go to the Manage Jenkins page and click on the "Configure Global Security" option under the Security section, as highlighted below:
Step 2: For enabling the Role-based strategy on Jenkins, Follow the below steps as marked below:
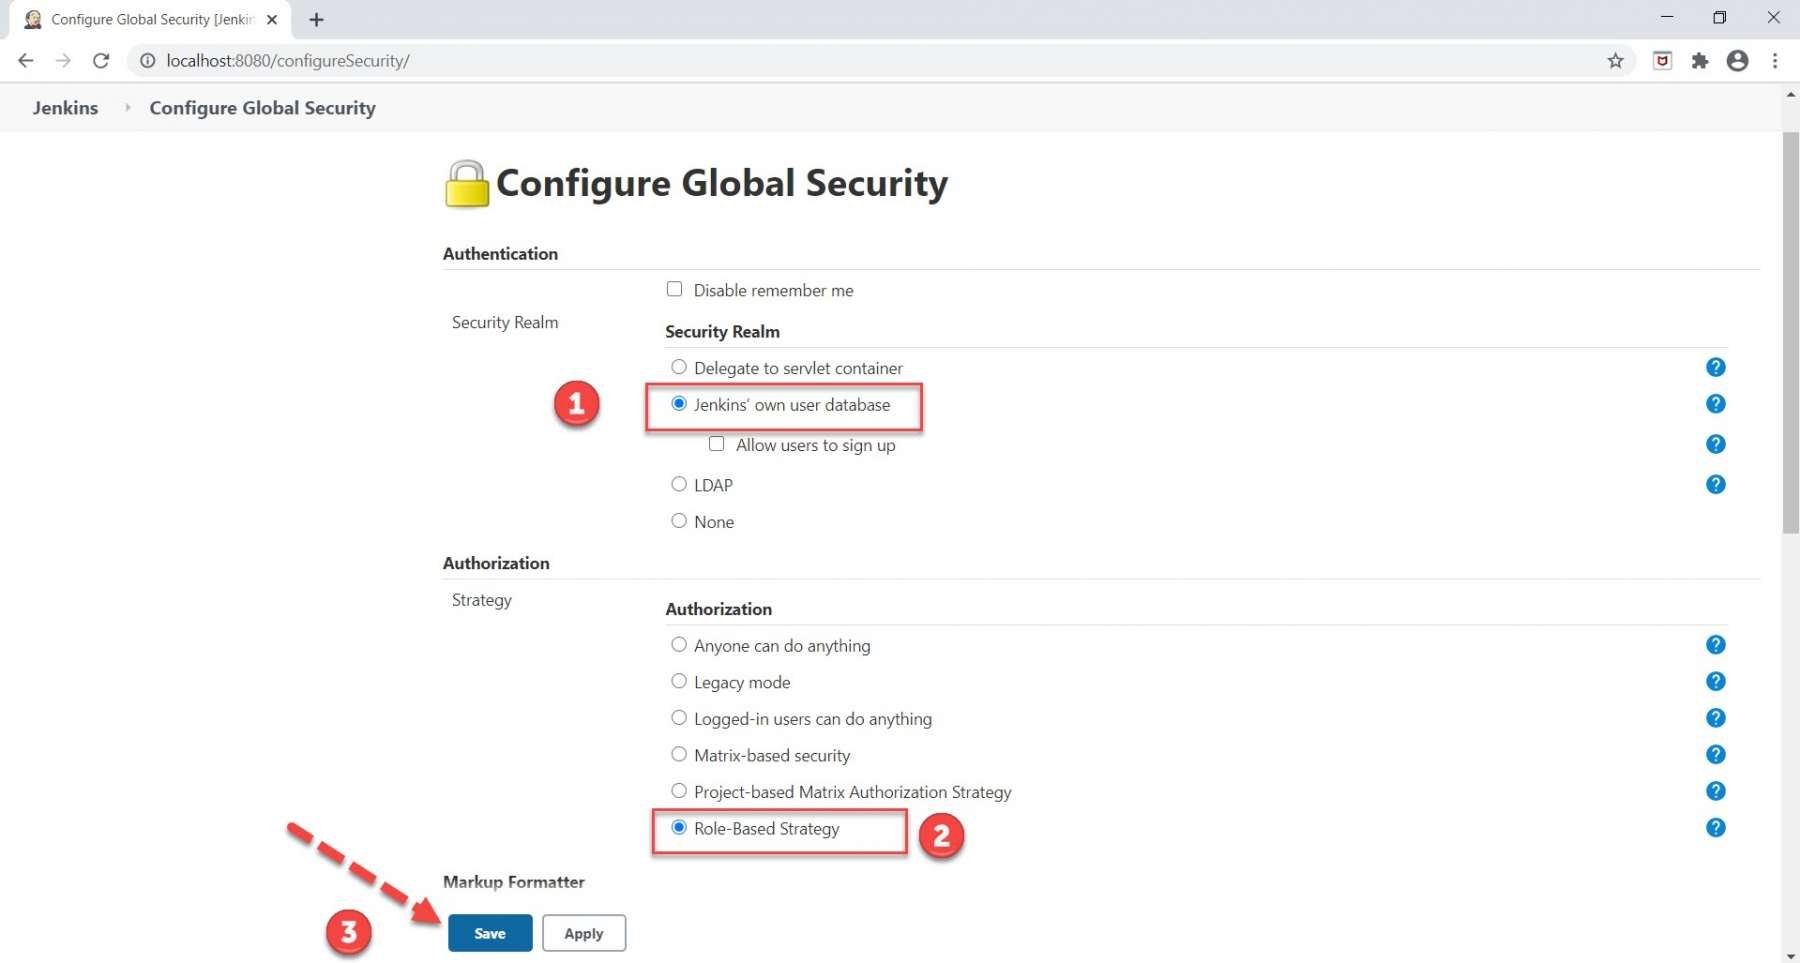
- Select the "Jenkins' user database" option, if by default not selected.
- Select the "Role-Based Strategy" option.
- Click on the Save button.
So, in this way, we can enable the Role-based strategy on Jenkins. Now Jenkins is ready to provide role-based access to different users. Let's create a new user and understand how we can provide different permissions to that user?
How to Create a User in Jenkins?
When we completed the installation process of Jenkins then one admin user was created by default by Jenkins who has all the accesses. For creating a new user in Jenkins, kindly follow the below steps:
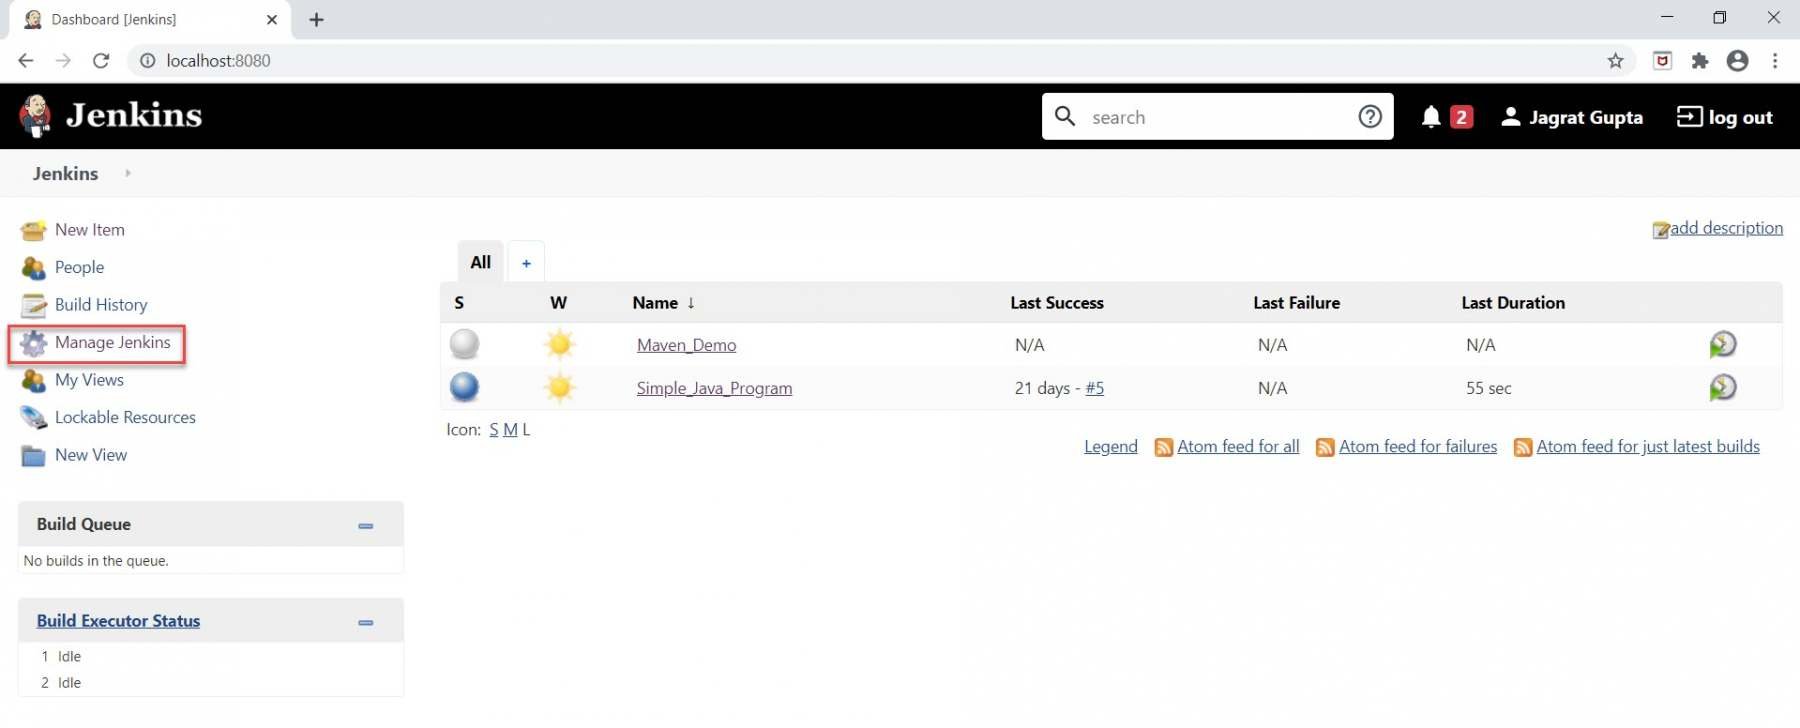
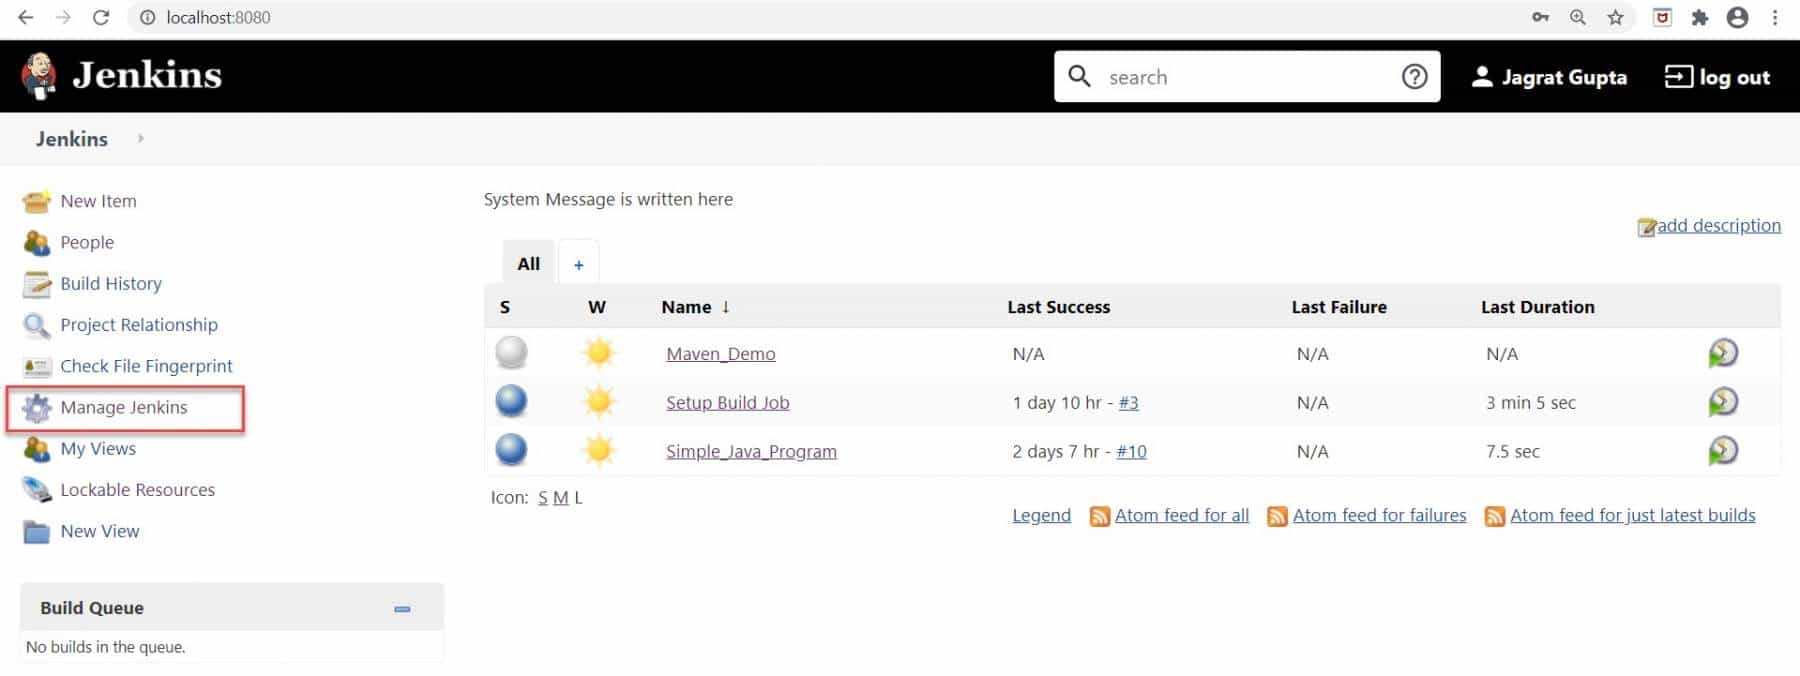
Step 1: Go to Jenkins dashboard and click on the "Manage Jenkins " link, as highlighted below:
Step 2: As soon as we will click on Manage Jenkins, we will be redirected to the Manage Jenkins Page.
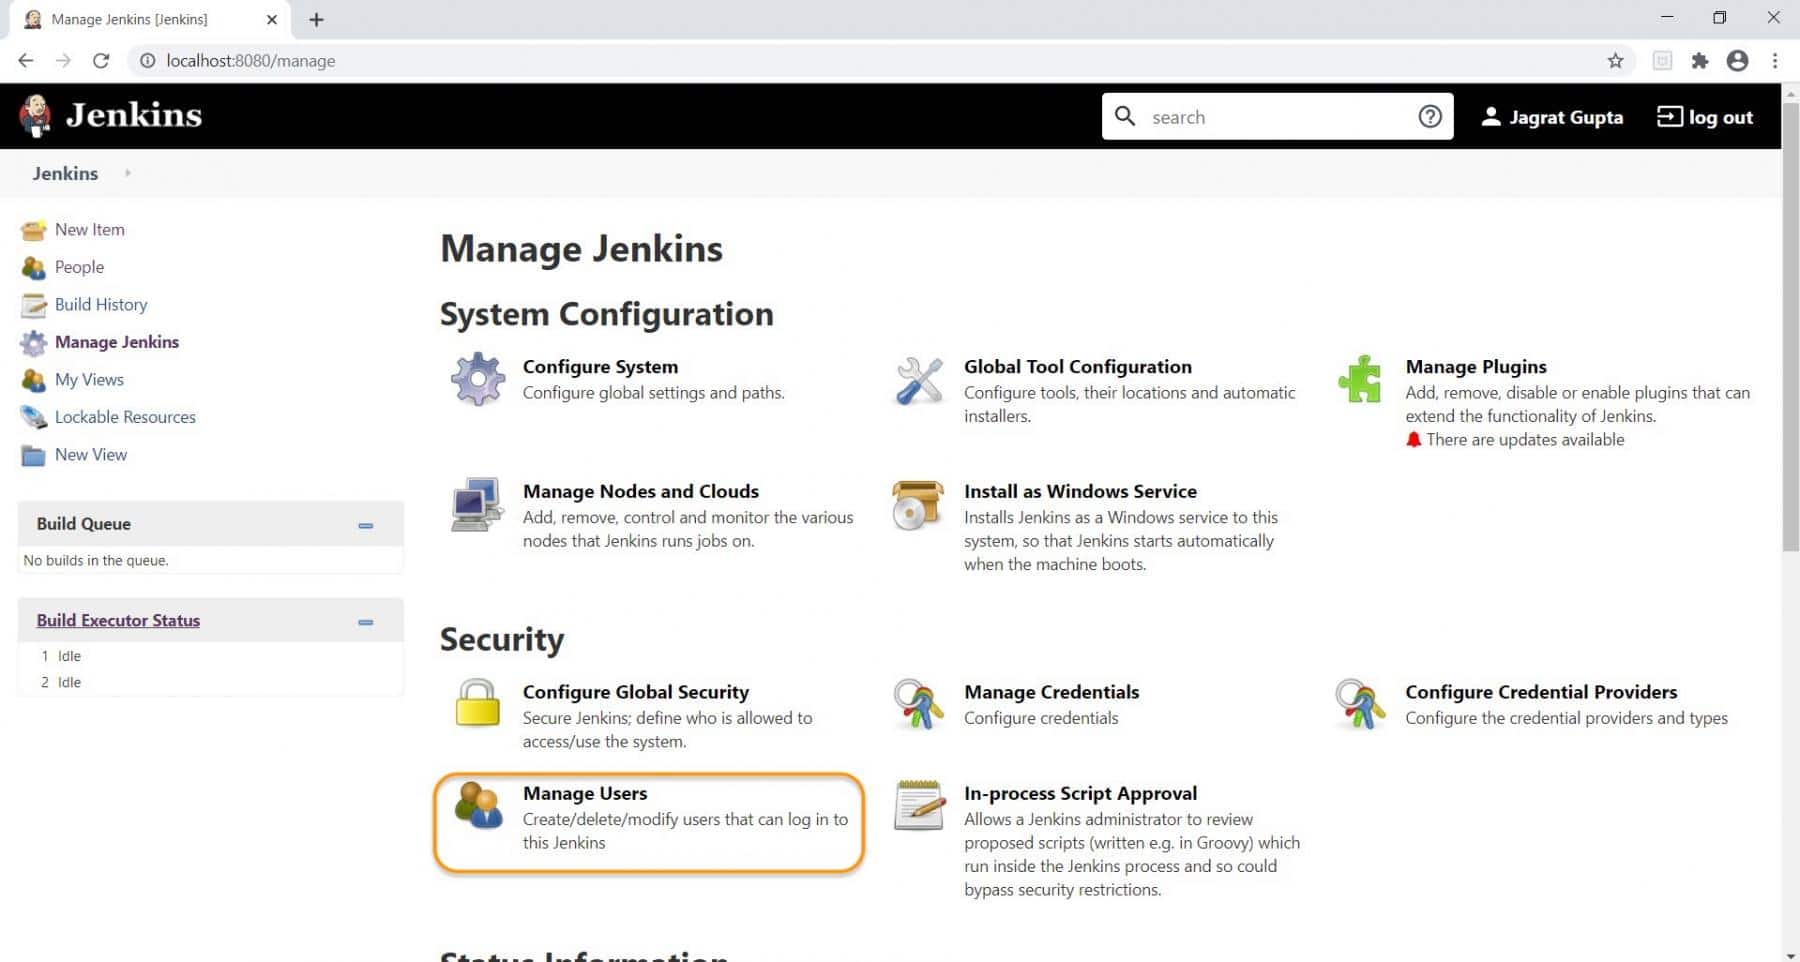
Now, click on the "Manage Users" under the Security section on the Manage Jenkins page.
Step 3: As soon as we click on "Manage Users" under the Security section on the Manage Jenkins page, we will be redirected to the Users page.
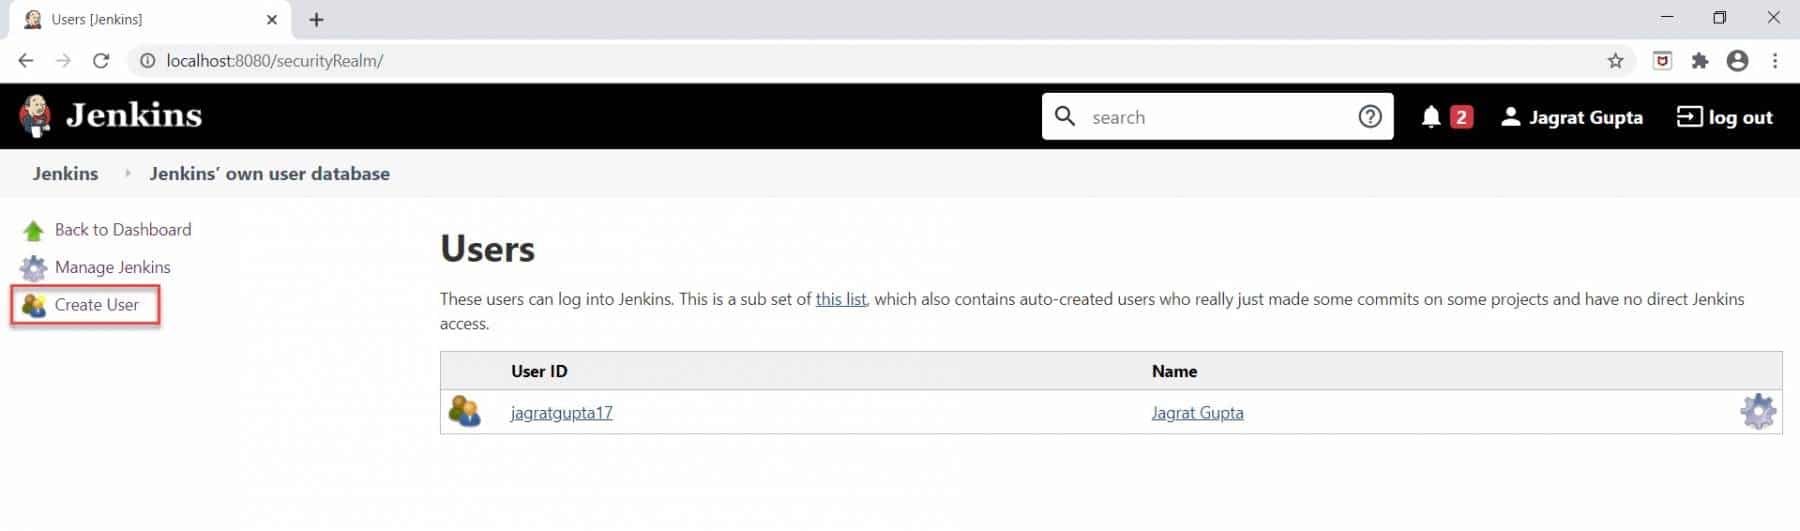
We can create a new user by clicking on the "Create User" link as highlighted above.
Step 4: As soon as we will click on the Create User link, we will be redirected to the Create User page on which we need to fill in the username, password, confirm password, Full name, and email address information.
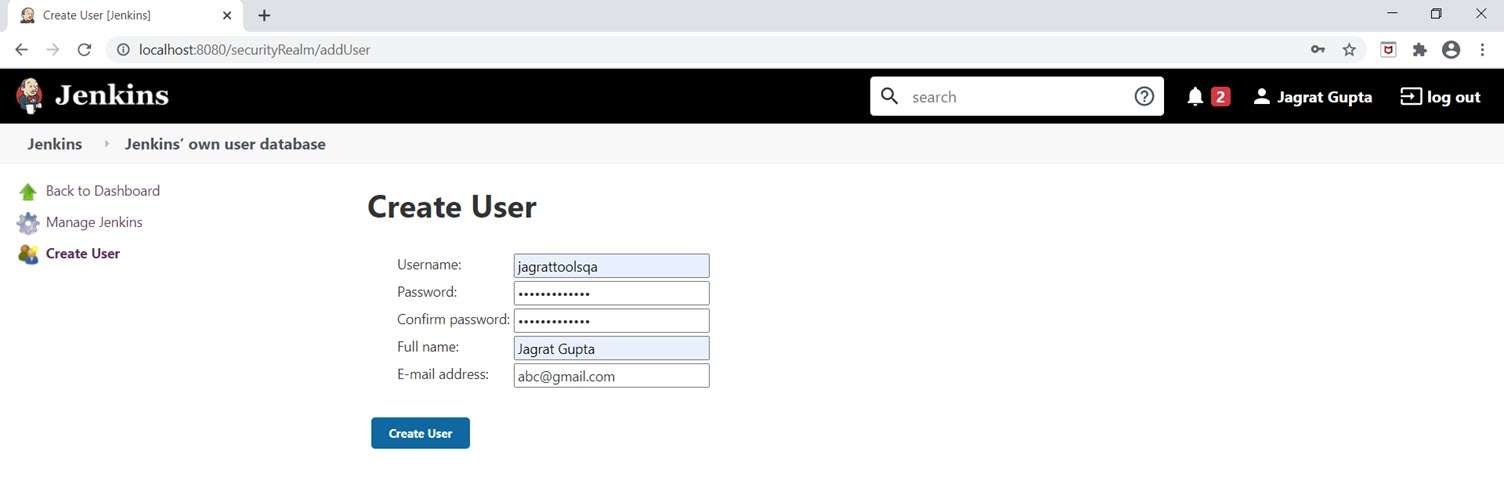
After filling in all information, click on the Create User button.
Step 5: As soon as we click on the Create User button, a new user will be created and displayed on the Manage Users page.
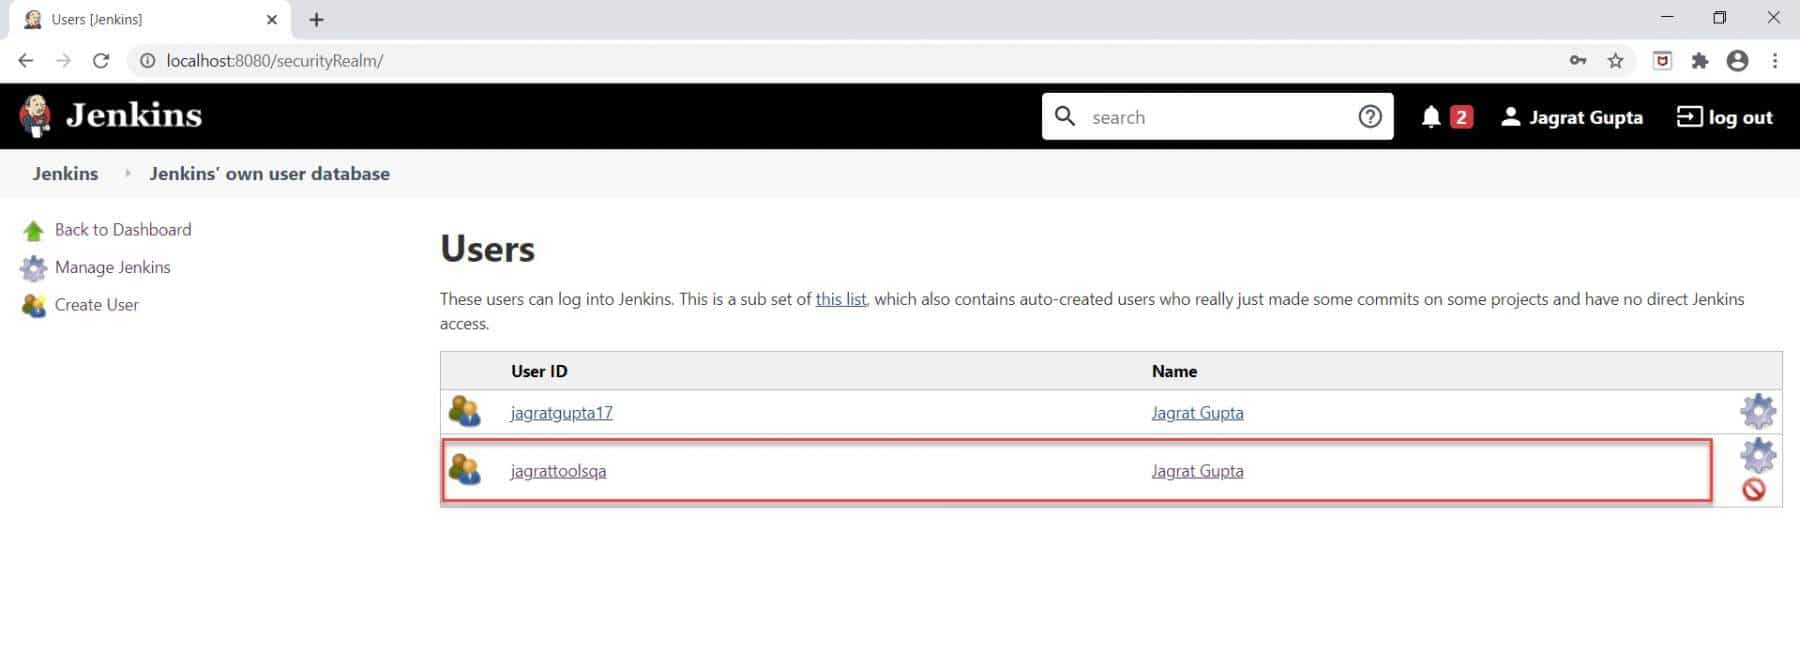
So, in this way, we can create as many as users in Jenkins. Now, let's see how we can assign roles to these users?
How to manage user roles in Jenkins?
Alright, so in this section, we will see how to create roles and assign permissions to users. For achieving this, follow the below steps:
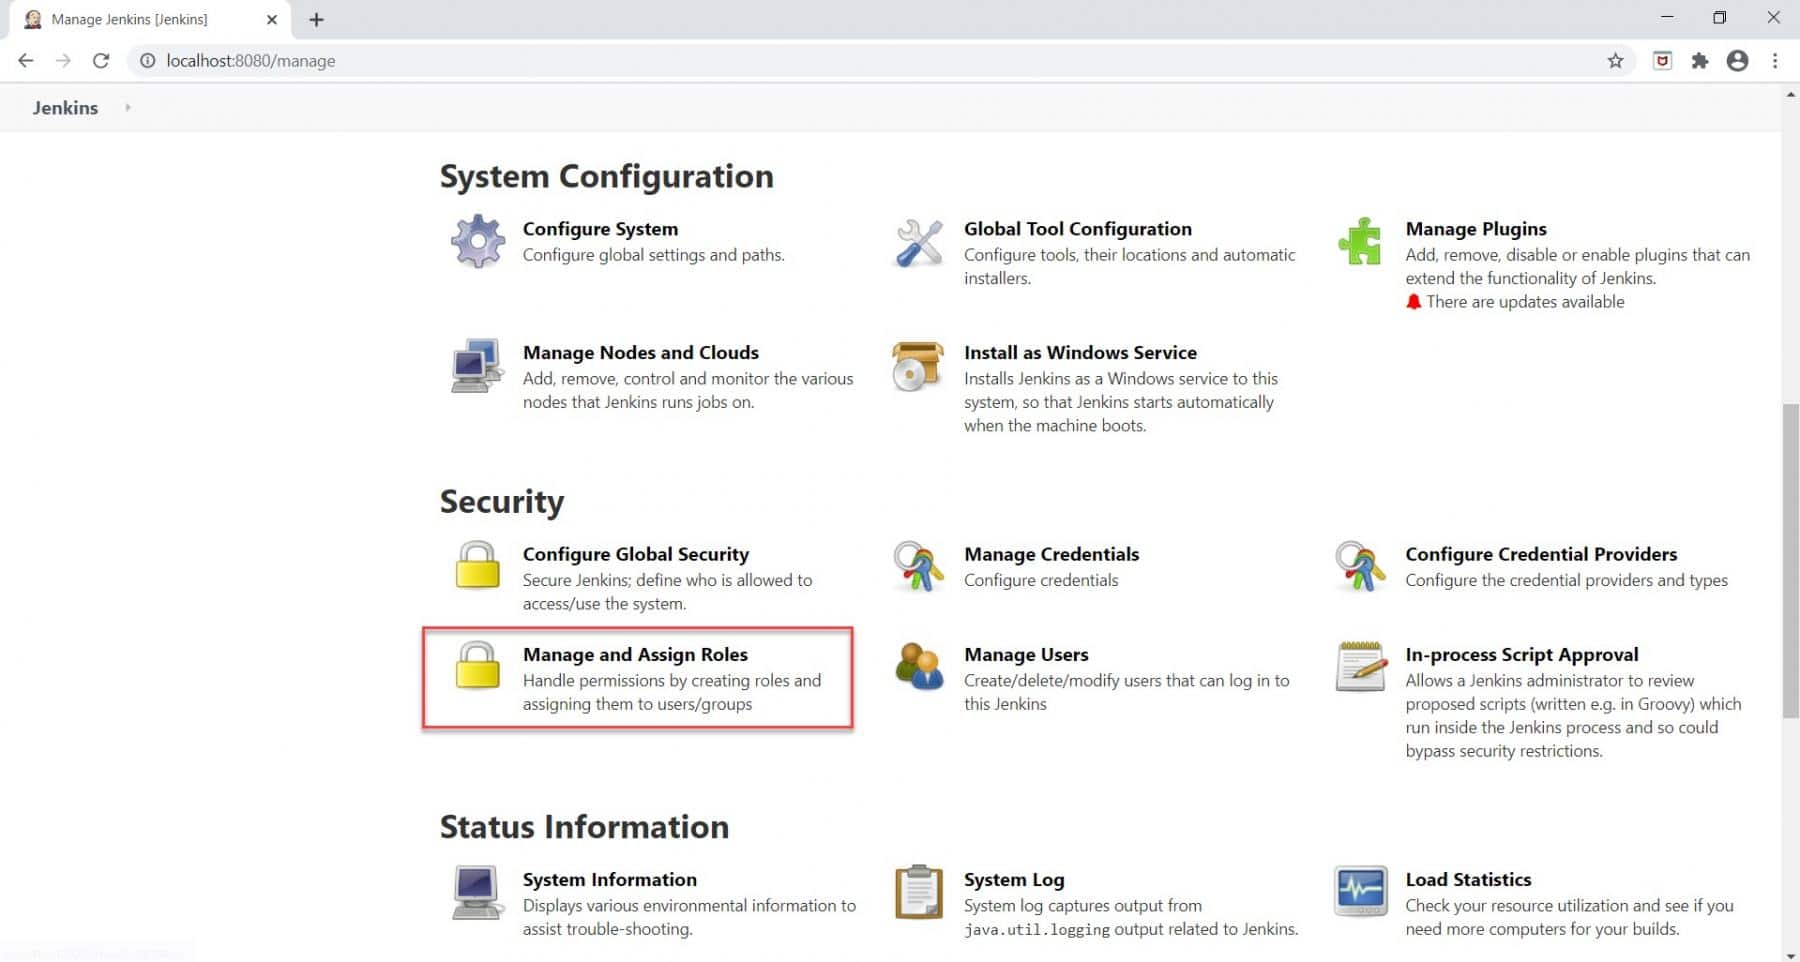
Step 1: Firstly, go to the Manage Jenkins page and click on "Manage and Assign Roles".
Note: This option will be visible only after installing the "Role-based strategy plugin".
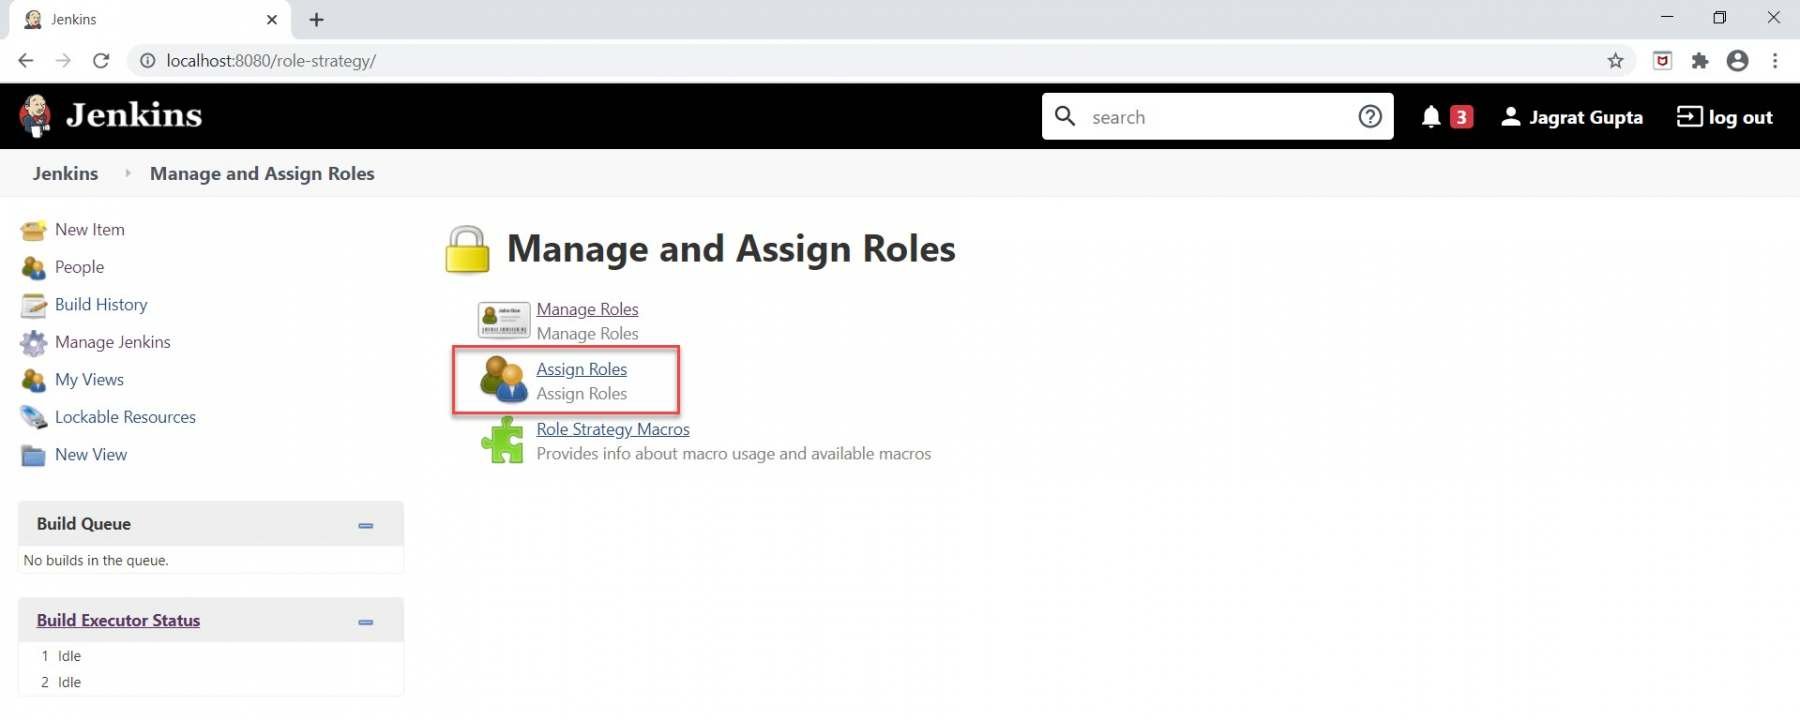
As soon as, we will click on Manage and Assign Roles, we will be redirected to the Manage and Assign Roles page.
Step 2: Secondly, click on the "Manage Roles" option, as highlighted below:
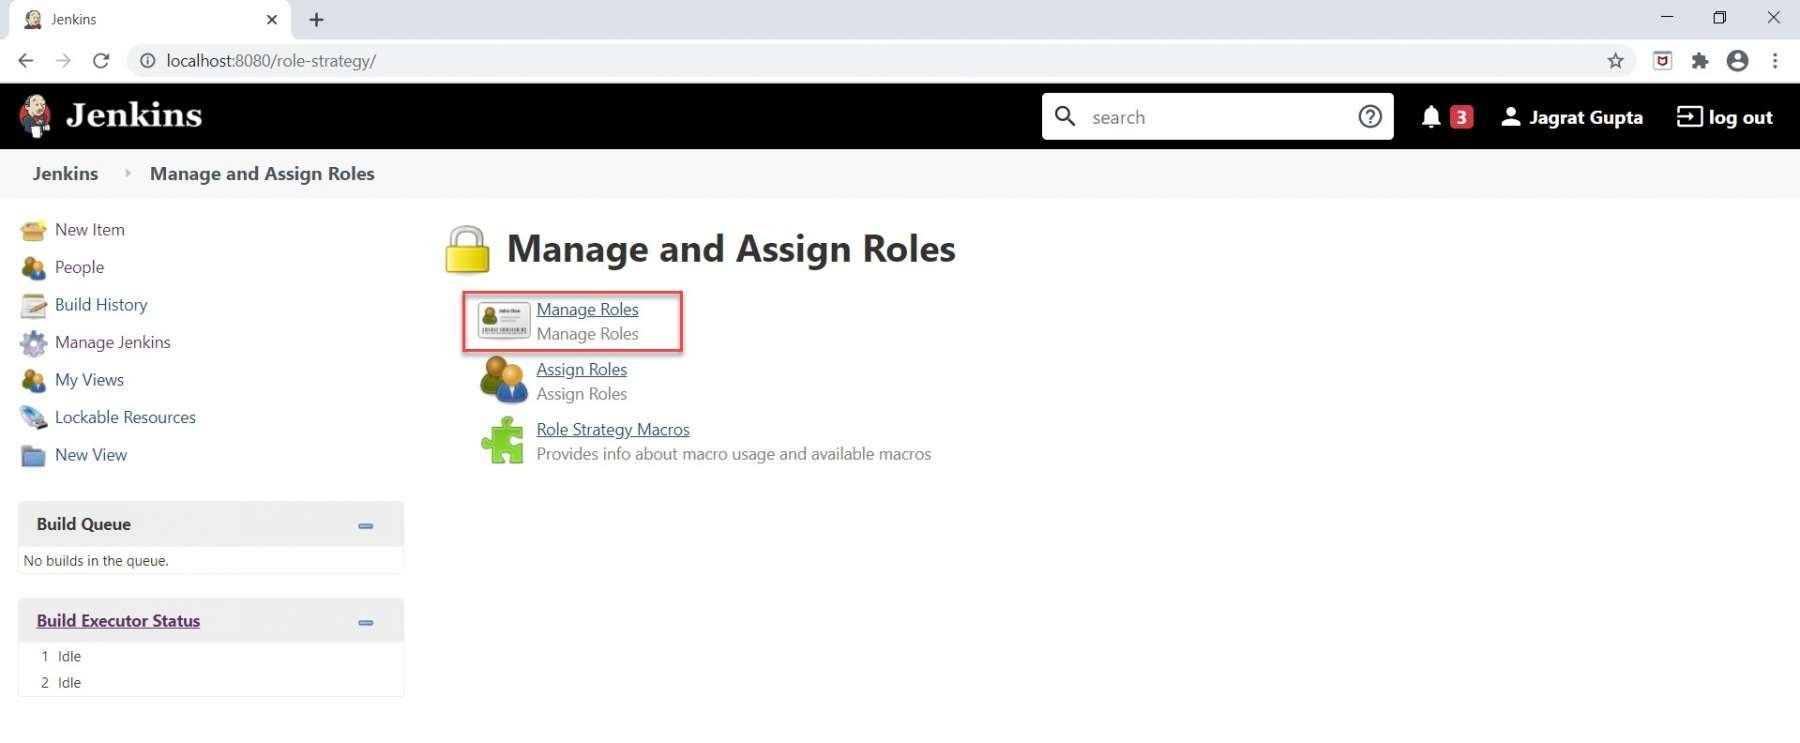
As soon as we click on the Manage Roles option, we will go to the Manage Roles page.
Step 3: For creating new roles, kindly follow the below highlighted steps:
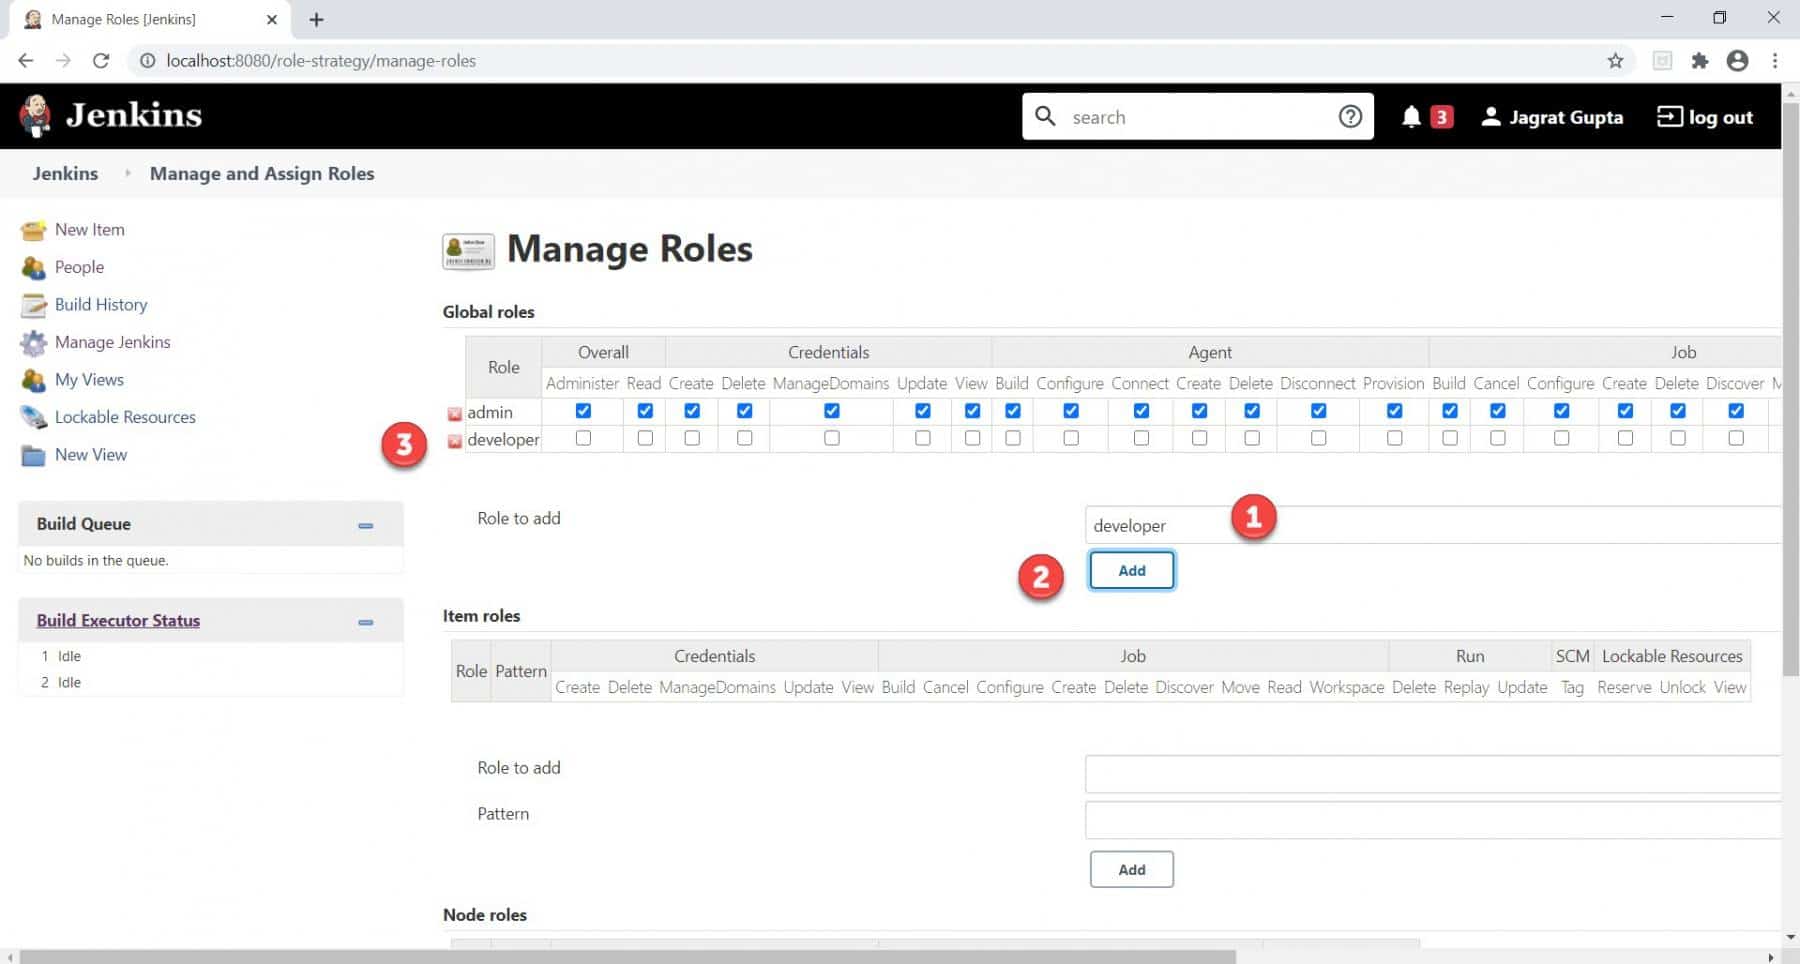
- Type the Role that we want to add in the "Role to add" textbox. Here, we are going to create a role named "developer".
- Click on the Add button.
- As soon as we will click on the Add button, the required role will be added to the Global roles grid.
So in this way, we can create as many roles as we want. Now it's time to permit the newly added role.
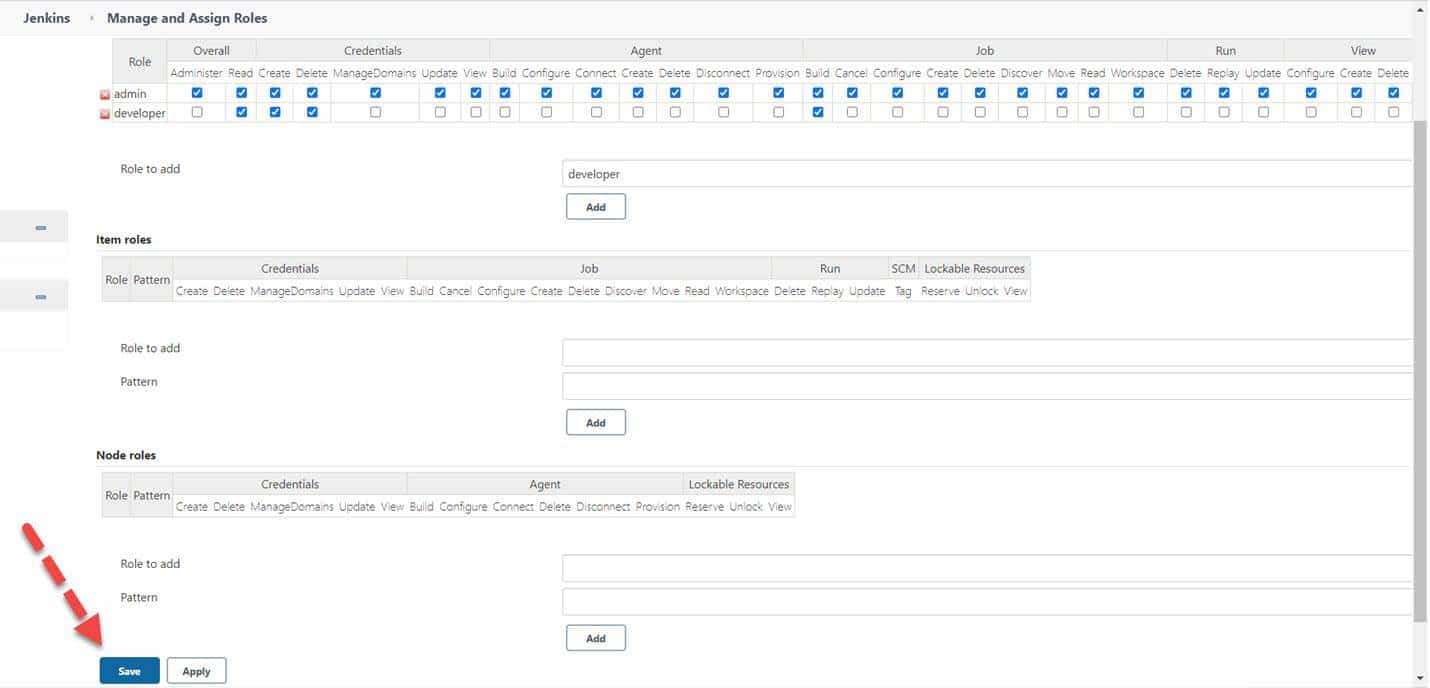
Step 4: Check the permissions that we want to give to the newly added role and click on the Save button.
So, now we have a new role in the system and it has certain permissions associated with it. Now, let's see how we can assign these roles to a specific user, so that that user also gets the same permissions, as given to the mentioned role.
How to assign roles to a user in Jenkins?
In the previous section, we saw how to create roles and give permission to those roles. In this section, we will see how to assign those roles to the users. For demonstration purposes, we created one user on Jenkins. Kindly follow the below steps to assign the role to the specific user:
Step 1: Go to the Manage and Assign Roles page and click on the "Assign Roles" link, as highlighted below:
Step 2: As soon as we will click on Assign Roles, we will go to the Assign Roles page. Here, under the Global roles section, we can see the new role ("developer") that we added in the previous section. Now we can assign this role to the respective user. Kindly do the following steps to achieve it:
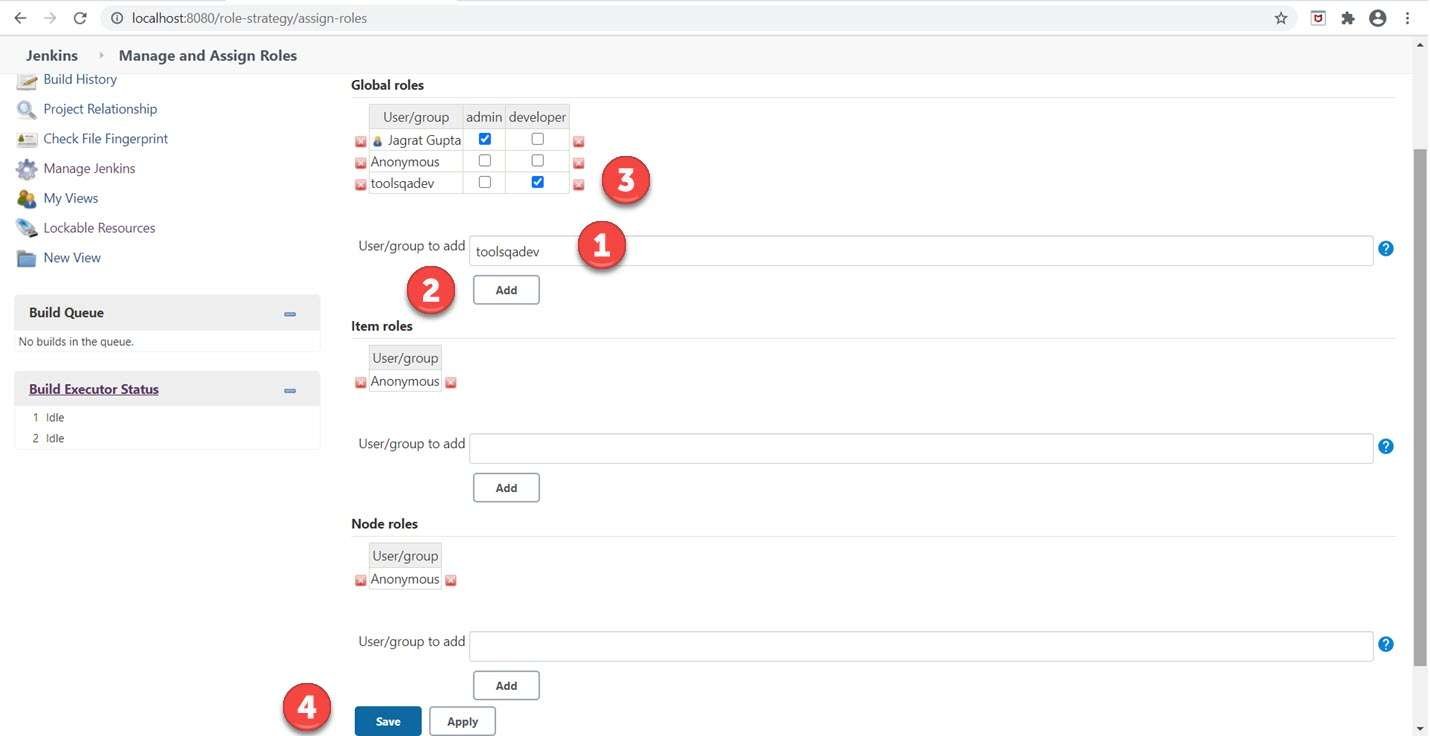
- Type the user that we want to add in the "User/group to add" textbox. Here, we are going to add a user named "toolsqadev".
- Click on the Add button.
- As soon as we will click on the Add button, the required user will add to the Global roles grid. Now, check the developer checkbox against this user.
- Click on the Save button.
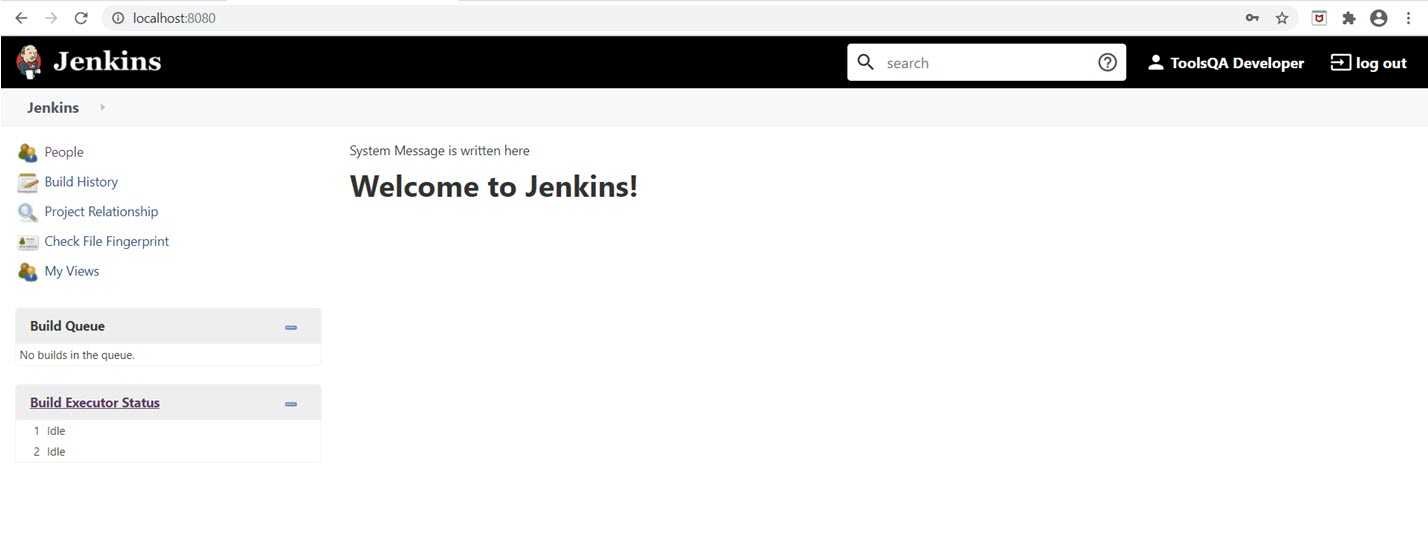
Step 3: As we have assigned a role to the user in the previous step so now it's time to validate the permissions that we assigned to the role for any specific user. To do this, log in with that specific user. In the previous section, we did not assign the "Create Job" role to the user "toolsqadev" so when we login with this user the "Create a new Item" link should not appear in the Jenkins dashboard which we can see in the below image.
So, in a summarized way, whatever permissions that we will assign to the role, only those operations that the user will perform. That's all for this section. In the next section, we will discuss the project-based matrix authorization strategy in Jenkins.
What is the Project-based Matrix Authorization strategy in Jenkins?
The Project-based matrix strategy is an authorization strategy that defines the permission of the user or group on specific projects. It also defines the permission on actions that any user or the group can perform over jobs. This option comes under the Authorization and when we choose this option then a grid opens where we can add users as well as assign them privileges by checking the checkbox.
These privilege groups come under the category as Overall, credentials, agent, job, run, view, and SCM. In the next sub-section, let's see how can we perform a project-based matrix strategy in Jenkins.
How to assign job-specific permissions in Jenkins?
In the previous section, we saw the introductory aspect of the project-based matrix authorization strategy. Now, in this sub-section let's see how to implement this strategy in Jenkins. Follow the below steps for the implementation of it:
Step 1: Click on "Manage Jenkins" in the Jenkins dashboard.
As soon as we will click on it, we will redirect towards the Manage Jenkins page.
Step 2: Click on "Configure Global Security" under the "Security" section.
We will redirect towards the Configure Global Security page.
Step 3: Select the "Project-based matrix authorization strategy" option under the authorization section.
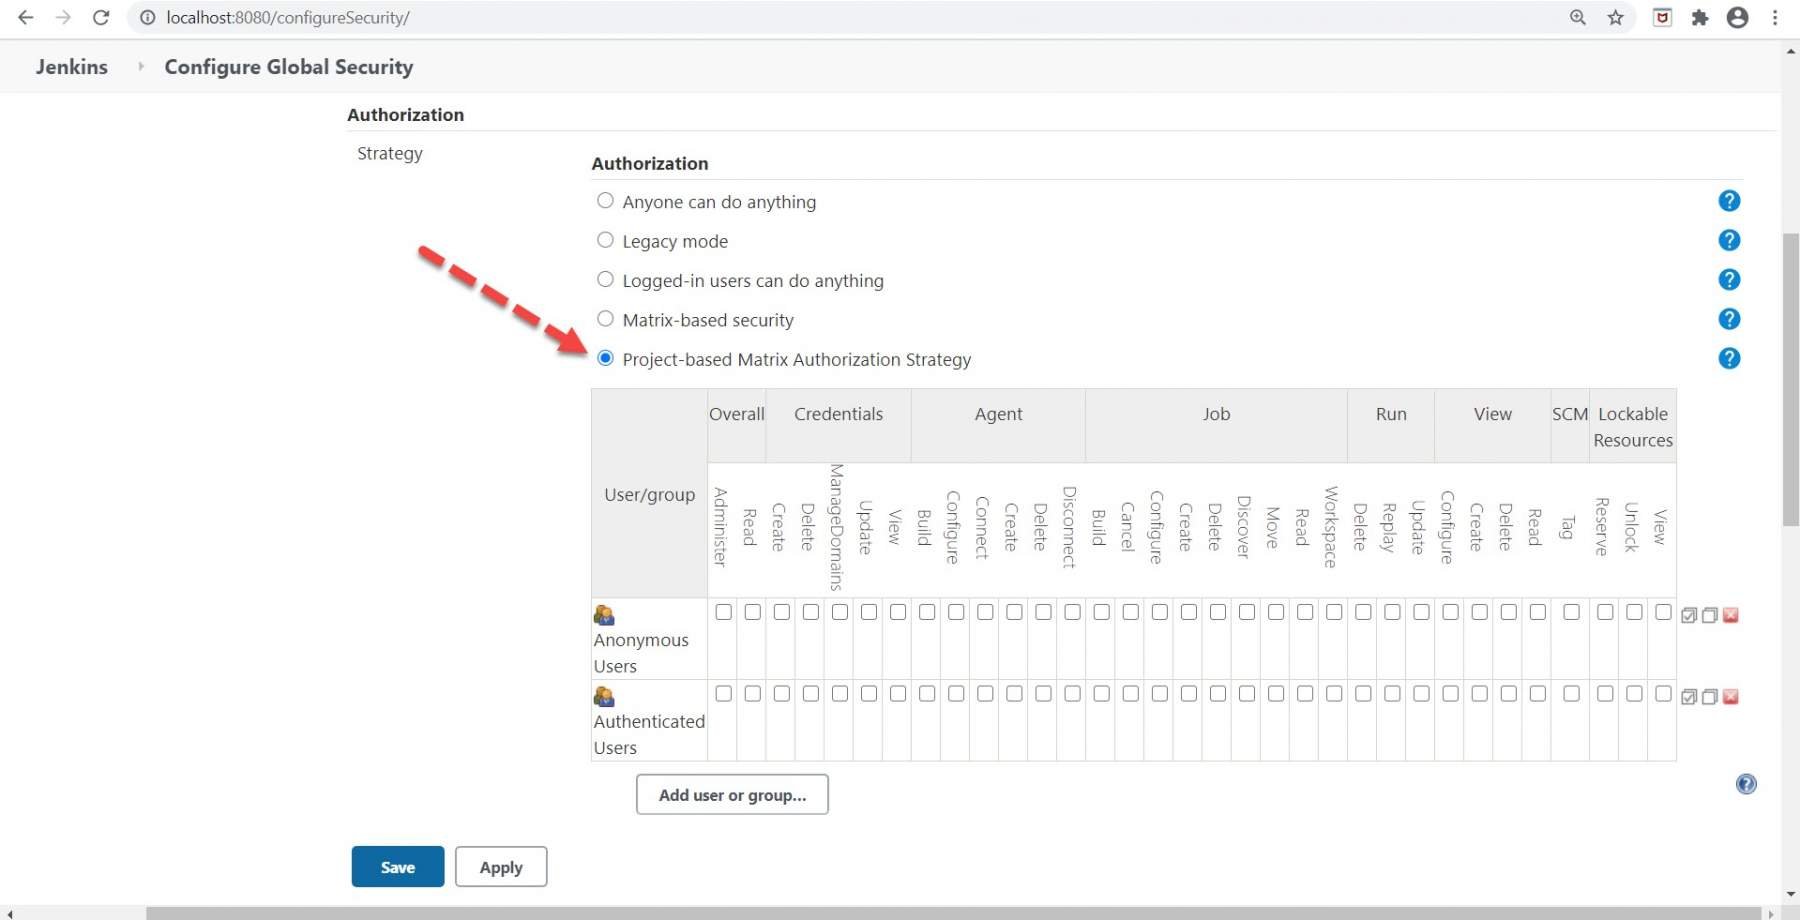
We can see a grid-based structure after selecting the required option where we need to add users that we have already created.
Step 4: Add the user that you want to add by following the below steps:
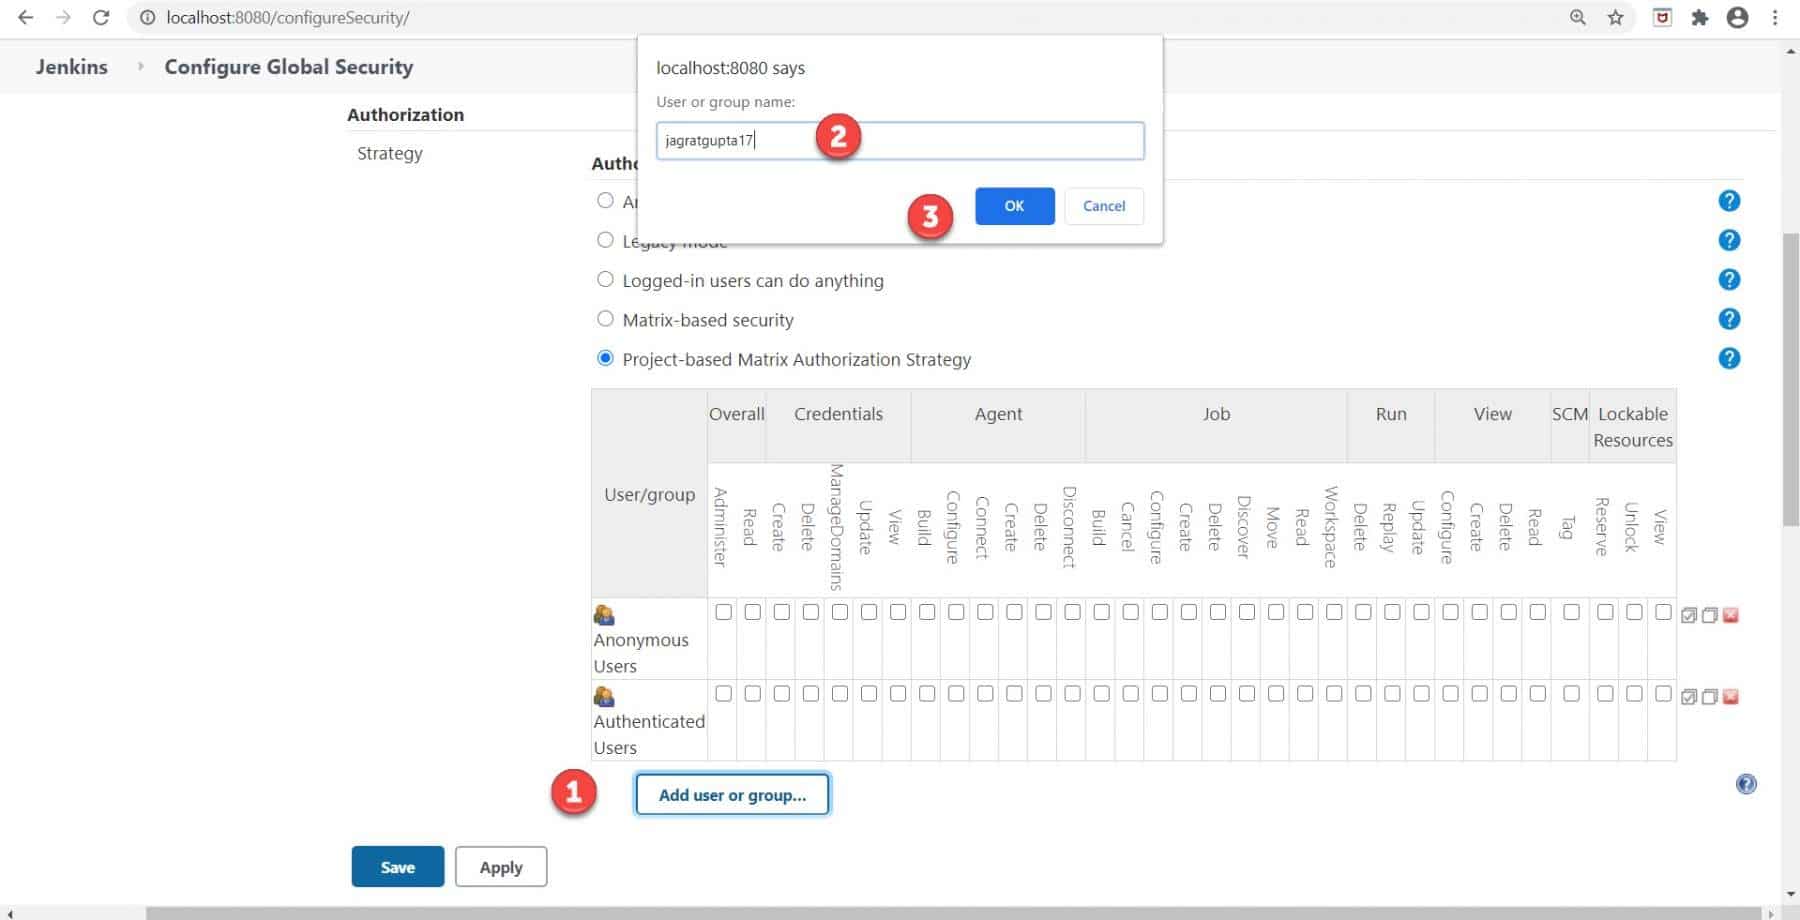
- Click on the "Add user or group" button.
- Put user "jagratgupta17" that you want to add.
- Click on the Ok button.
As soon as we will click on the OK button, the user will add to the grid-like below image.
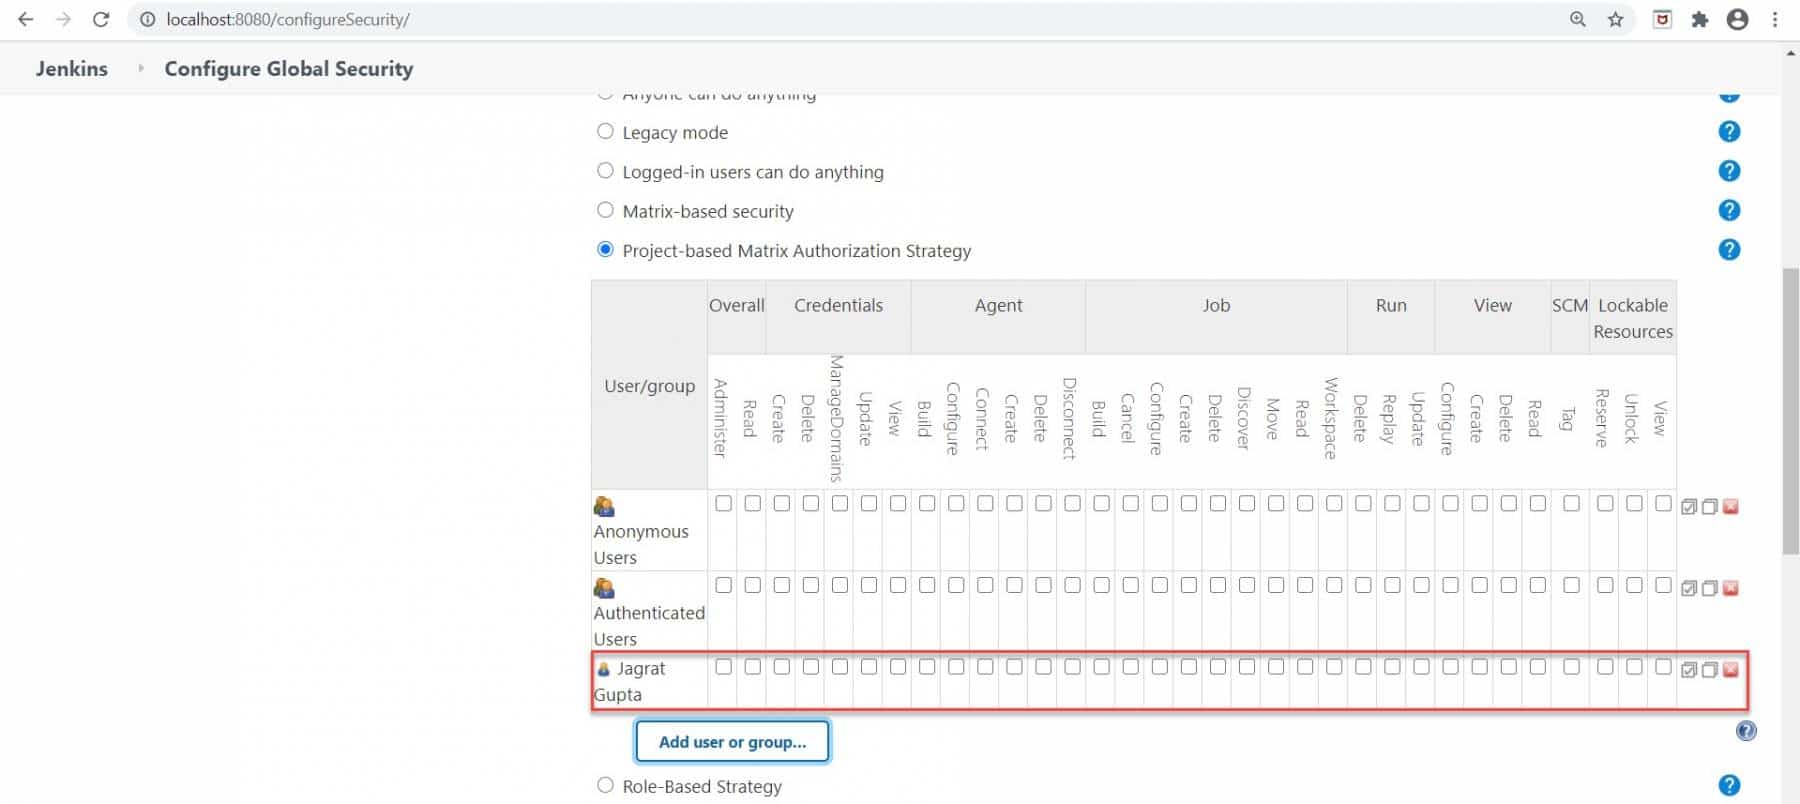
Step 5: Now assign all privileges to this user as we are making as admin and click on the Save button.

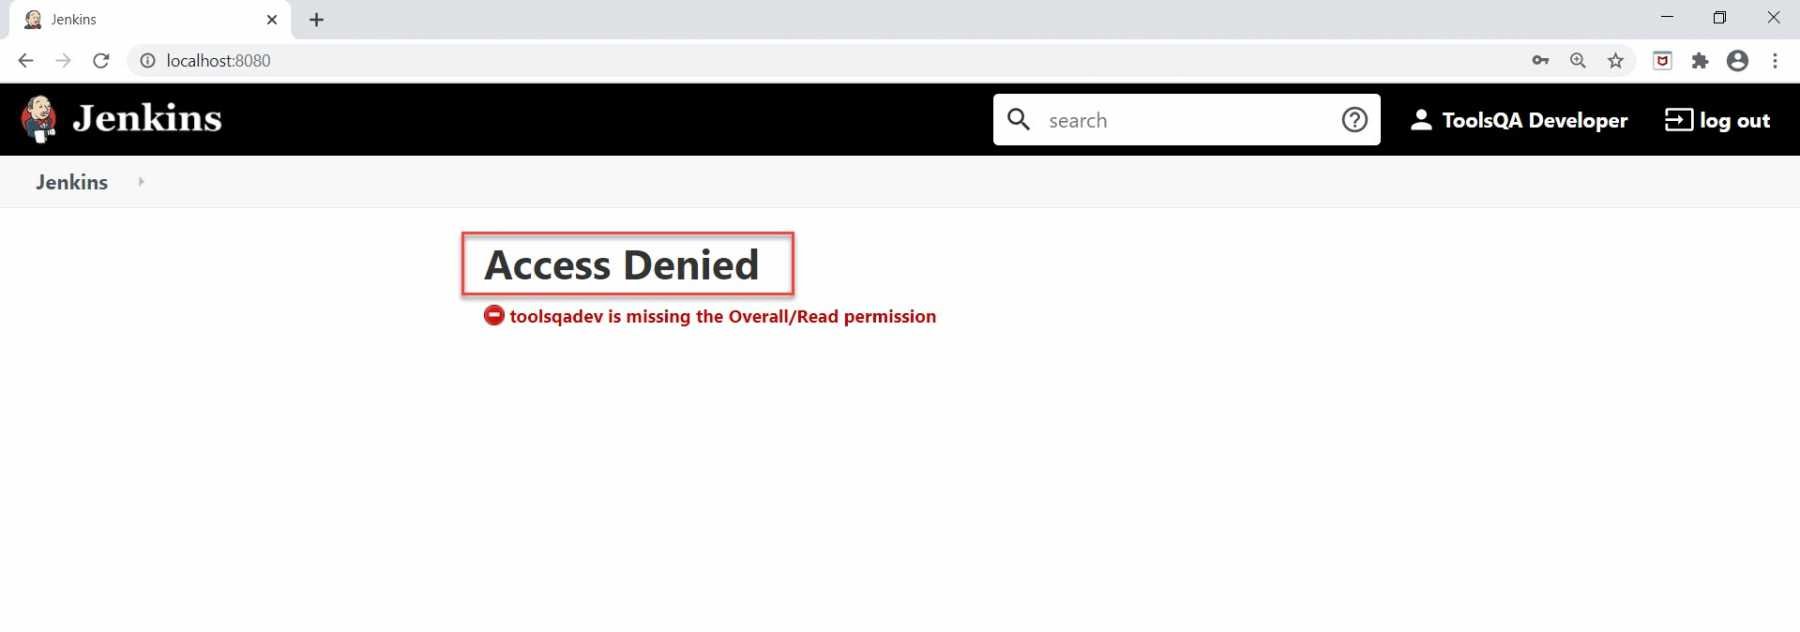
Step 6: Now, we have another user "toolsqadev" that we already created. When we login with this user then we will see an "Access denied " message in the Jenkins dashboard as we did not add this user in the grid as well as assign privilege to this user.
Now, in the next step, we will log in again from the admin user and we will add this user inside that grid and assign READ privilege to this user.
Step 7: Now, add this user inside the grid as we did in previous steps and assign READ privilege to this user.
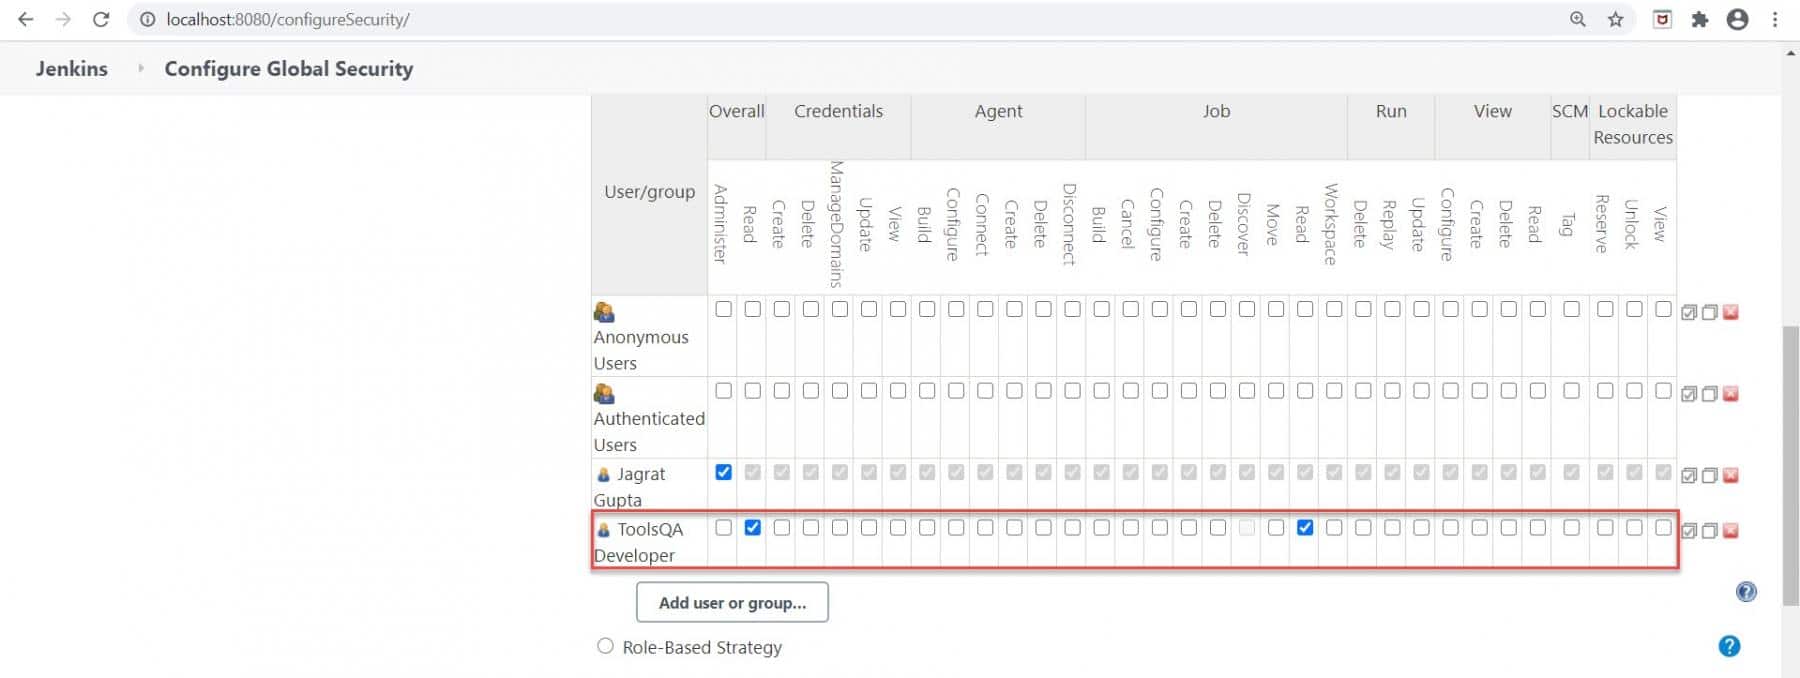
So in this way READ privilege, we assigned to user "toolsqadev ".
Step 8: Now, when we again login with this user we can see all jobs in the Jenkins dashboard.
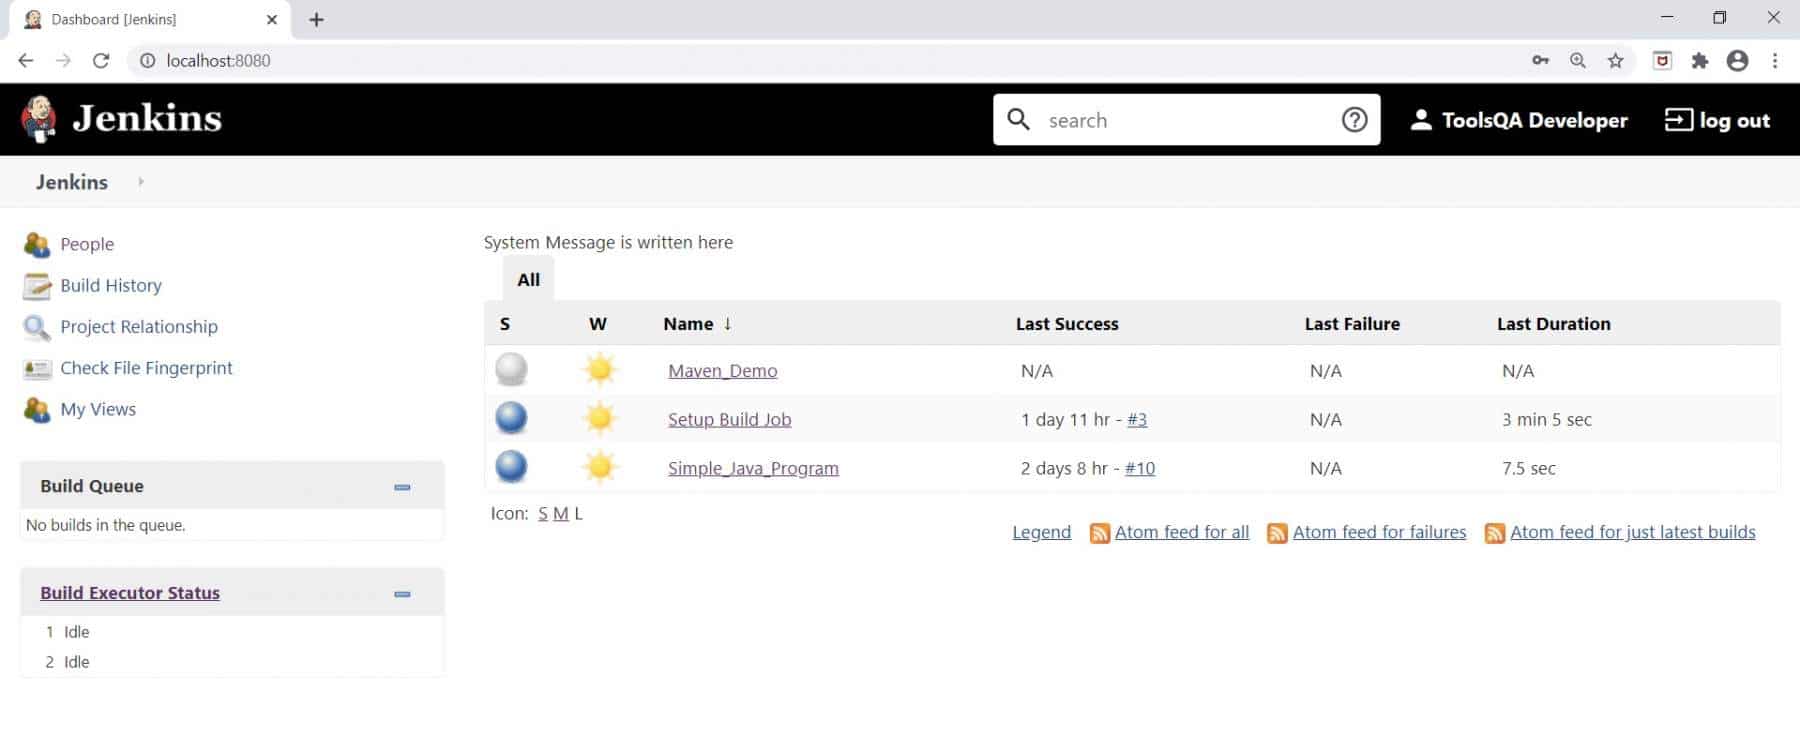
The important point to note here is that we did not see the "Build Now " option here on the left for this user because we only assigned READ only privilege to this user.
Key Takeaways:
- Role-based strategy plugin is a special kind of plugin in Jenkins that is based on a role-based mechanism and allows us to manage users' permission.
- If we want to create roles as well as assign roles to users then we need to install the "Role-Based Authorization Strategy" plugin.
- We can create roles as well as assign permission to those roles after clicking on Manage Roles under manage and assign roles.
- After creating roles, we can assign these roles to users after clicking on Assign Roles under manage and assign roles.
- A project-based matrix strategy is an authorization strategy that defines the permission of the user or group on specific projects. It also defines the permission on actions that any user or group can perform over jobs.