Running jobs using Jenkins is one of the essential activities during the project development and maintenance, but the questions arise here: this is the only significant activity. What about that situation in which higher management wants to see the builds activity over a while. Here, Jenkins metrics and trends come into the picture. There are some plugins available in Jenkins using which we can easily see about build history over time. We are dedicating this article to understand the details of a few plugins that can help gather the Jenkins metrics and Trends for various jobs and activities. Let's start the journey with the understanding of the below points:
- What are the metrics and trends in Jenkins?
- How to install the metric-related plugin in Jenkins?
- And, how to view metrics in Jenkins?
- How to install the trends-related plugin in Jenkins?
- How to view trends in Jenkins?
What are the metrics and trends in Jenkins?
We stated in the introductory part that metrics and trends are helpful to present the metrics of builds that we carry out over a period of time. We can also view these metrics and trends with the help of graphical formats so that in a single report, we can easily analyze that what is the success and failure ratio of our builds over a while. For example, if we take the "Build History Metrics" plugin, then this plugin shows the following metrics for all of the builds in Jenkins:
- MTTF (Metrics Time to Failure)
- MTTR (Mean Time to Recovery)
- Standard Deviation of Build Time
In the same case, if we install the "build-metrics" plugin in Jenkins, then we can see global build stats in graphical format. So, in the further sections, let's talk about the installation and usage of these plugins.
How to install the metric-related plugin in Jenkins?
In the previous section, we understood the concept of metrics and trends in Jenkins. Now, it's time to see the practical implementation of these metrics and trends. Let's start with the installation of the metric-related plugin. First, we will install the "Build History Metrics" plugin in Jenkins. Kindly follow the below steps to install this plugin:
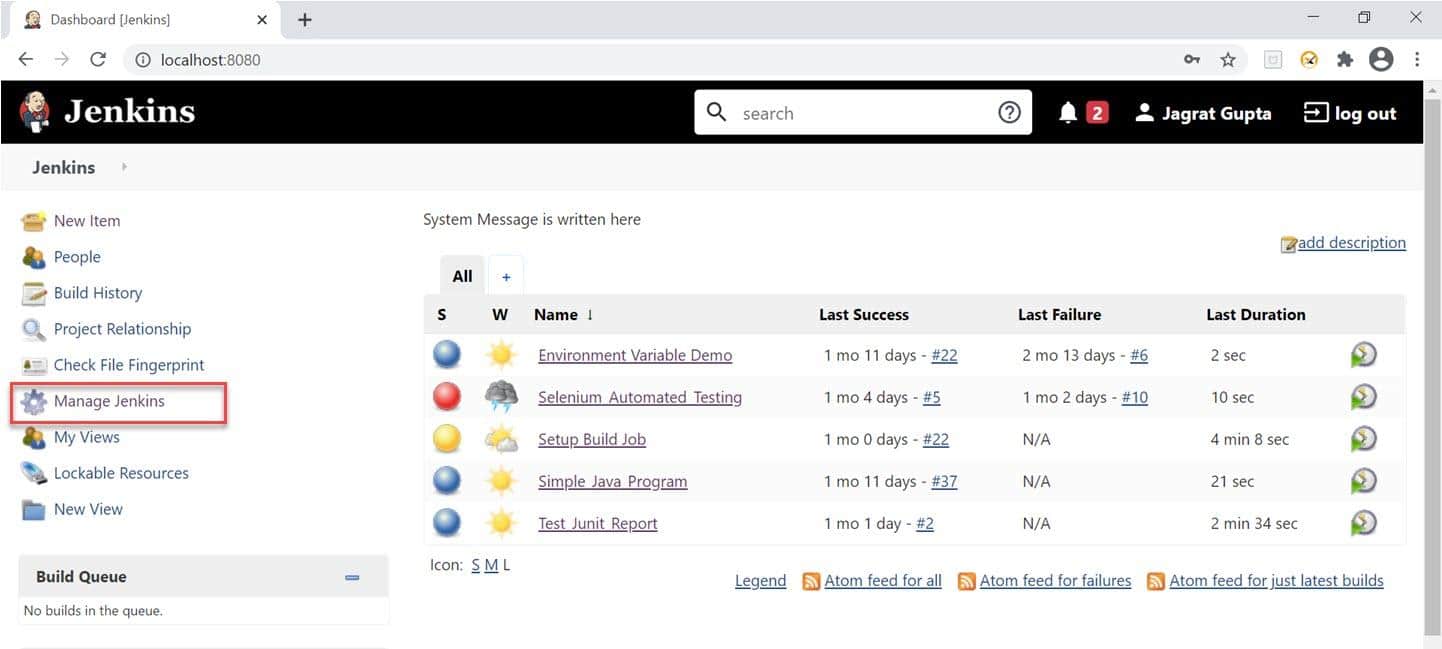
Step 1: Firstly, go to Jenkins dashboard and click on the "Manage Jenkins" link highlighted in the below image:
Step 2: We will redirect towards the Manage Jenkins page. Here click on "Manage Plugins".
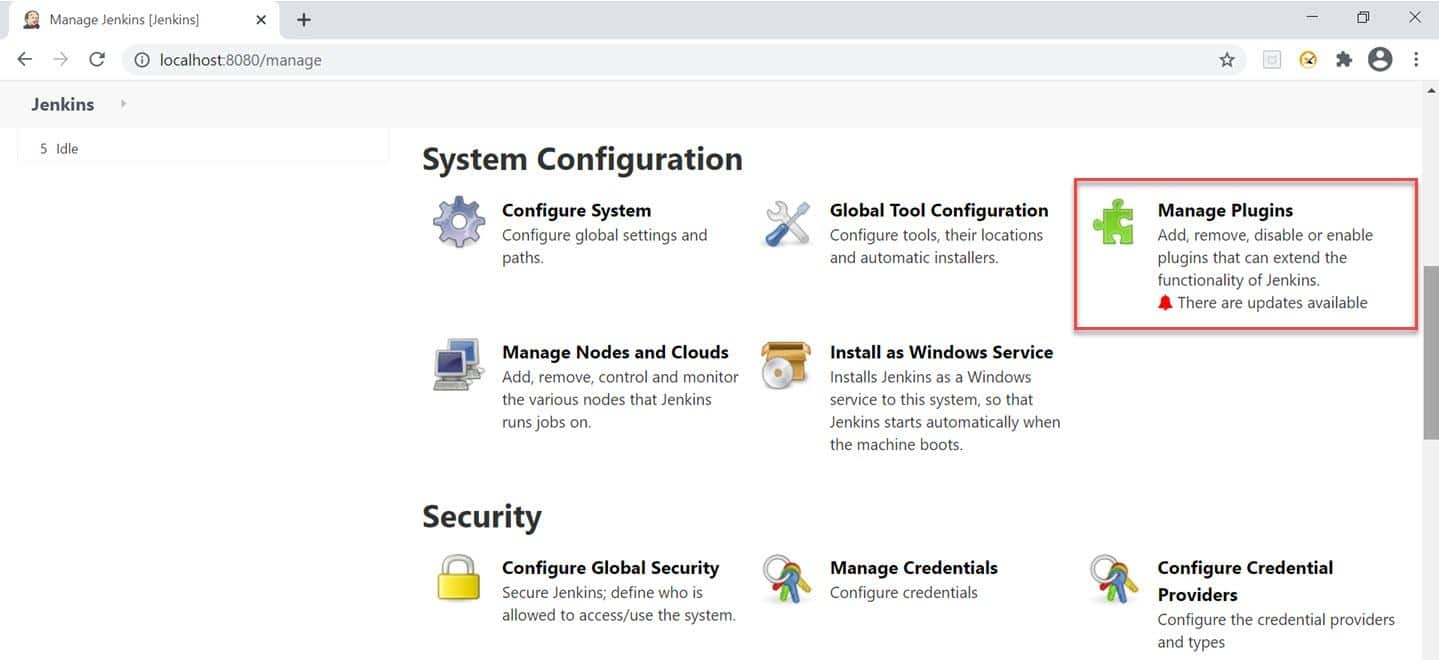
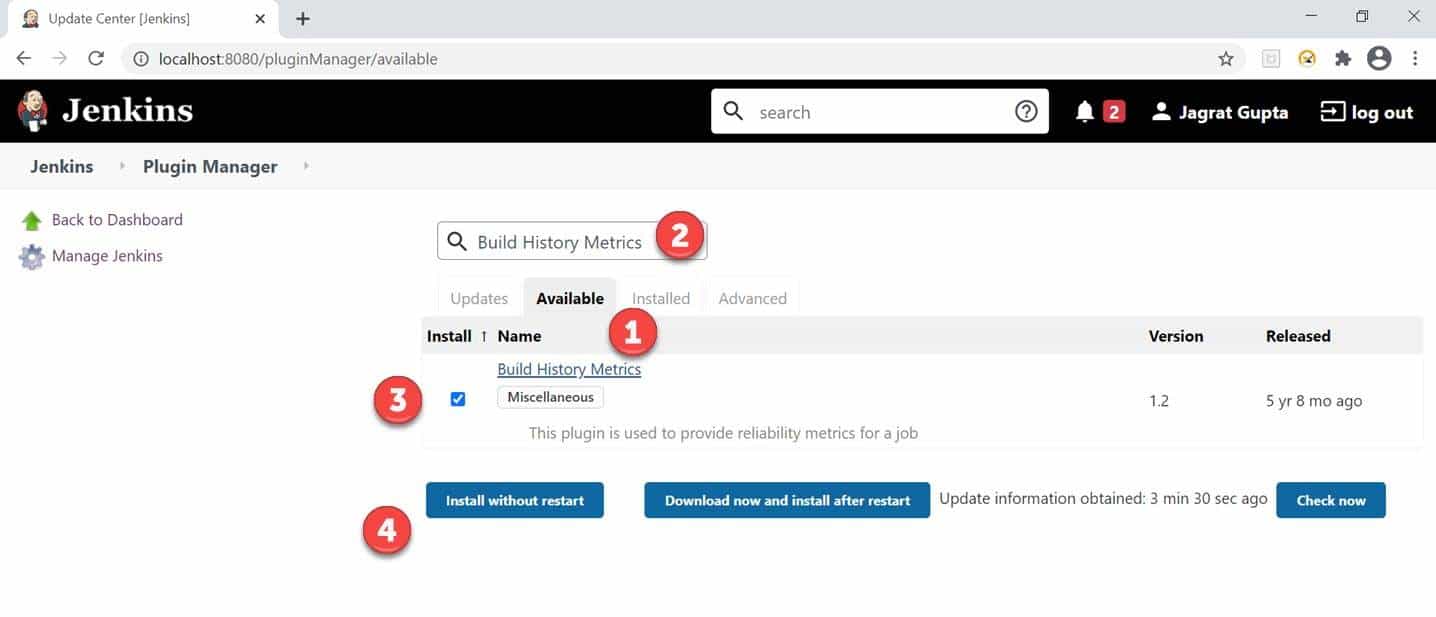
Step 3: After clicking, we will redirect towards the plugin manager page. Please do the following steps to install the build history metric plugin:
- Click on the "Available" tab.
- Put/ enter the text "Build History Metrics" in the search box.
- Check on the checkbox against the plugin.
- Click on the "Install without restart" button.
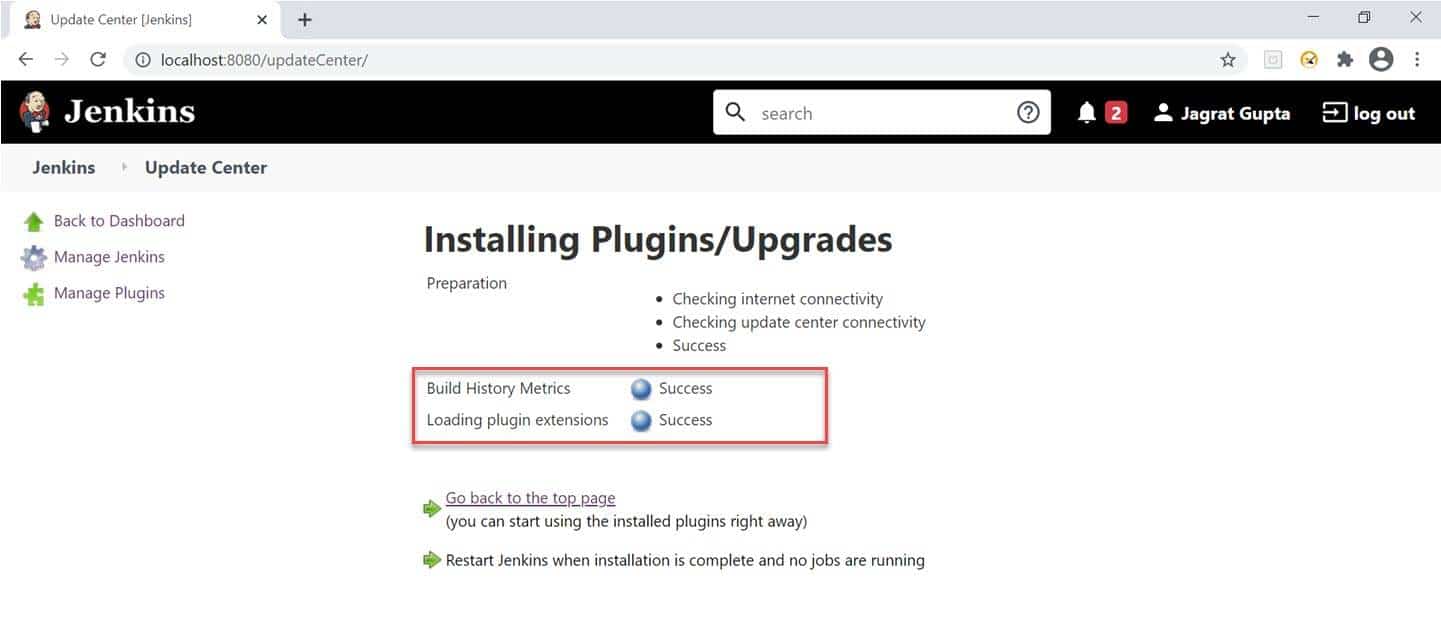
Step 4: As soon as we complete the above steps, we will redirect towards the plugin installation progress page, and after successful installation, we can see the success message.
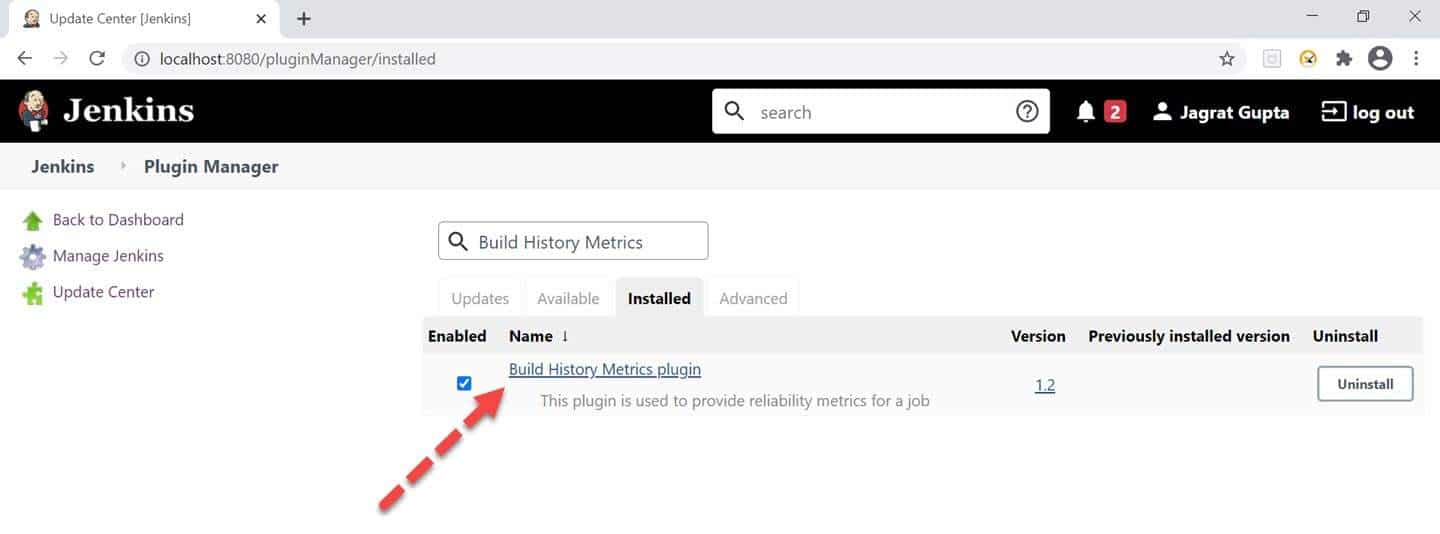
Step 5: For verification of successful installation of the plugin, we can go to the "installed" tab, and we can see the presence of the build history metrics plugin.
So, in this way, we can install the metric-related plugin in Jenkins. In the next sub-section, let's see how to view the metrics for any job in Jenkins.
How to view metrics in Jenkins?
Alright, we already install the build history metrics plugin in Jenkins. So, in this sub-section, we will see that how we can see metrics in Jenkins. Please follow the below steps to see metrics for different conditions:
Step 1: Go to Jenkins dashboard and click on any job. Here we can see the metrics like MTTR, MTTF, and Standard deviation in the tabular form highlighted below.
Note: If, after installing the plugin below, the tabular form does not display, then restart the Jenkins.
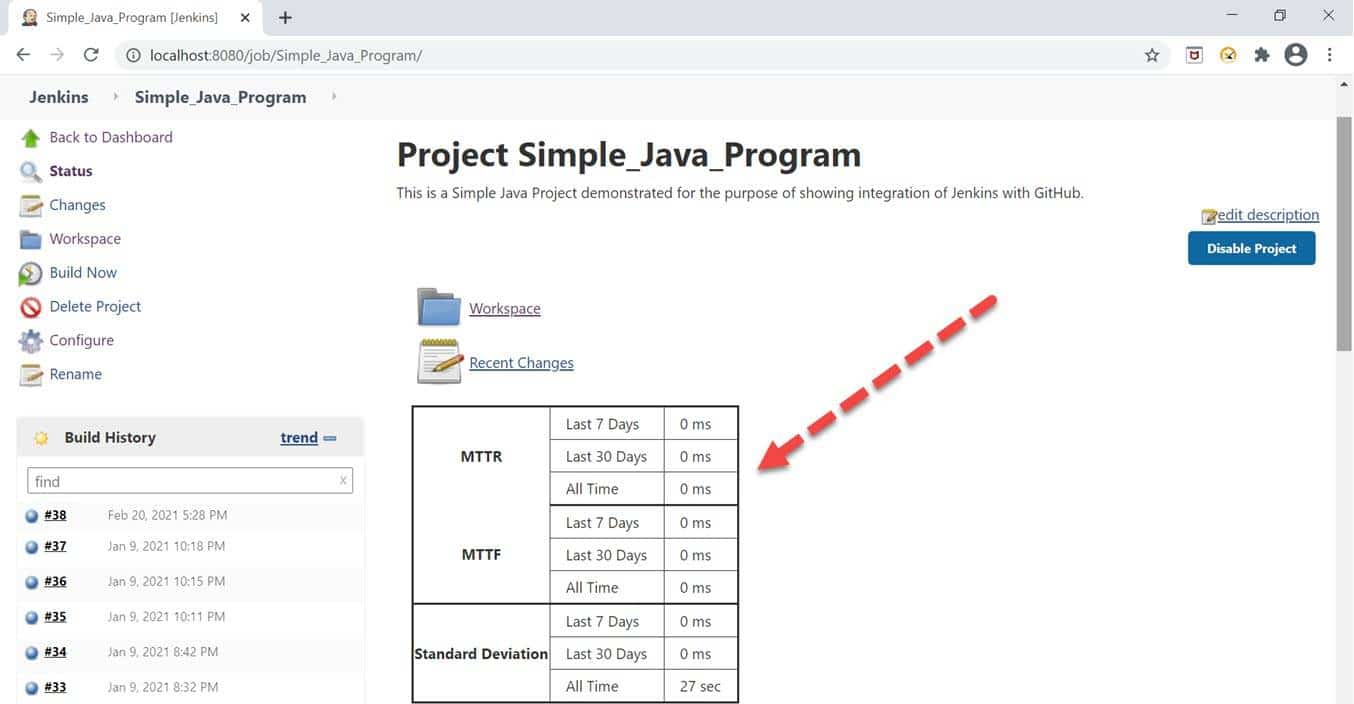
In the above image, we can see that there is no time recorded for failure because all builds are passed for that respective job. In the next step, let's see the time for failure also.
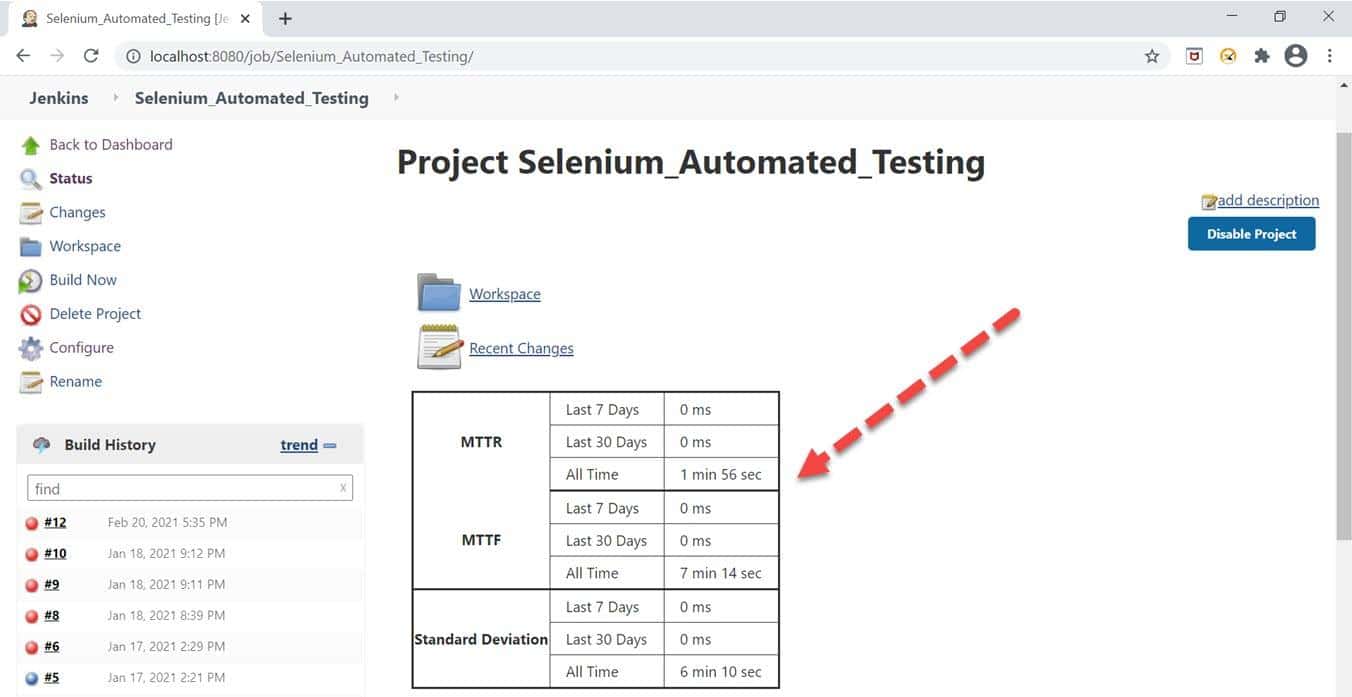
Step 2: Run any job for which build is showing as failed status, and then we can see time for MTTR and MTTF as mentioned in the below image.
So, in this way, we can see different types of metrics in tabular format for any job. In the next section, let's talk about the trends plugin in Jenkins.
How to install the trends-related plugin in Jenkins?
In the previous section, we saw that how to see metrics for any job in Jenkins. In this section, let's talk about the same trends. We will install the "build-metrics" plugin in Jenkins for this purpose. We can see global stats with the help of this plugin. Kindly follow the below steps to install this plugin:
Step 1: First, go to Jenkins dashboard and click on the "Manage Jenkins" link highlighted in the below image:

Step 2: We will redirect towards the Manage Jenkins page. Here click on "Manage Plugins".

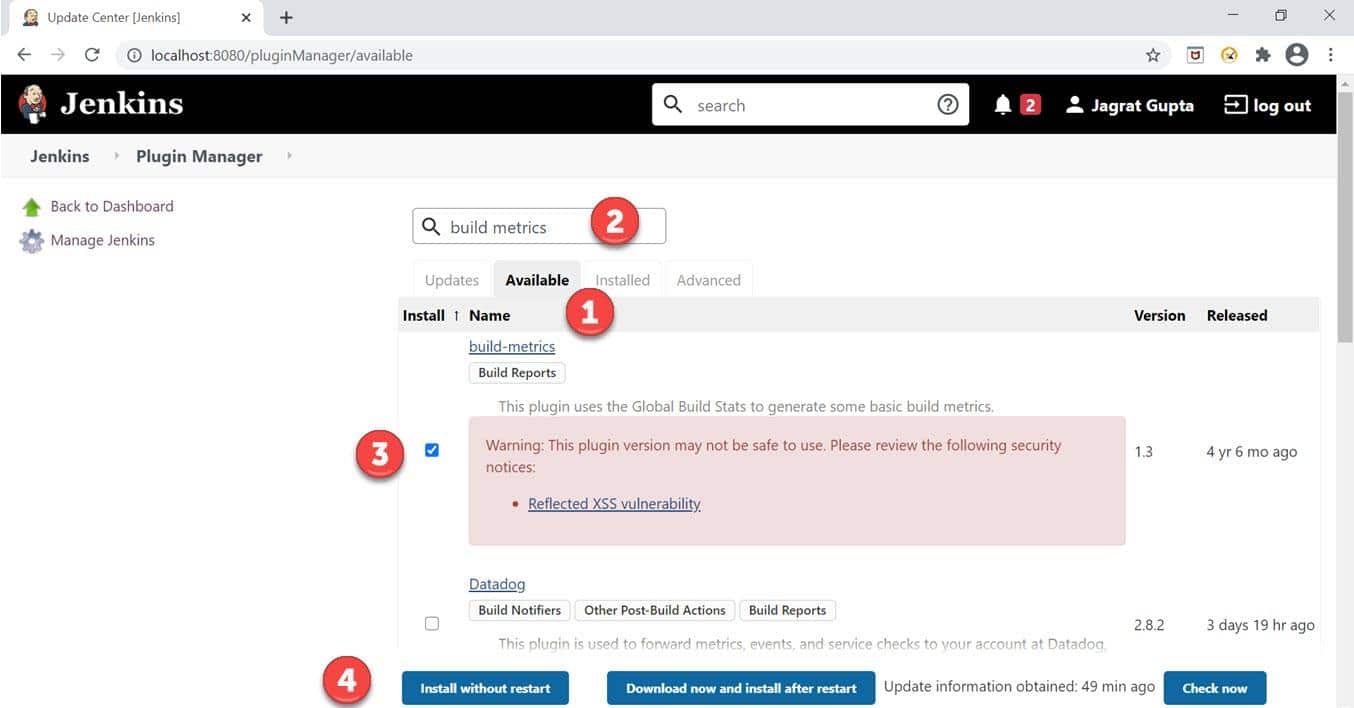
Step 3: After clicking, we will redirect towards the plugin manager page. Please do the following steps to install the build-metrics plugin:
- Click on the "Available" tab.
- Put the text "build metrics" in the search box.
- Check on the checkbox against the plugin.
- Click on the "Install without restart" button.
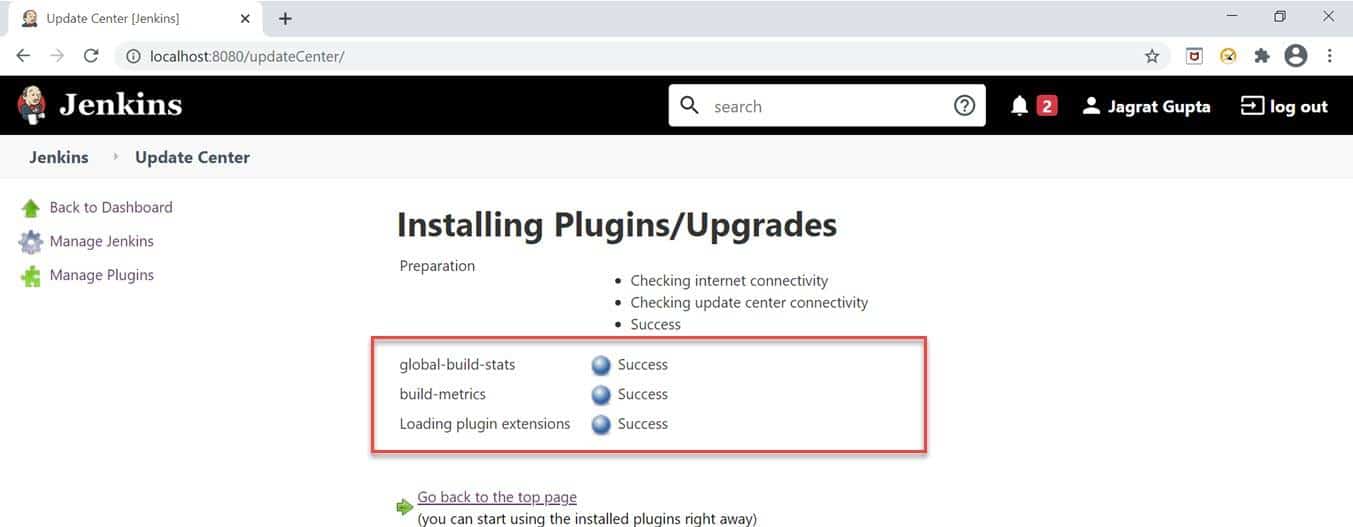
Step 4: As soon as we complete the above steps, we will redirect towards the plugin installation progress page, and after successful installation, we can see the success message.
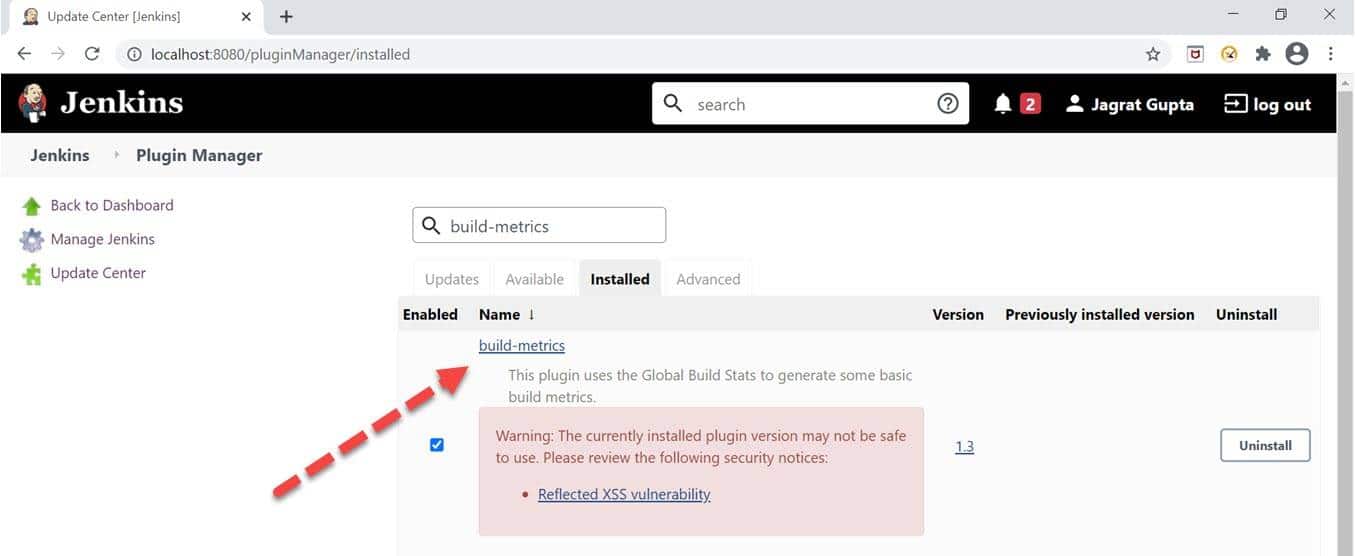
Step 5: For verification of successful installation of the plugin, we can go to the "installed" tab, and we can see the presence of the build metrics plugin.
So, in this way, we can install the trends-related plugin in Jenkins. In the next sub-section, let's see that how to see trends in Jenkins.
How to view trends in Jenkins?
Alright, we already install the build metrics plugin in Jenkins. So, in this sub-section, we will see how we can see global build stats in Jenkins. Please follow the below steps to see it:
Step 1: First, go to Jenkins dashboard and click on the "Manage Jenkins" link highlighted in the below image:

Step 2: If we install the build metrics plugin successfully, we will see the "Global Build Stats" link under the "Uncategorized" section. Click on this link highlighted in the below image.

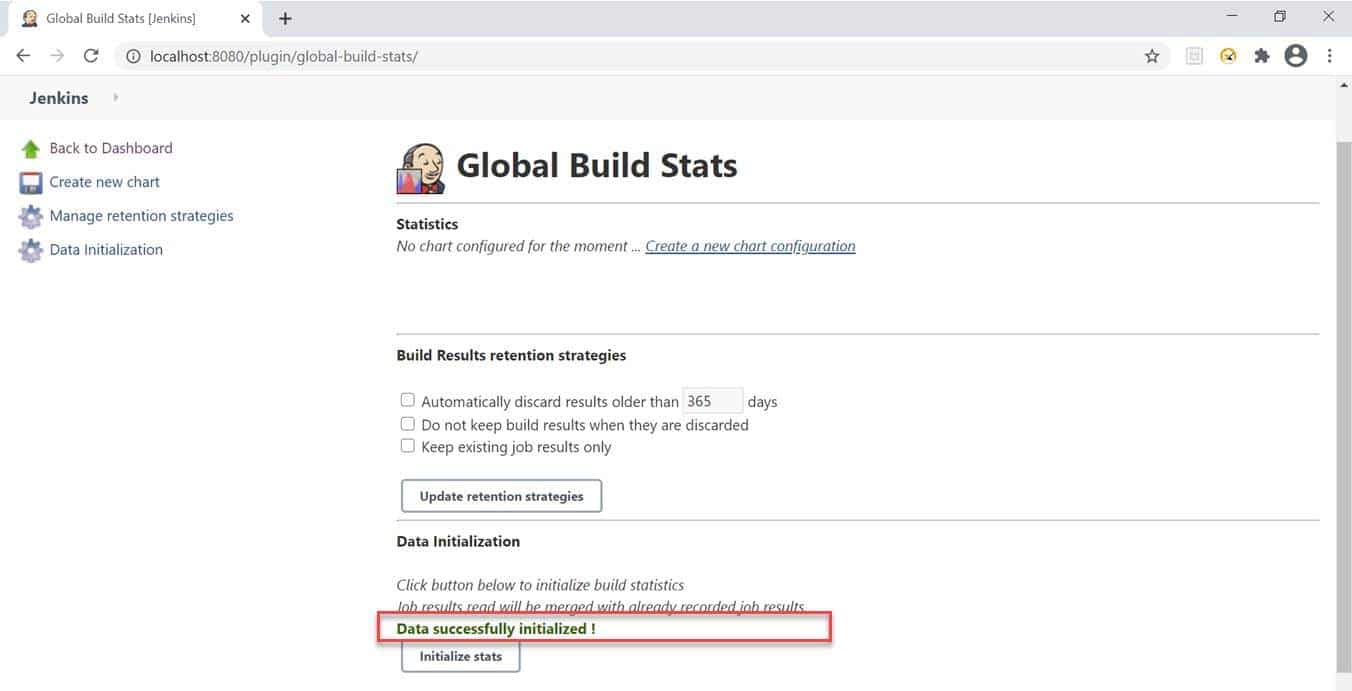
Step 3: As soon as we click on the above-mentioned link, we will redirect towards the global build stats page. Now click on the "Initialize stats" button to start the initialization of build statistics.
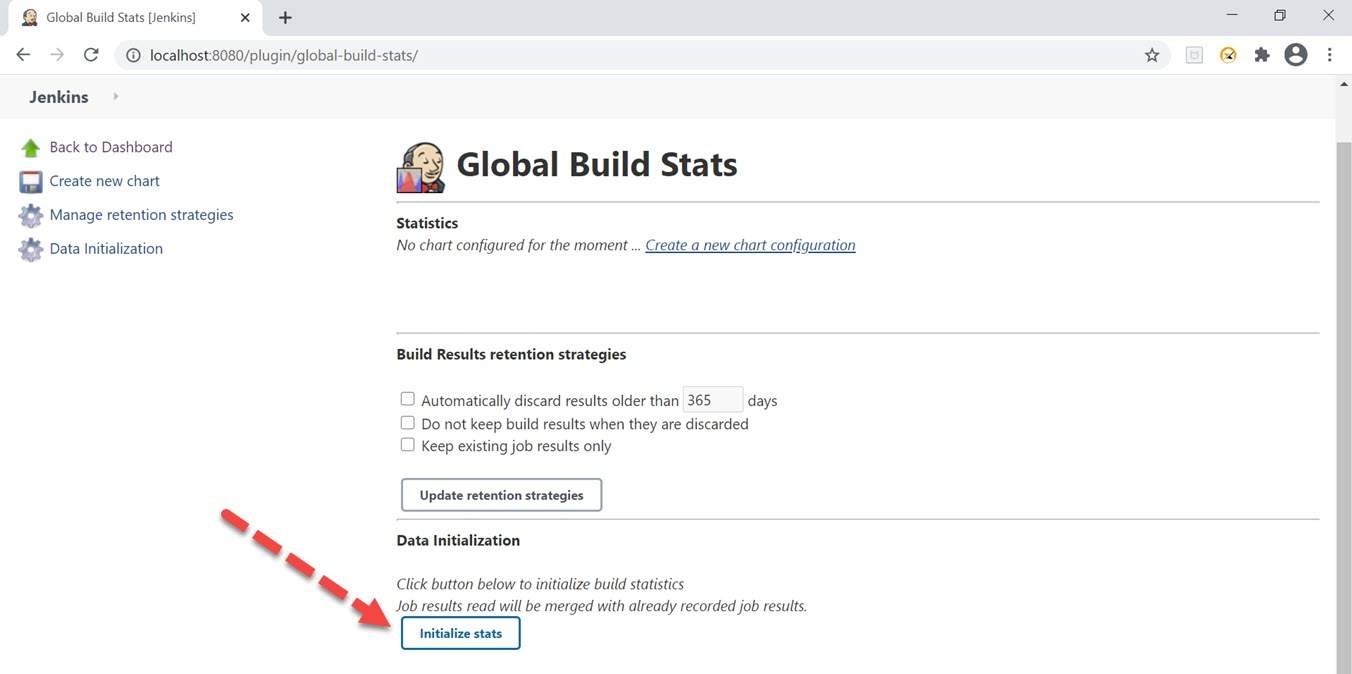
Once we click on this button, we will see a message like "Data successfully initialized !".
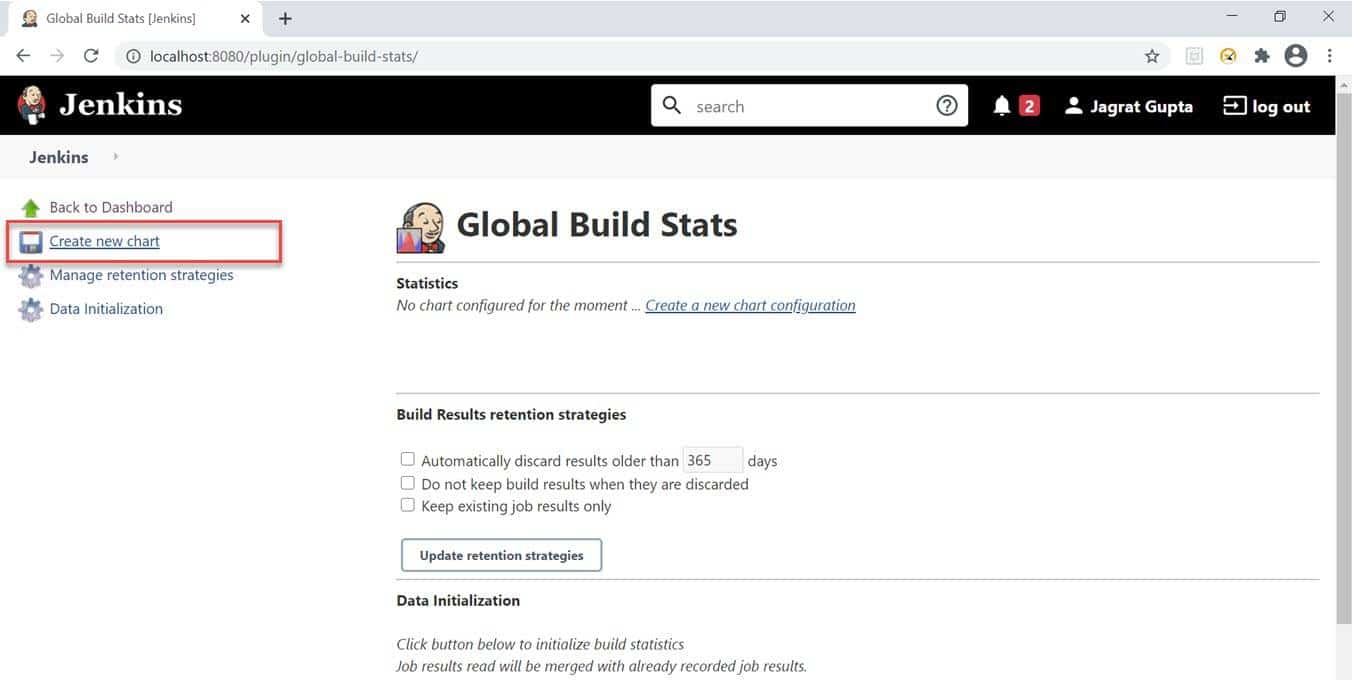
Step 4: Now, the next step is that we need to create a chart to show stats. We need to click on the "Create new chart" link highlighted in the below image to achieve it.
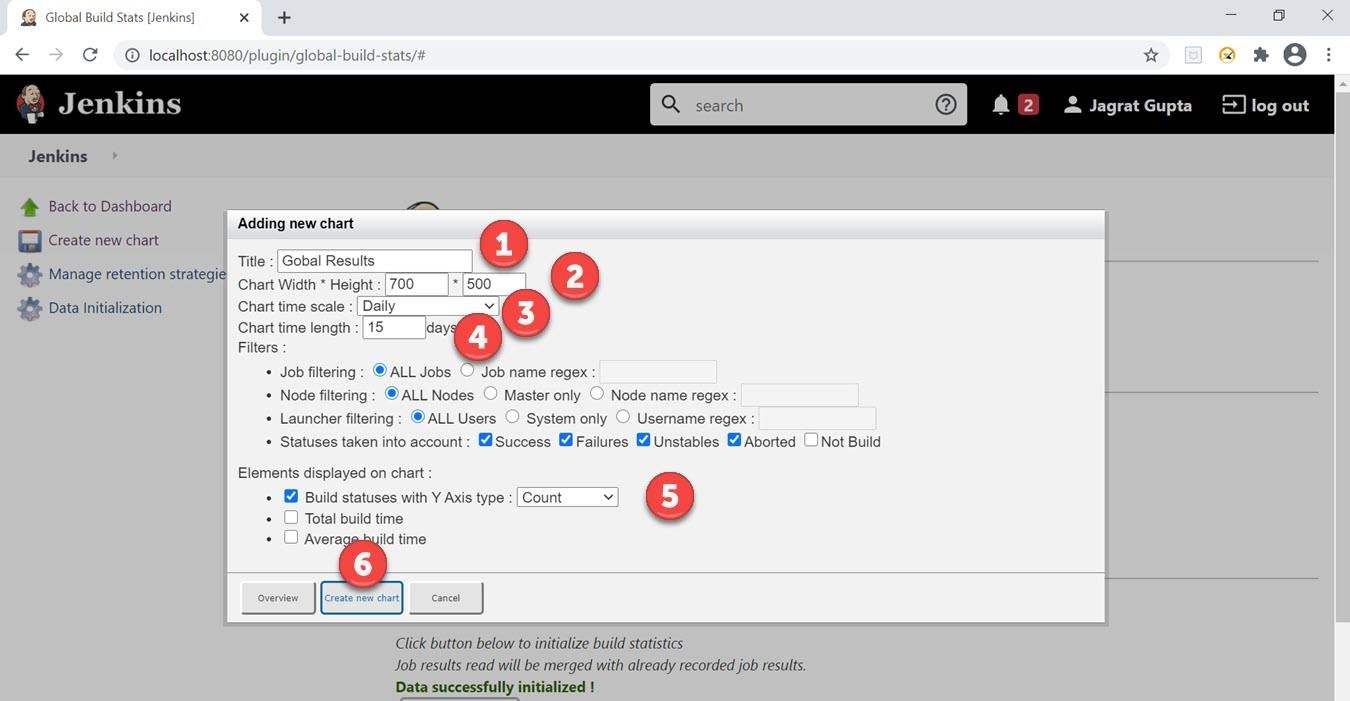
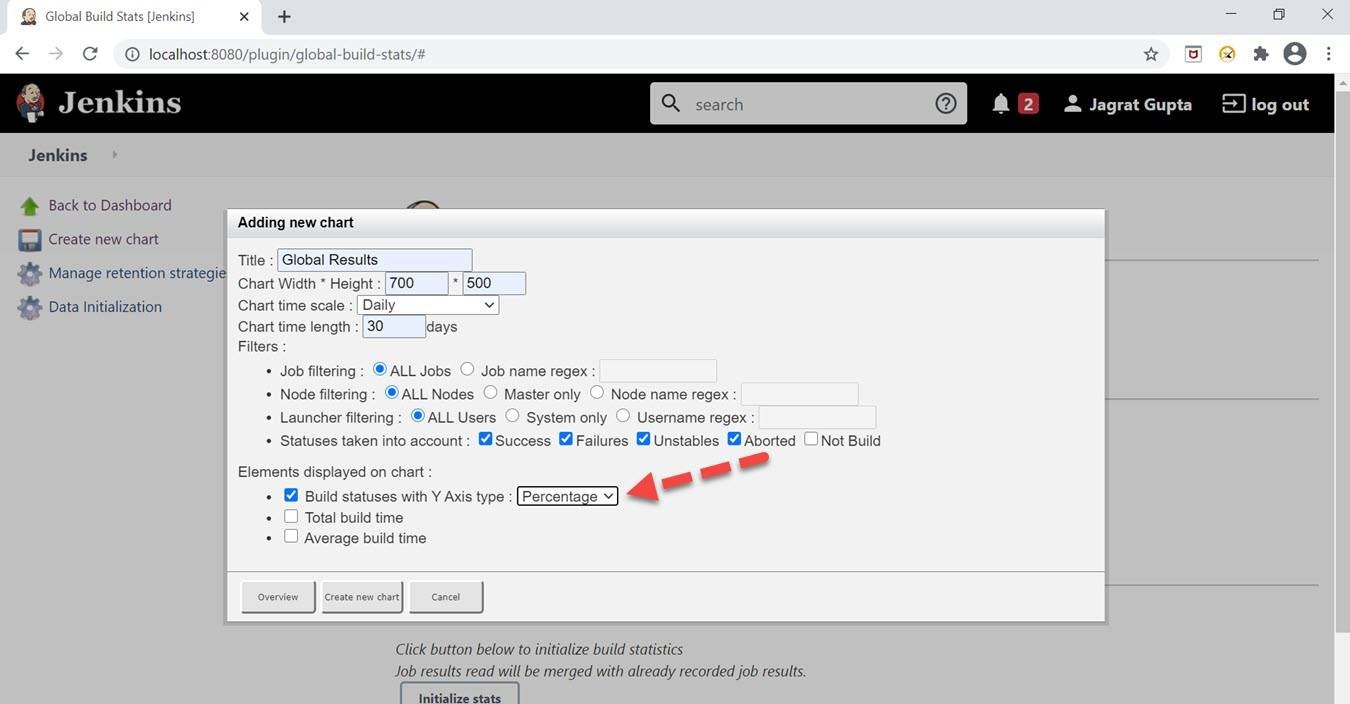
Step 5: As soon as we click on the above-mentioned link, we will get the "Adding new chart" popup in which we need to fill following things:
- Give a title like we gave "Global Results."
- We need to give a chart width and height like we gave 700 and 500.
- Give a chart time scale like we gave "Daily." we can give other options like hourly.
- We need to give a chart time length like "30" days according to our requirement.
- Give the option like "Count" in build statuses with Y-axis type.
- Now, click on the "Create new chart" button.
Step 6: As soon as we click on create new chart button, we will see the chart appeared on the build stats page. Here the blue part is showing for success, and the red part is showing for failure.
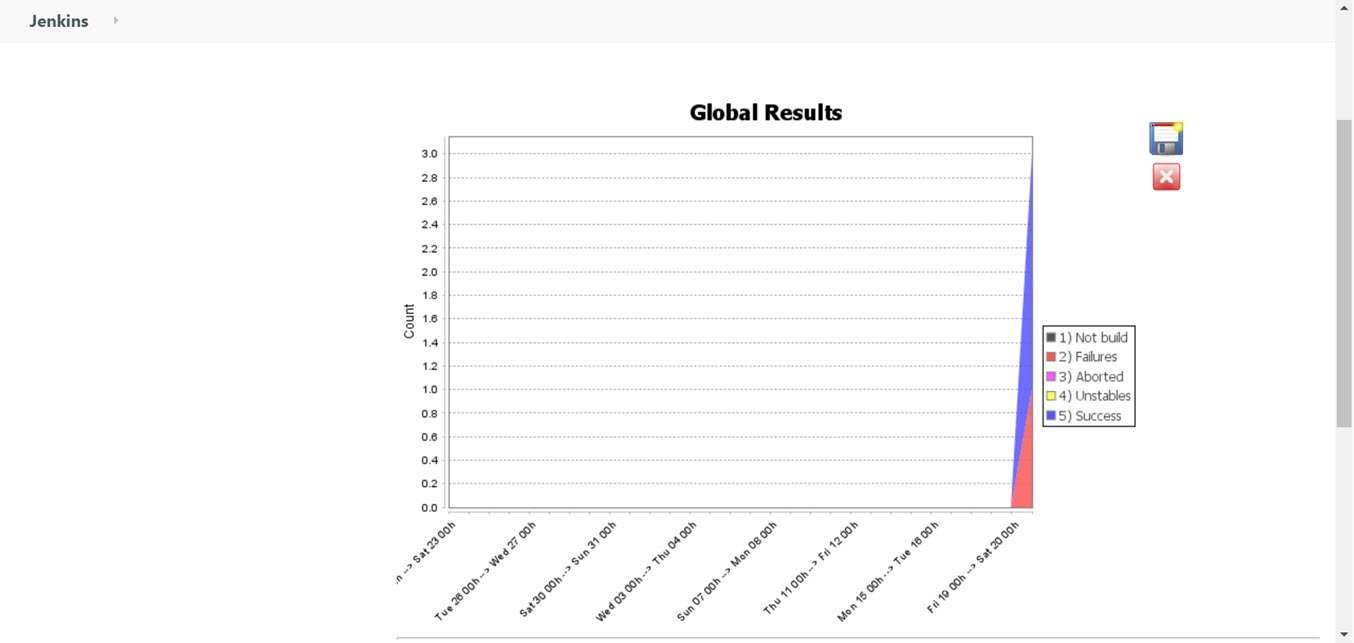
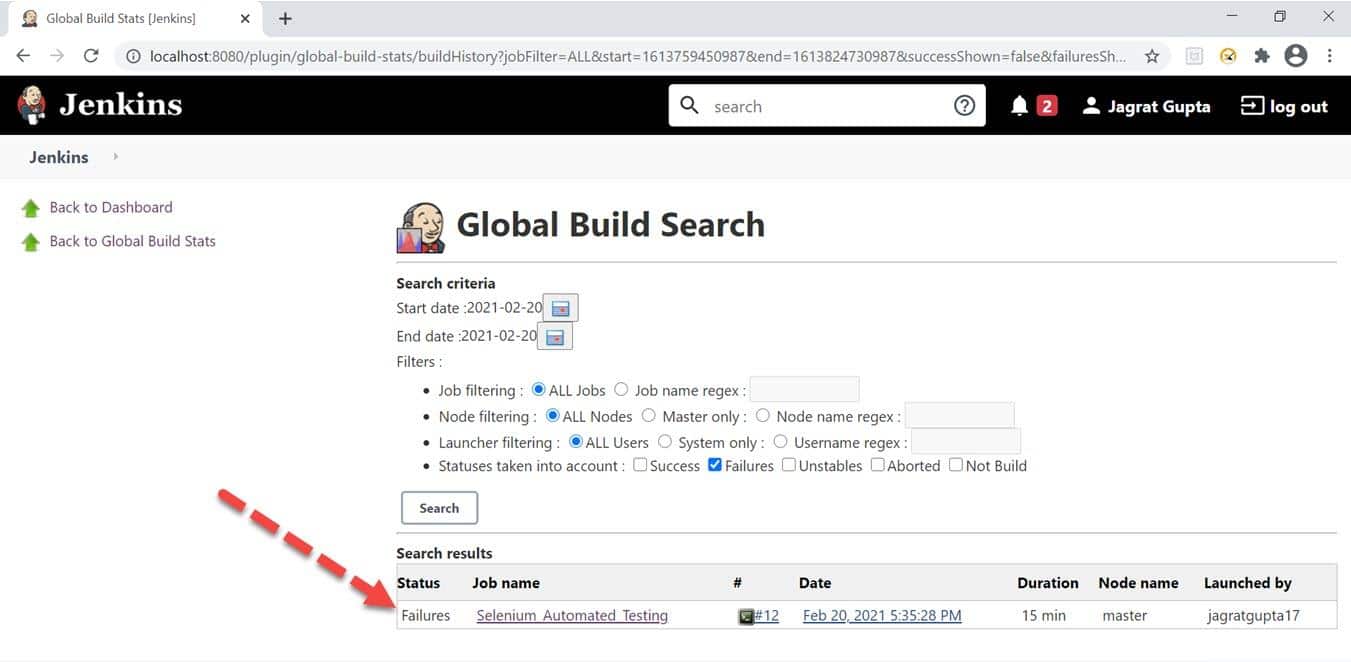
Step 7: We can click on either the blue or red part to show more stats about builds.

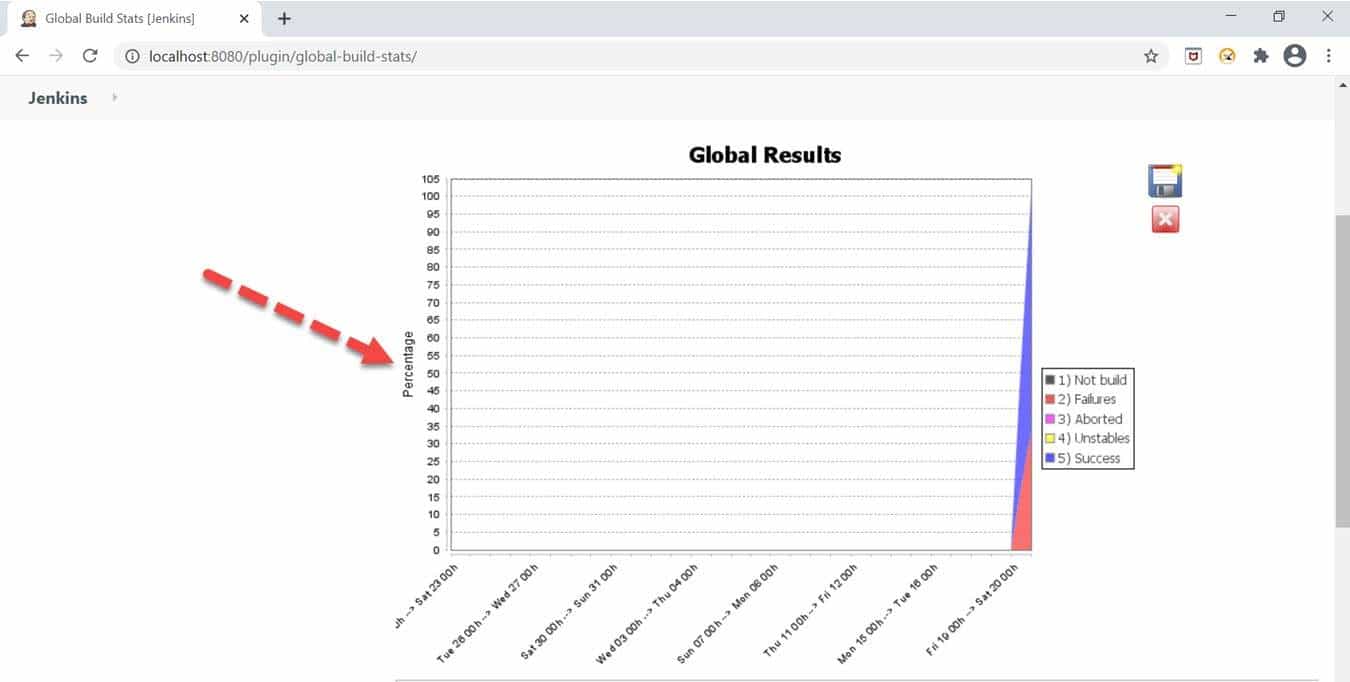
Step 8: Similarly, if we want to see the Y-axis type as "Percentage", then select Build statuses with Y-axis type as a percentage.
As soon as we click on create a new chart button, the new chart will display in which we can see the percentage on the Y-axis.
So in this way, we can see global stats in Jenkins with the help of the trends plugin.
So, using these plugins, we can visualize the Jenkins Metrics and Trends and analyze the jobs/activities in Jenkins.
Key Takeaways
- Metrics and Trends are useful to present the metrics of builds carried out over a period of time. Additionally, we can also these metrics and trends with the help of graphical formats.
- Moreover, we can see different types of metrics with the help of the "Build History Metrics" plugin.
- Also, for graphical format representation, we can install the "build-metrics" plugin.