In our last tutorial, we have discussed the fundamentals of Docker. To begin experimenting with Docker, like learning the commands, working with Docker, and deploying applications, we need first to install Docker on our machine. Almost all operating systems support Docker, but we need to follow a specific sequence of installation. In this tutorial, we will discuss the installation of Docker on Windows and Linux. In addition, Docker Engine is supported by the following platforms.
- Linux.
- Windows OS.
- macOS.
Windows and Mac OS offer Docker installation through "Docker Desktop". In addition, Docker provides ".rpm" or ".deb" packages for Linux architectures and distributions for various Linux versions.
Subsequently, we will be discussing the following topics in this article:
- How to install Docker in Linux?
- System Requirements/Prerequisites.
- How to Install Docker on Ubuntu?
- How to Uninstall Docker?
- And, how to install Docker on other Linux versions?
- How to Install Docker on Windows?
- Prerequisites for installing Docker on Windows.
- How to install Docker Desktop on Windows?
- And, how to uninstall Docker Desktop on Windows?
- How to Install Docker on macOS?
- And, how to uninstall Docker on macOS?
How to install Docker on Linux?
We should ensure that we fulfill all the prerequisites and/or system requirements before installing Docker in a Linux environment,
System Requirements/Prerequisites
We should ensure that the Linux machine has satisfied the following requirements.
Check for OS requirements.
To install Docker on Linux, the system should be 64-bit and have one of the following Linux Ubuntu versions installed.
- Ubuntu Focal 20.04 (LTS)
- Ubuntu Bionic 18.04 (LTS)
- Or, Ubuntu Xenial 16.04 (LTS)
The various architectures that support Docker Engine are x86_64 (amd64), armhf, and arm64.
Uninstall older Docker versions
Next, we need to uninstall any older Docker versions on the machine. Older versions of Docker were named docker-engine, docker.io, docker. To uninstall these versions, run the following command.
$ docker apt-get remove docker docker-engine docker.io containerd runc
This command will remove the Docker software from the machine if any or will give a message that none were found.
Configure Driver support
Docker Engine supports overlay2, btrfs, and aufs storage drivers on Ubuntu. By default, Docker Engine uses the overlay2 driver. So we need to ensure the appropriate drivers are configured. (Usually present on the machine. If we need another like aufs, then we need to manually configure it).
How to Install Docker on Ubuntu?
We can install Docker on Ubuntu in three ways:
- Repositories: This is the recommended approach. In this approach, we set up Docker's repositories and install Docker in Ubuntu from these repositories. This approach makes installation as well as upgrade tasks easier.
- Manual Installation: In this approach, users download the "DEB" package and install the docker manually in Ubuntu. This approach can be adopted when there is no access to the internet.
- Using automated convenience scripts This approach is mostly used in development and testing environments wherein users use automated convenience scripts to install Docker.
In this article, we will provide a detailed approach to install Docker in Ubuntu by using repositories.
Installing Docker using repositories
We have to set the repository before installing Docker Engine for the first time on a fresh Linux machine. Then we can install Docker Engine and upgrade it.
The following are steps or sequences of commands to install Docker on an Ubuntu 18.04 (LTS) machine. One can repeat these same steps on machines with other versions of Ubuntu.
Set up the repository for Docker
The following sequence of steps is carried out for setting up the repository.
i. Update the "apt" package index. For this given the following command.
$ docker apt-get update
The above command generates the following output.

Once the "apt" package index is updated, install the packages that allow apt to use a repository over HTTPS. For this, execute the following command:
$ docker apt-get install \
    apt-transport-https \
    ca-certificates \
    curl \
    gnupg-agent \
    software-properties-common
The above command will set up the repository. For example, this command gives the following output.
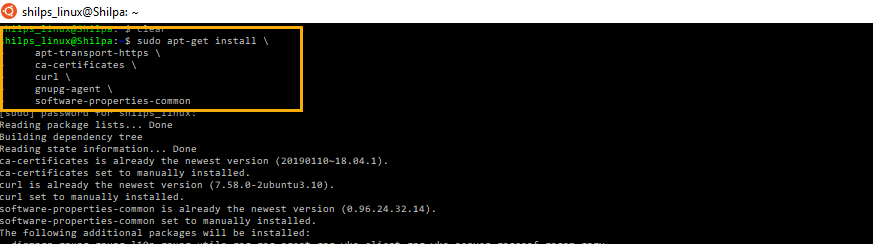
The above screenshot shows the entire process of setting up a repository due to the "sudo apt-get install..." command.
ii. Once the repository is installed, we have to add and verify Docker's official GPG key.
Note: GPG Key: This is not Docker-specific but Linux - specific. Using the GPG key, Linux package managers can validate the integrity of the software package being installed by verifying it PGP or GPG key. Most modern Linux distributions come with a set of PGP keys installed for default repositories for that particular distribution. Docker runs its own package repositories for major distribution.
After this, add Docker's official GPG key with the following command.
$ curl -fsSL https://download.docker.com/linux/ubuntu/gpg | sudo apt-key add -
Once the GPG key is added, we can verify it by giving the following command.
$ docker apt-key fingerprint 0EBFCD88
Executing the above commands one after the other generates the following output.
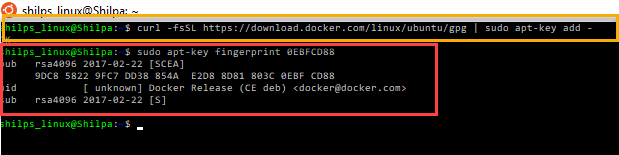
In the above screenshot, we can see the GPG key details.
iii. Once our GPG key is added, we can set up a stable repository of the "nightly" or "test" repository by giving the following command.
$ docker add-apt-repository \
   "deb [arch=amd64] https://download.docker.com/linux/ubuntu \
   $(lsb_release -cs) \
   stable test"
This command gives the following output.
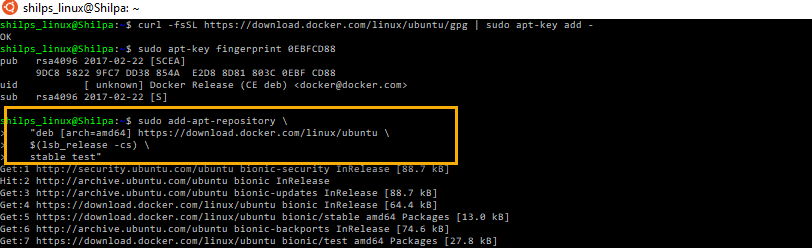
As seen from the above output, we have used a test repository here.
Now, we have successfully set up the repository, and we can proceed with the next step of installation of Docker Engine.
Install Docker Engine
First, to install Docker Engine, we update the "apt" package and then install the latest version of Docker Engine and 'containerd'.
To update the 'apt' package, we give the same command we have given in step 1.
$ docker apt-get update
Once the apt package is updated, we install the latest version of the Docker Engine.
The command is as follows:
$ docker apt-get install docker-ce docker-ce-cli containerd.io
The above command generates the following output.

We can verify if the Docker Engine is successfully installed by issuing the following command that generates the following output (partial output).
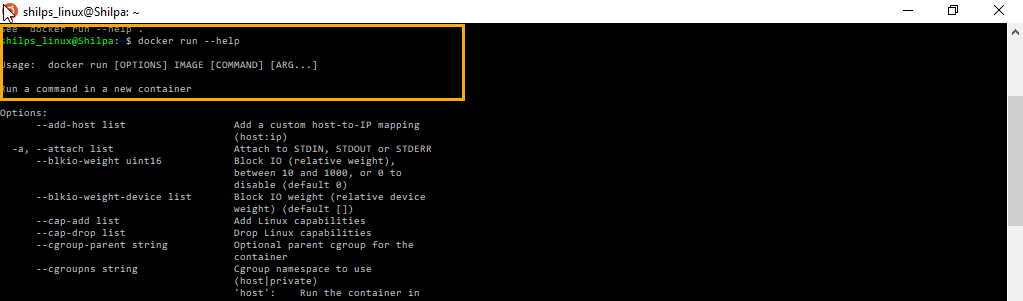
Or we can give any command like
$ docker run hello-world
The above command will download a test image and run it in a container. Finally, the container will run and print the informational message and exit.
Upgrade Docker Engine
If we need to upgrade the Docker Engine to another version, we once again need to execute the command.
docker apt-get update
Repeat the above installation instructions further to install the new version.
How to uninstall Docker?
To uninstall the Docker from the Linux machine (with Ubuntu), give the following command.
$ docker apt-get purge docker-ce docker-ce-cli containerd.io
This will uninstall the Docker, CLI, and containerd packages from the machine.
Note that the above command will not remove images, containers, customized configurations, or volumes from the machine. So we need to delete them with the following command explicitly.
$ docker rm -rf /var/lib/docker
Still, if there are any additional configurations, we have to delete them manually.
What are the other Docker installation methods?
Apart from the installation method described above, we can use other installation methods as well.
Below we briefly discuss the other two methods:
Install Docker from a package
Although installing Docker using a repository is a recommended method, we can also install Docker by downloading the ".deb" package and installing it manually.
The steps involved are as follows:
Access the link https://download.docker.com/linux/ubuntu/dists/. Navigate to "pool/stable/" . Select amd64/armf/arm64 and then download the ".deb" file. A screenshot of one of the repository contents is shown below:
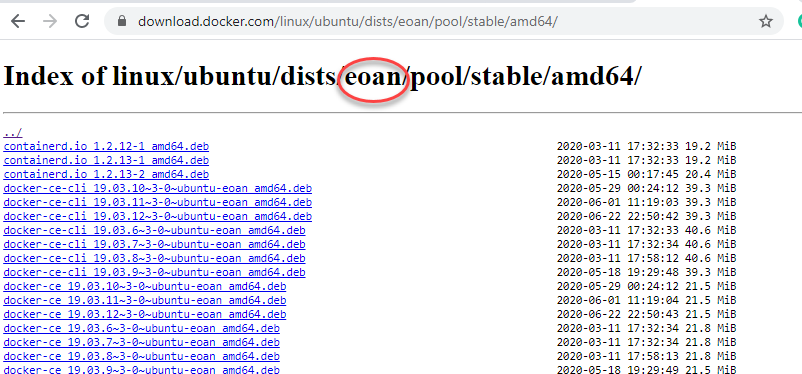
We can select any folder (as per our requirements) from the 'dists' folder, and further, we can see the contents of each repository. For example, in the above screenshot, we have selected the "eoan" folder, and then we navigate to the ".deb" file as explained in the following steps.
Install docker with the following command.
$ docker dpkg -i /path/to/package.deb
The path in the command "/path/to/package.deb" should be changed to the appropriate Docker package path.
As with the first installation method, we can verify if the Docker is installed correctly using the command.
$ docker run hello-world
Note: If we need a nightly or test package, we can do so by replacing the word 'stable' with 'nightly' or 'test'.
Install Docker using Convenience scripts
Installing Docker using Convenience scripts is not a recommended option, especially for the production environment. The reason Convenience scripts are not recommended :
- The convenience scripts mostly install packages without asking for confirmation.
- Also, we need 'root' or 'sudo' privileges to run the convenience scripts.
- Convenience scripts do not allow us to customize any installation.
- It, by default, installs the latest version of Docker, and we have no option to specify a version of our choice.
We can find the convenience scripts for installing edge and testing versions of Docker Engine - Community at get.docker.com and test.docker.com, respectively. We can use these scripts for installing Docker in a non-interactive mode in the development environment.
The command to run the convenience script is as follows:
$ curl -fsSL https://get.docker.com -o get-docker.sh
$ sh get-docker.sh
Note:
-
We should not use convenience scripts on the host machine on which the Docker is installed using other methods.
-
We should always verify the downloaded convenience scripts before running them on the local machine.
How to install Docker on other Linux versions?
We have seen the Docker installation on the Ubuntu version of Linux. In this section, let us briefly discuss the Docker installation on other Linux versions.
One thing to keep in mind is that irrespective of the Linux distributions, we always need 64-bit installations and kernel version with 3.10 or newer. 4
Docker runs on:
- Ubuntu
- Xenial 16.04 LTS
- Wily 15.10
- Trusty 14.04 LTS
- Precise 12.04 LTS
- Debian
- testing stretch
- Debian 8.0 Jessie
- Debian 7.0 Wheezy (with backports enabled)
The steps to install Docker on the Debian Linux version are basically the same as described above. But if we are installing docker on Debian distribution, then first, we need to enable the backports.
The steps to enable backports on Debian Wheezy are as follows:
- Log in to the Linux terminal with root/sudo privileges
- Navigate to and open "/etc/apt/sources.list.d/backports.list" . (Create the file if not already exists)
- Remove existing entries.
- Now add an entry for backports:
deb http://http.debian.net/debian wheezy-backports main
- Now update the packages using the following command:
apt - get update -y
Once the above steps are completed, proceed with the installation of Docker.
How to Install Docker on Windows?
Docker provides a community version for Microsoft windows in the form of Docker Desktop.
We can install Docker Desktop on Windows 10 Enterprise, Pro, and Education. In addition, we can install Docker on Windows 10 Home. One can download it from here. This link opens up the following screen.
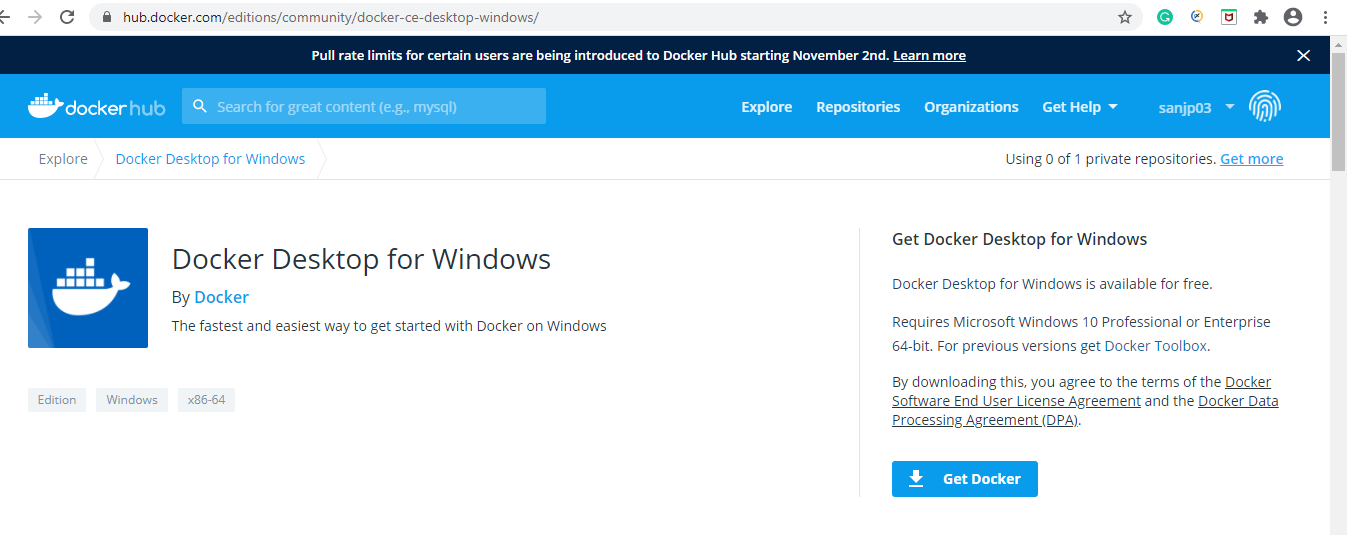
When "Get Docker" is clicked, the installer "Docker Desktop Installer.exe" is downloaded.
Before we proceed with the installation, let us discuss the system requirements/ prerequisites of the installation.
Prerequisites for installing Docker on Windows
The Windows system on which Docker Desktop is to be installed should fulfill the following prerequisites.
- Windows 10 should be a 64-bit machine with one of the versions: Pro, Enterprise, or Education. The build should be 16299 or later.
- Windows features, namely, Hyper-V and Containers, should be enabled.
- For the successful running of Client Hyper-V on Windows 10, the fulfillment of the following hardware prerequisites should happen:
- System RAM should be at least 4GB.
- The processor (64 bit) should have Second Level Address Translation (SLAT)
- Using BIOS settings, enable BIOS-level hardware virtualization support.
Once these requirements are fulfilled, we can proceed with the Docker Desktop installation on Windows.
How to install Docker Desktop on Windows?
One should follow the sequence of steps below to install Docker Desktop on Windows.
-
Double Click the "Docker Desktop Installer.exe" to begin the installation.
-
The Docker Desktop installation begins by first downloading the files, and the installation begins as shown in the below screenshot.
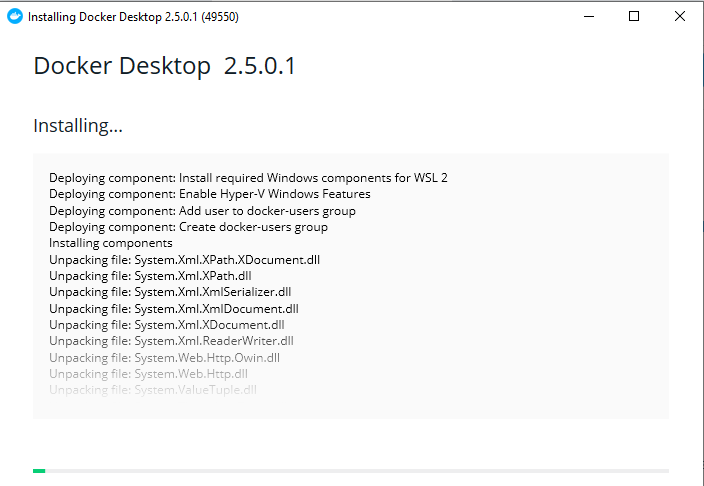
The above screenshot shows the installation in progress. Once all the packed files are installed, it will prompt the user to check/uncheck the configuration.
- During the installation, the installer prompts us to enable Hyper-v Windows features.
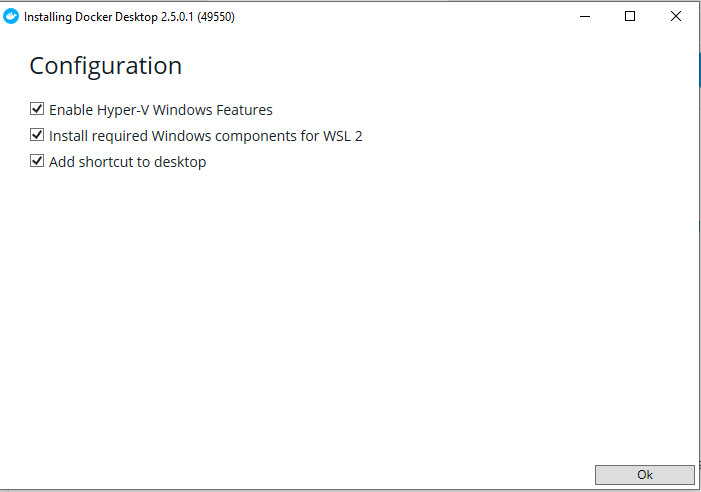
Here we should ensure that all Hyper-v Windows features are enabled, and appropriate components are installed.
Once the configuration dialog box is checked, click "Ok" to proceed with the installation.
- Once installation completes, the user is prompted to restart the machine.
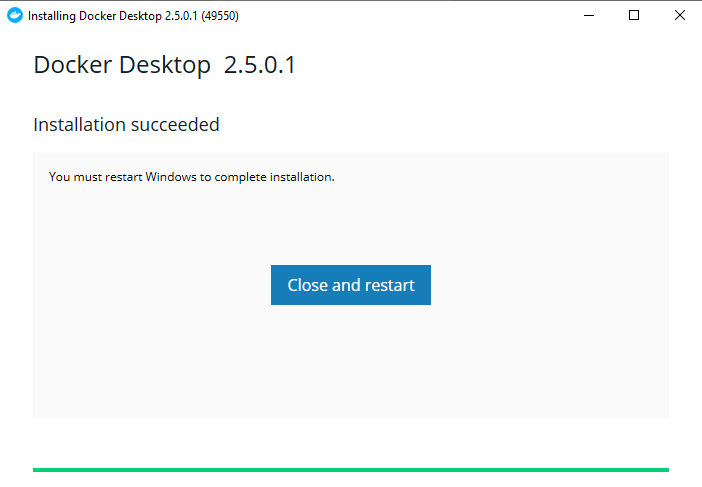
We can click "Close and restart" to restart the machine to complete the installation.
Once the Docker Desktop installation is successful, it does not start immediately. Instead, we can start Docker Desktop by clicking the related Icon from programs or clicking on the Docker Desktop shortcut. Once this is done, the following screen appears.
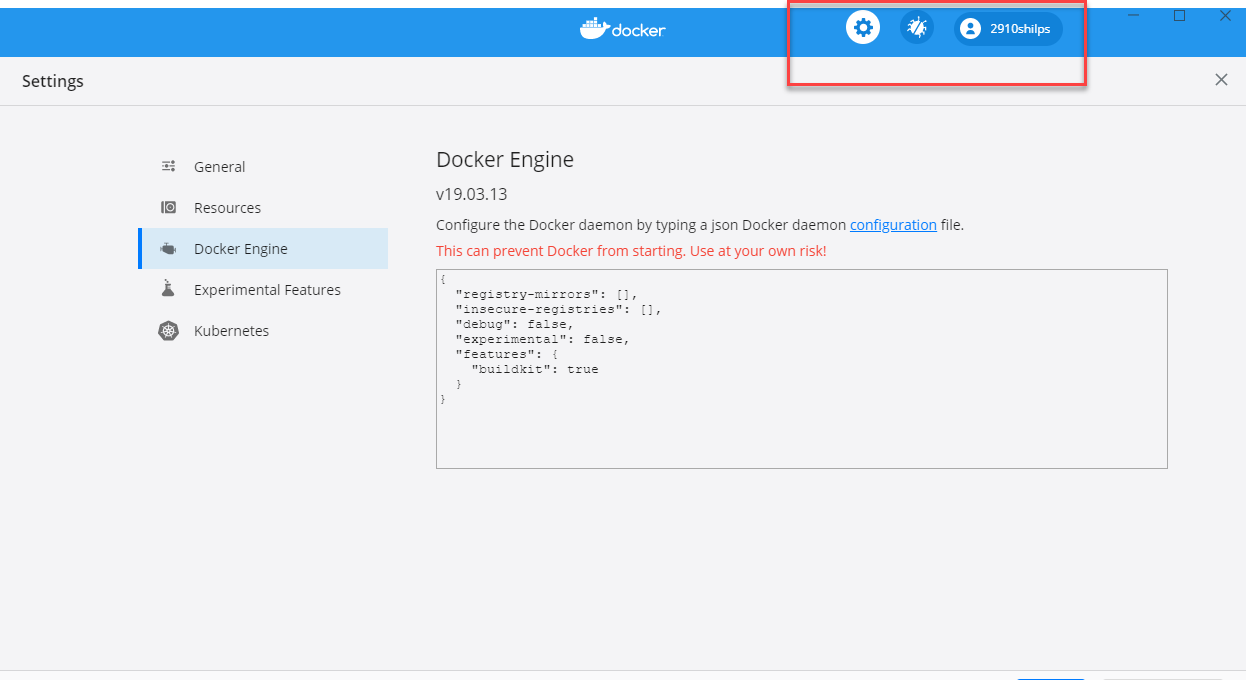
The above screenshot shows the 'Settings screen for the Docker Desktop'. Now that the Docker Desktop is installed successfully and running, we can access it from any terminal window.
How to uninstall Docker Desktop on Windows?
We follow the below steps to uninstall Docker Desktop on Windows:
- First, click the Windows Start menu, and select Settings > Apps > Apps & features.
- Now select/ choose Docker Desktop from the Apps & features list and then click Uninstall.
- Click Uninstall to confirm your selection.
Note: As a result of Docker Desktop uninstallation, the Docker containers and images local to the machine are destroyed and also remove the files generated by the application.
How to Install Docker on macOS?
Docker can be installed on macOS either using the HomeBrew package installer or downloading the package directly from the docker site. In this article, we will cover the details of how we can install the Docker on a macOS machine using the HomeBrew package:
Run the following command to install Docker using HomeBrew:
brew cask install docker
Once Docker will be successfully installed, it will show a success message as shown in the following image:

You can also validate the successful installation of Docker on macOS by checking the details in Docker Desktop, as shown below:
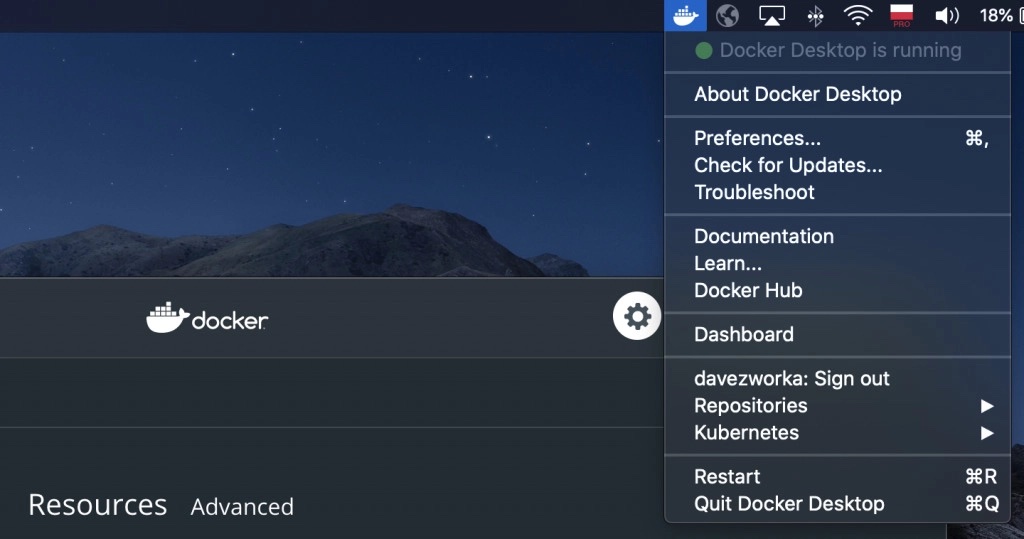
Once the Docker is running, you can use it for pulling any of the Docker images and spinning containers.
How to uninstall Docker on macOS?
You can run the following command to uninstall Docker from a Mac machine:
brew cask uninstall docker
This will remove all the components from the machine.
Note: The Docker images will not remove from the machine.
Key Takeaways:
- Docker supports almost all modern operating systems, and we can install using various package managers provided by the operating systems.
- On Windows and macOS, Docker provides a desktop version as well that we can use to enable various settings and configurations for the Docker.