In our last chapter, which revolved around the introduction to testRigor, we got a gist of what this tool is all about and why we should invest our time into it. An intelligent automation testing tool like testRigor is like having an extraordinary talented machine beside us. It demands minimum effort from the testers and carries a heavier load on its own shoulders. For example, understanding English-based test cases is one of the things that is unique and does not require any additional skills from the tester. If you are good at observing bugs and have a keen eye to test the functionalities, a programming language should not be a barrier to your career growth.
Moving ahead in learning more about this tool, in this post, we intend to familiarize you with your dashboard, different elements in your account, and the meaning of different options that you see when you sign up for your first test case with testRigor. In simple words, we will navigate through testRigor and explore its settings and options. To index the major topics, our topics would follow this route:
- Signing up on testRigor.
- Creating a new test suite in testRigor.
- Navigating through testRigor dashboard.
- The header section.
- testRigor navigation panel.
- The test case section.
Signing up on testRigor
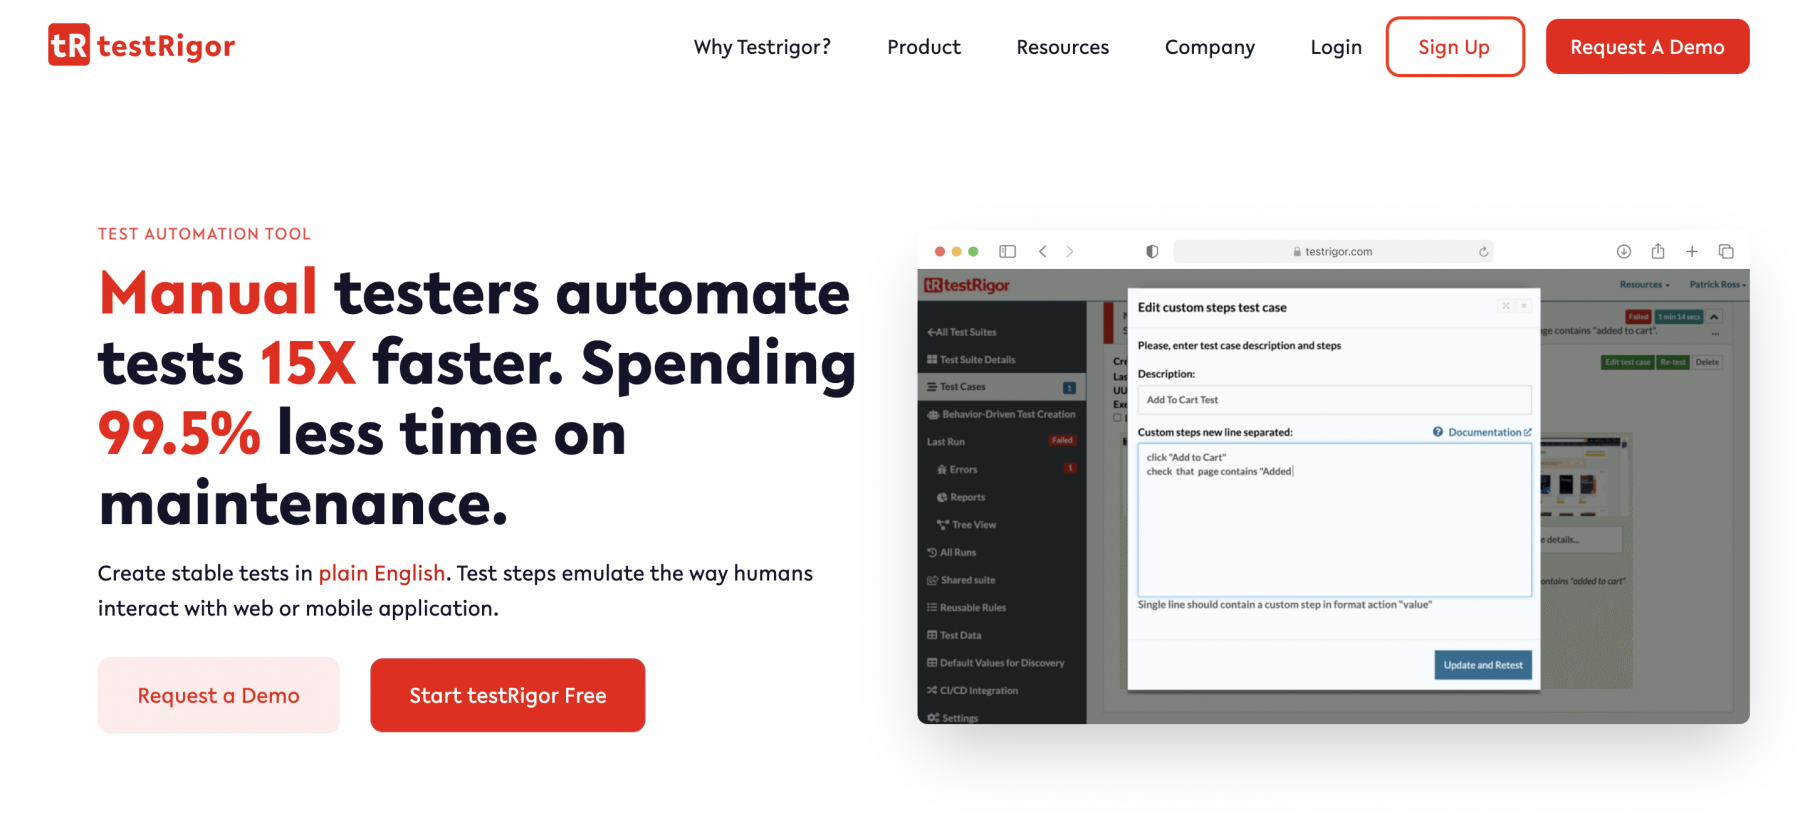
The first step in our automation journey is signing up for the platform. We initiate this by clicking on the Sign Up button located in the top-right corner of the landing page.
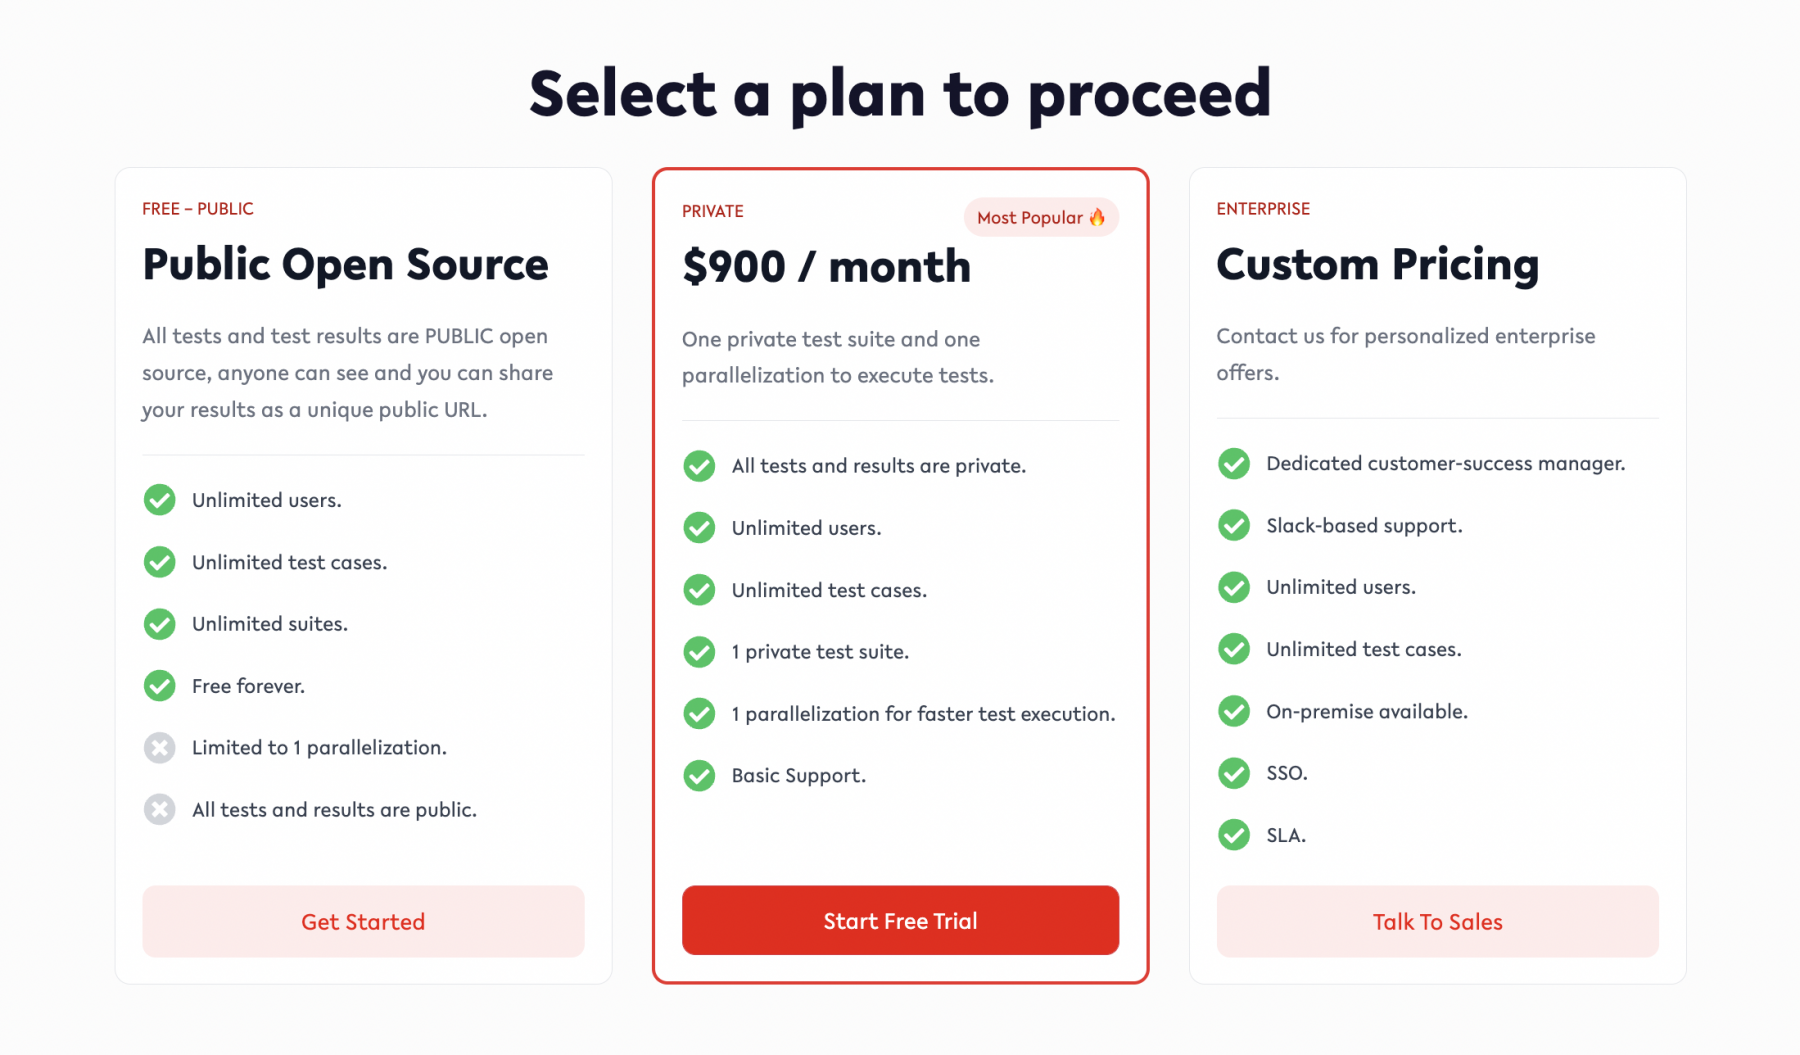
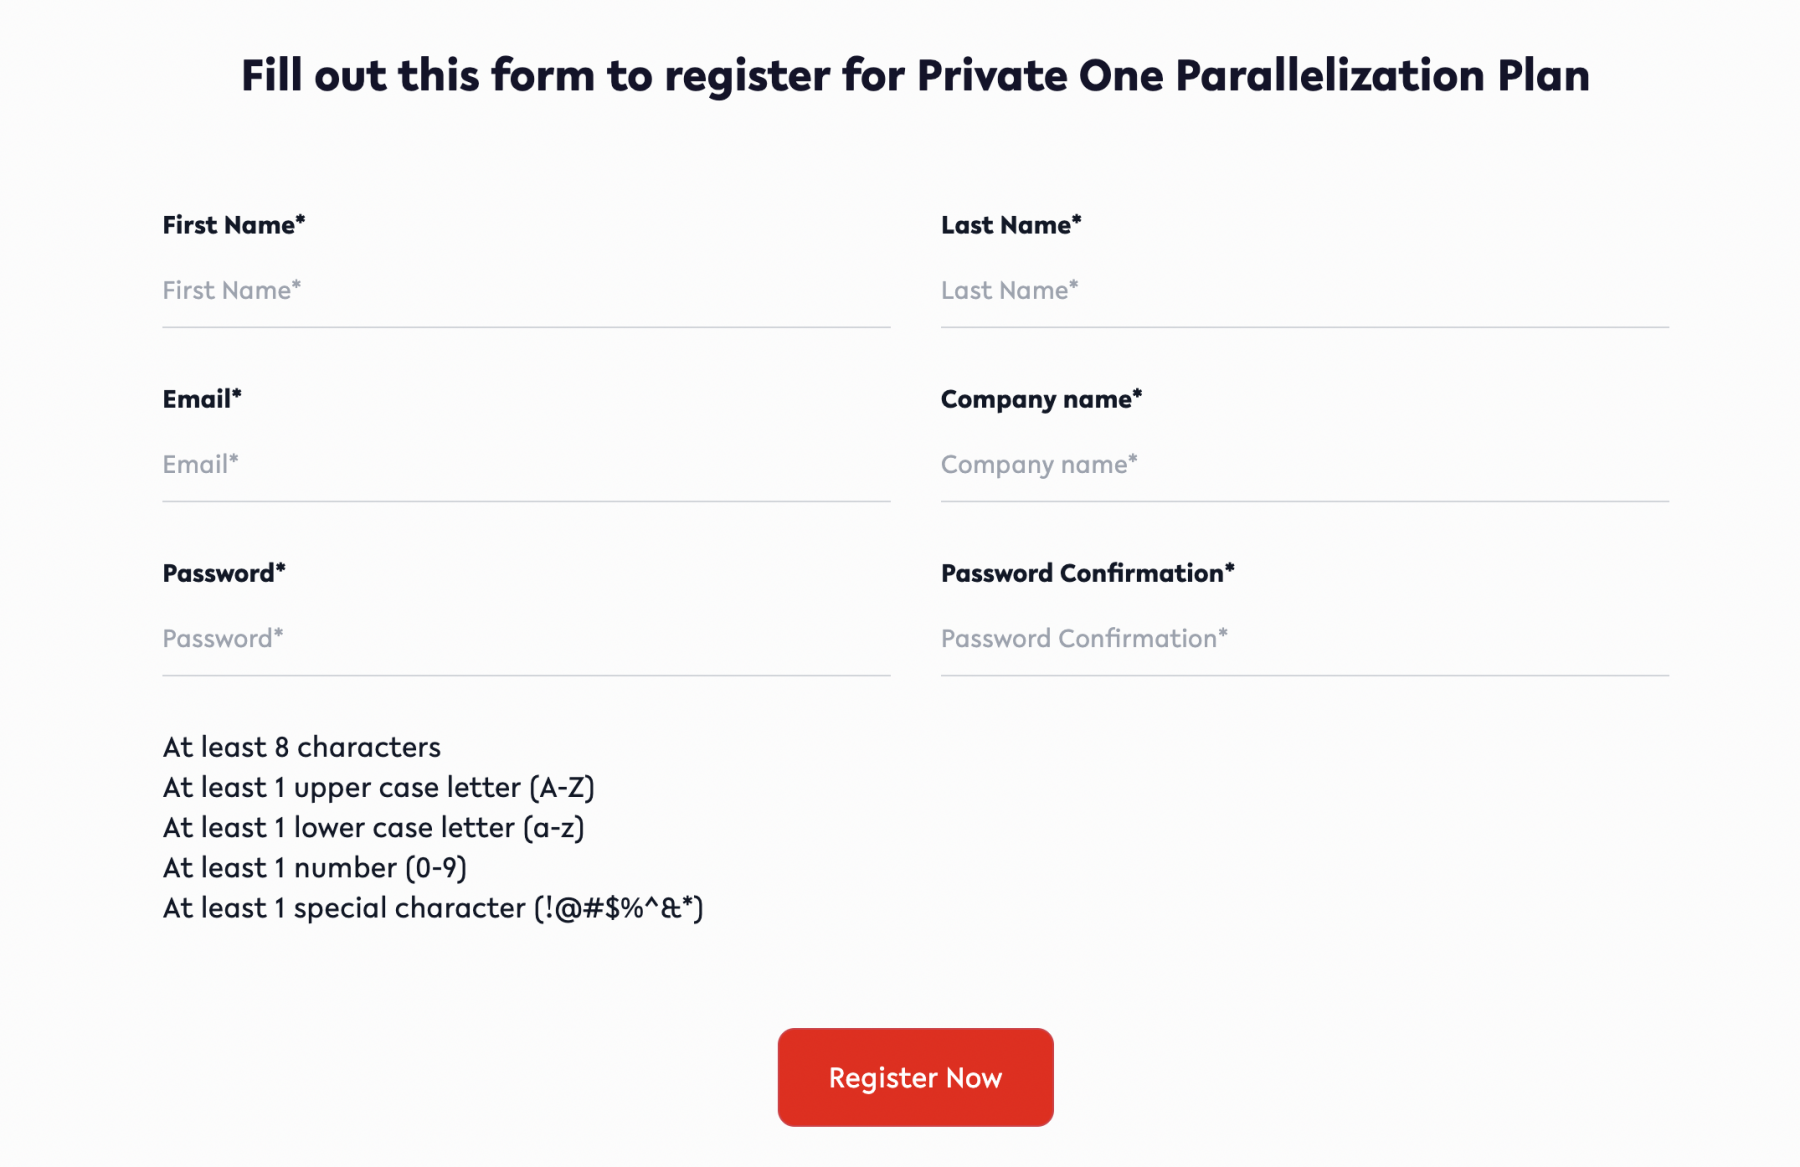
Next, select a plan to proceed ahead according to your needs.
Fill in your details and press Register Now. At this point, make sure that your email id is correct and that you have access to it. Without verification, testRigor does not allow users to log in to the system.
After clicking the button, an email will be sent to your email id. Verify the email and press Login to log in to your account.
Enter login details and you will arrive at a new test suite screen as follows:
Note: Please note that if you already have created suites previously, you will see them listed here once you log in.
Creating a new test suite in testRigor
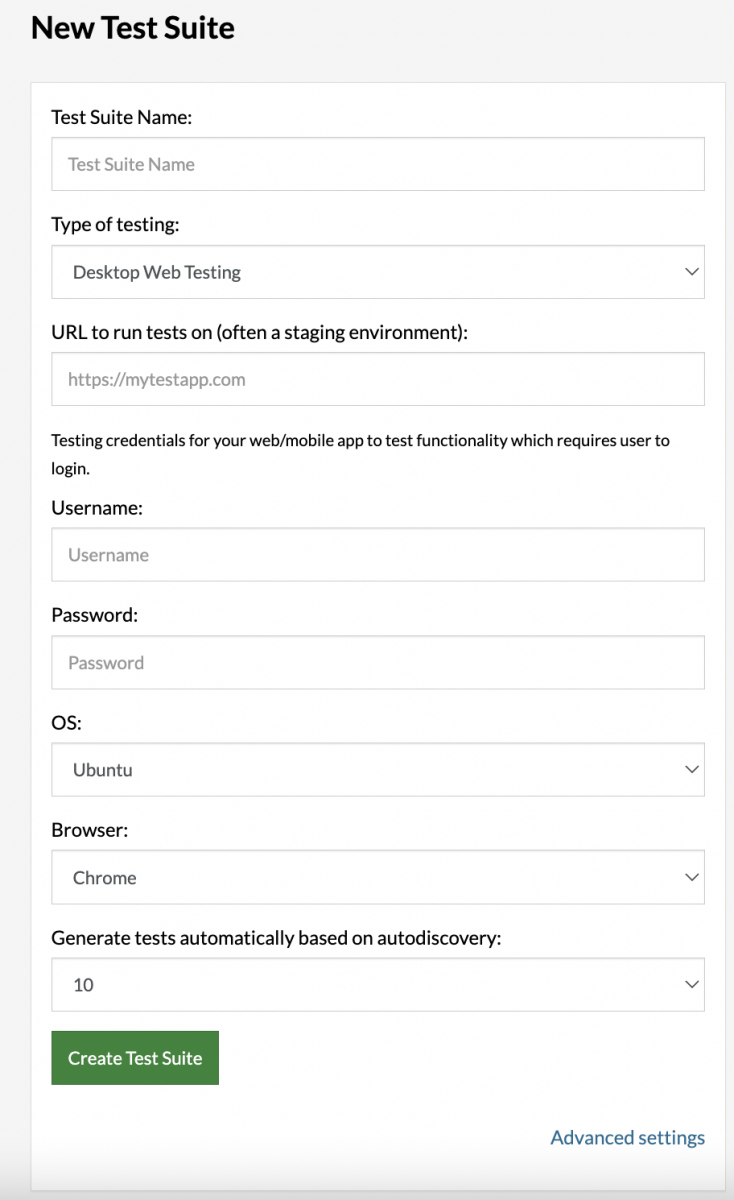
The first screen that prompts us is the "Create Test Suite" screen. Here, we can create our first test suite. With reference to the above image, please consider the following data values as inputs for now:
Test Suite Name - myFirstSuite
Type of testing: Desktop Web Testing
URL: https://www.demoqa.com
OS: Windows
Browser: Chrome
Generate tests automatically based on autodiscovery: 0
All the input fields are self-explanatory here. The final option called "Generate tests automatically based on autodiscovery" is a unique feature of testRigor. With this feature, the platform generates n number of test cases (where n is the selected option by the tester) when the application is uploaded on the platform. This is done automatically by scanning the application. You can choose a number anywhere between 0 and 10000.
Since this is a demonstration, we will not interfere with the advanced settings section. However, if your infrastructure demands it, you can get all the necessary options in the same sections by clicking "Advanced Settings".
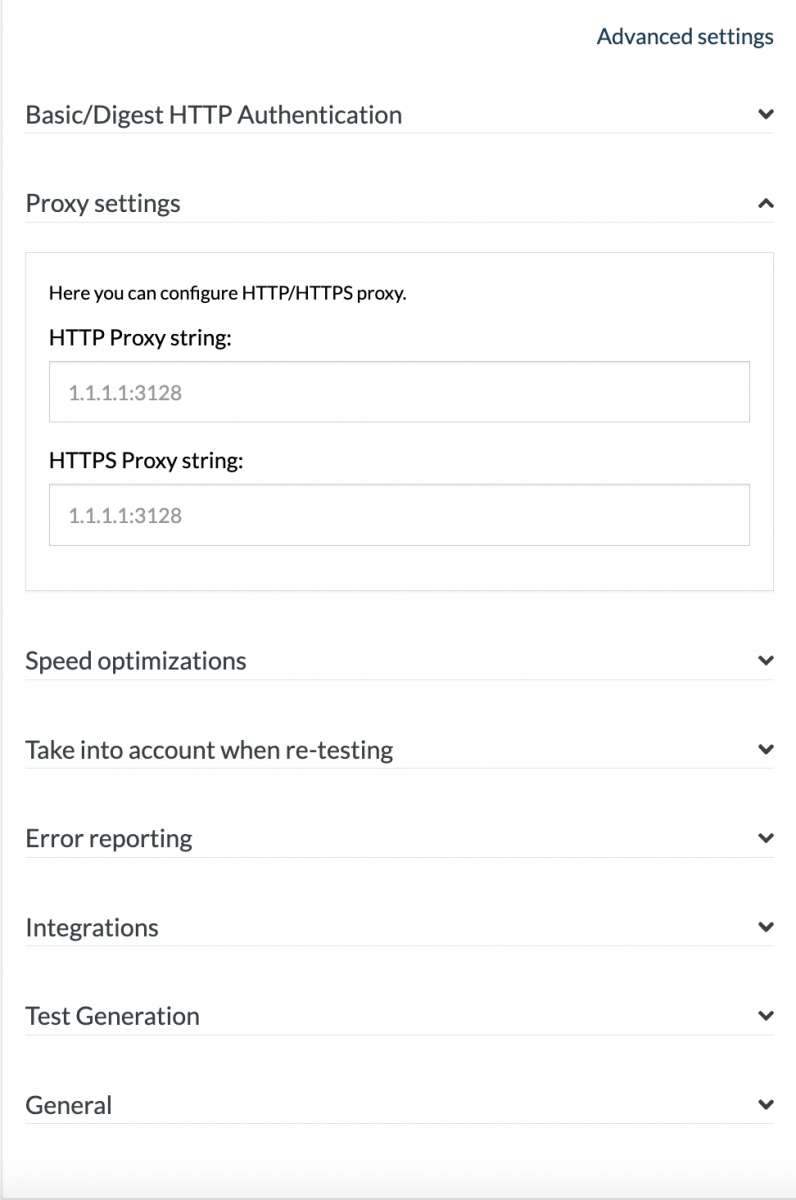
The following options are available in advanced settings:
- Basic/Digest HTTP Authentication: Here you can put your basic authentication credentials for the tests.
- Proxy settings: If you are connected to a proxy server or all your communication goes through a proxy server, this is the place to put your proxy settings.
- Speed optimizations: Here you can choose the speed-related delays (or time gaps) for various actions. These actions may include page load time, wait timeout, download time, etc.
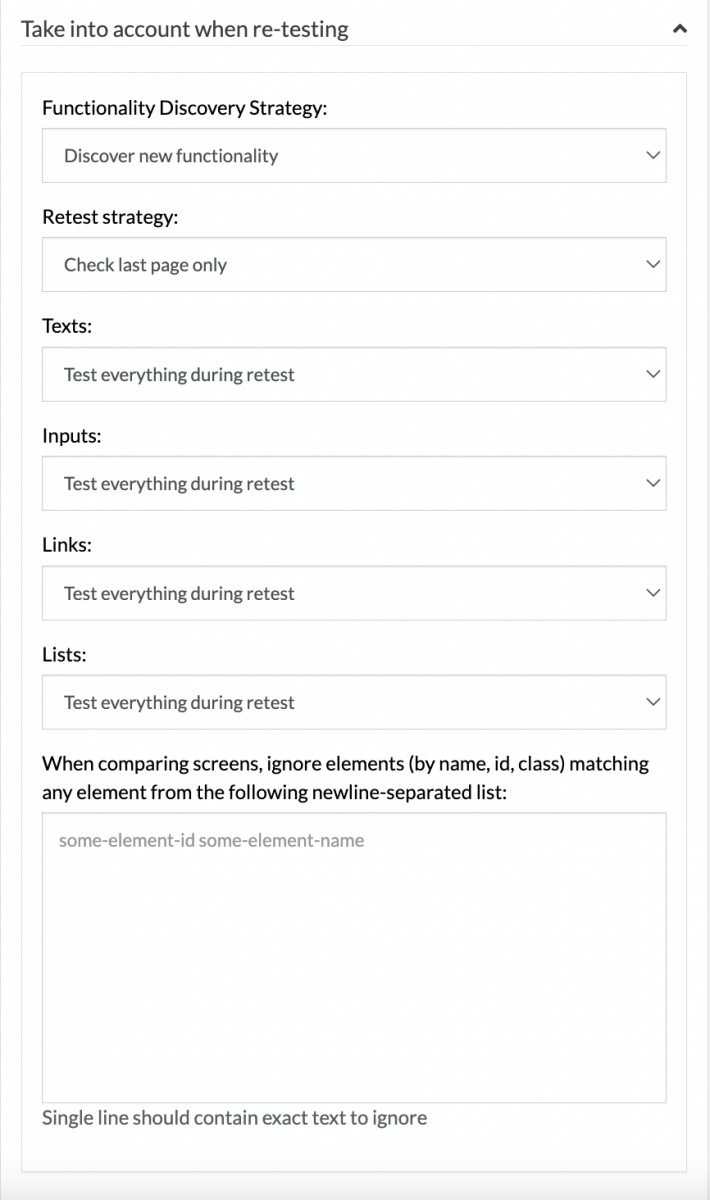
- Take into account when re-testing: A lot of the time testers would want to ignore a few things during re-testing. For example, if I run my test cases and see some bug at some point but notice that all my links have passed the tests, I would not want to run my tests again on the links. Such types of settings can be adjusted in this section.
- Error reporting: This is a section where you can choose specific situations/errors that you want to be reported. For example, "Check that Javascript files loaded successfully" ensures that even if one JS file is not loaded, the error is reported. These types of errors save the tester's time as they can be done without writing any scripts.
- Integrations: In this option, you can choose which third-party tool you want to integrate with your tests. If you choose to allow JIRA integration, you would be able to access JIRA features from within the test environment.
- Test Generation: This panel will contain options specific to your test case generation. For example, the allowed text length recorded session cutoff timeout, etc.
- General: Here you will find general settings related to your environment and experience. For example, the screen resolution, how to process a new tab, etc.
Once we have filled out each option, press "Create Test Suite". If successful, the screen redirects to the following page:
Let's explore its components in brief in the next section.
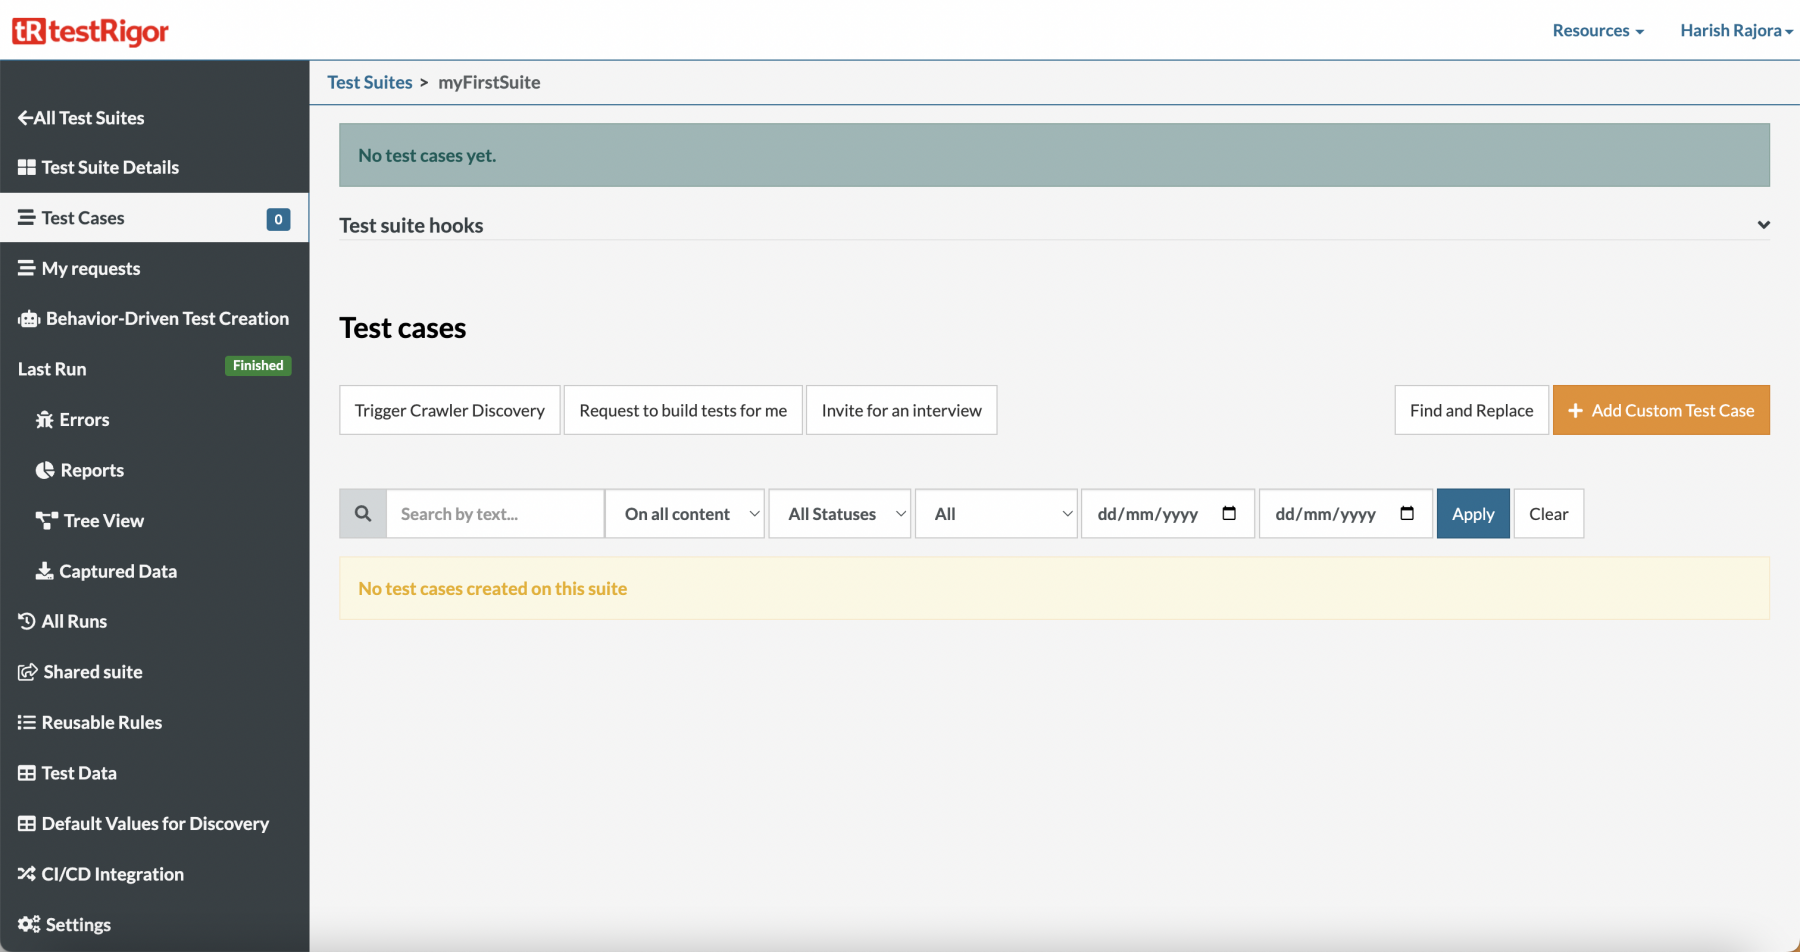
Navigating through testRigor dashboard
The above image shows us the account dashboard after successful test suite creation. This dashboard contains three main compartments:
- The header section.
- The navigation panel.
- The test case area.
The header section
The header section is the top-most section of the dashboard that contains information regarding the tool and the user. It contains two main buttons:
- Resources
- User Profile

The "Resources" section has all the testRigor-related links which you can use when you want to learn about the platform, the tests, tutorials, or go through the documentation section. This section also has an option called "Chrome Extension" about which we will talk in a dedicated post.
The "User Profile" section contains links through which you can explore your profile settings, change your password and even apply for a trainer job. The header section has standard options as you would find on other automation websites.
testRigor navigation menu
The second section of our landing screen is the navigation panel through which we navigate to different sections of the tool and explore its features that help us in testing. It contains the following options:
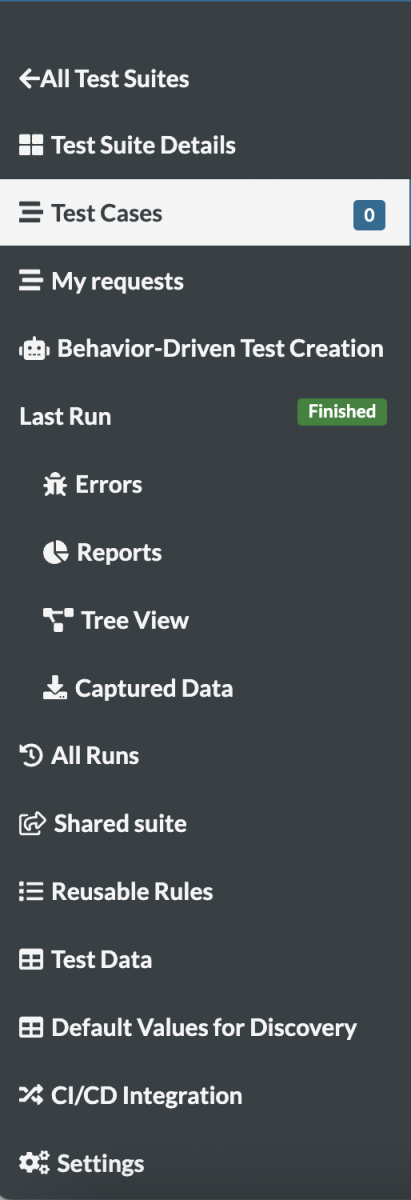
The options have the following meanings:
- Test Suite Details: This section contains the current test suite details. The details may cover operating system used, browser used, URL targeted, last run metrics etc. Currently, with no test cases run, it will look as follows:
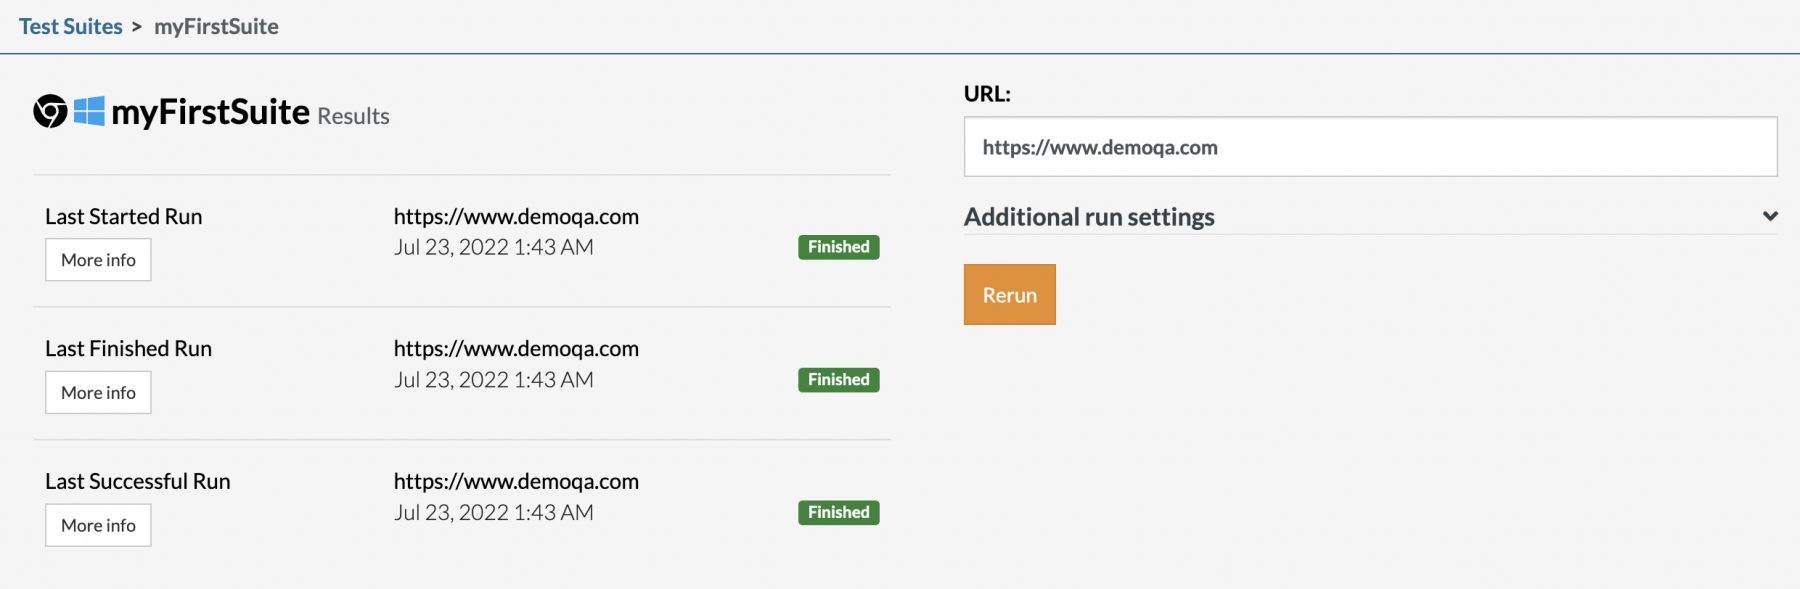
When we start running the test cases, we will see some more details in this section and will discuss them there.
- Test Cases: This is what the landing (or default) screen is. It contains the details about the test cases. Since we have not created any, the badge shows "0" alongside the name.
- My Requests: This section will contain information if you've filled in "Request to build tests for me" or "Invite for an interview" requests in the Test Cases section.
- Behavior-Driven Test Case Creation: In this section you can add a piece of code to your page and testRigor will automatically create tests based on how real users interact with your application. All your BDD-related test cases and requirements will be fulfilled in this section.
- Last Run: This section will show all your data collected during the last run of the suite. It includes the generated report from the data and errors that occurred.
- All Runs: This section lists down all your test case runs along with test run details.
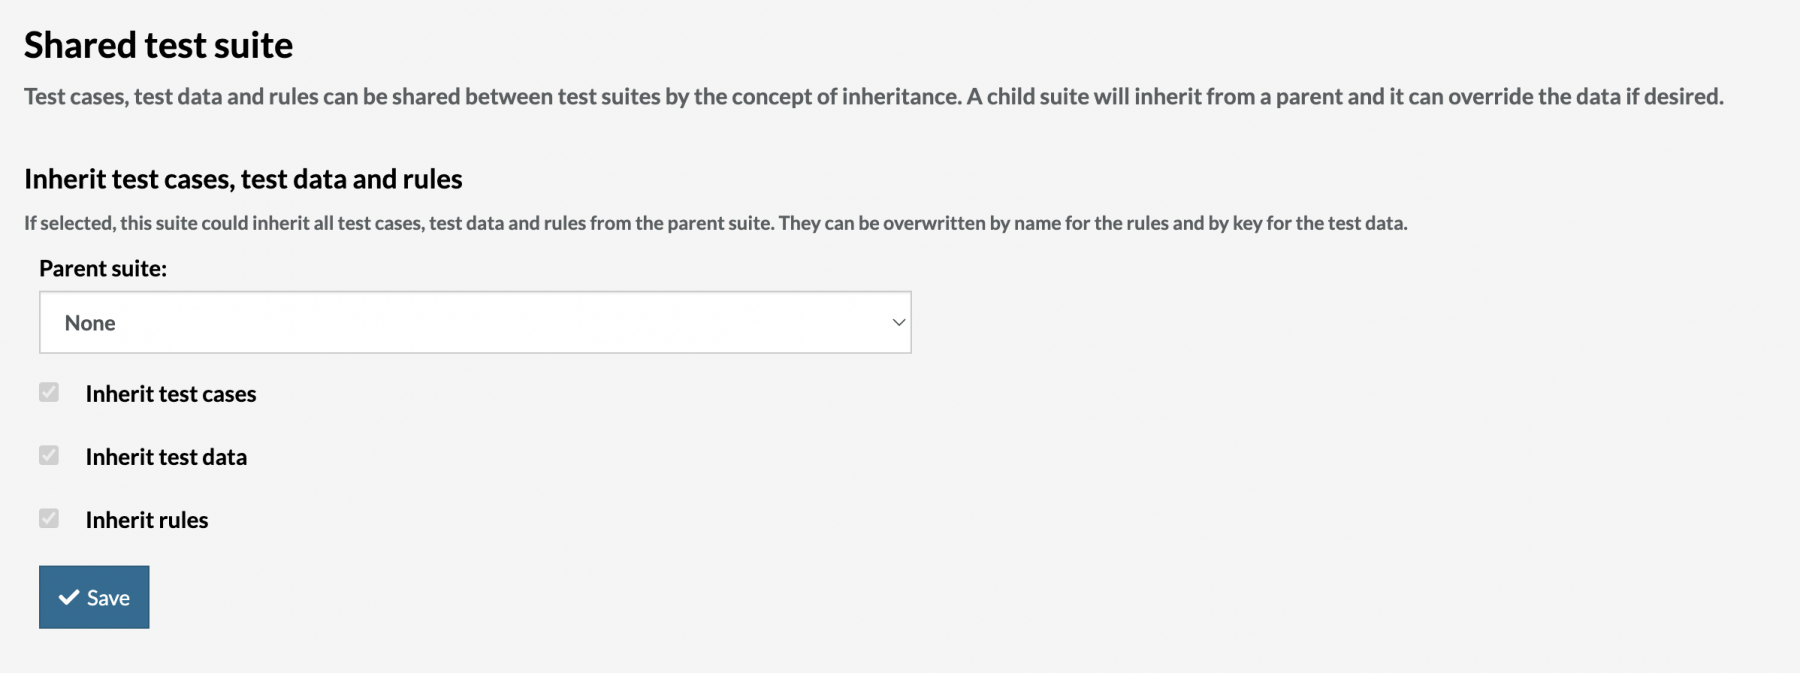
- Shared Suite: The shared suite section contains details about the test suites that are in a parent-child relationship. When a tester declares such a relationship, the data can be shared within two suites.
- Reusable Rules: In this section you can create new rules(commands) encompassing multiple steps (ex: add steps for checkout process and call the command "checkout" - to be re-used across your test cases.
- Test Data: This section contains the data used in the test cases. The data includes the global variables and data sets used directly while creating the test cases.
- Default Values for Discovery: Here you can define values for any page url which the autodiscovery feature will use to fill-in the fields (ex: on a given page, enter 323-456-7890 when there is a phone number field).
- CI/CD Integration: This section contains necessary information to integrate your test cases into the CI/CD.
- Settings: This section contains all detailed settings on authentication, test creation, speed optimizations, integrations, etc.
This concludes our long list of options in the testRigor navigation menu which will help in shaping our overall testing phase in the way we want. In this section, we discussed just the one-liners to brief you about these options. All of these options will be discussed in detail in their dedicated posts. Please subscribe to our newsletter to never miss future testRigor posts.
The landing panel - Test Case
The final center section that we witnessed when we created the test suite is the same "Test Case" section that we discussed above in the testRigor navigation panel. Here, we can create test cases, filter them out for analysis or request someone else to write the cases for us (such as a team member). This section will make more sense when we start creating our first test case.
What's next?
The main motive of this post on testRigor navigation was to get you familiar with the technical aspects of testRigor and what features it offers to facilitate automation testing efficiently. But this did not let us build any test cases. When we start exploring the test case creation, we will observe and explore a few more powers of this platform. From the next post onwards, we will pick one of the sections available in the testRigor navigation menu and explore it in detail.