Maven is a build and dependency management tool for java based application development. Just like other Java-based development tools, it is not installed as windows service, rather it is configured using windows environment variables. These variables can be accessed from the below location:
All Control Panel Items > System > Advanced system settings > Environment Variables
There are certain steps which we need to perform to set up Maven, such as installing Java on the system, setting up environment variable and downloading Eclipse IDE. In this chapter, we will go through these steps one by one to set Maven in Windows.
Step 1: Download and Install Java
Install Java, if it is not already installed on your system. Java latest version can be installed from here. In case you face any issue please go through the steps to Download and Install Java.
-
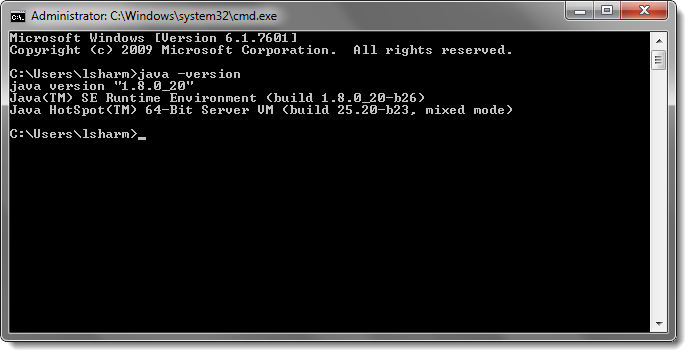
To check the Java version installed on your machine, please go to Run and type 'cmd' to launch the command prompt.
-
Now type 'Java -version' and press Enter.
Step 2: Set Up Java Environment Variable
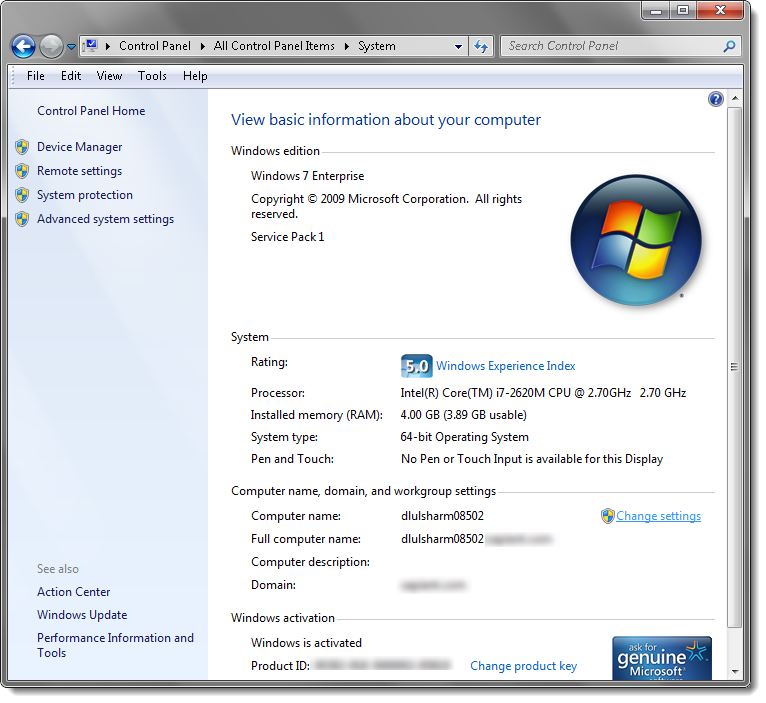
Once the Java installation is done, set up the Java Environment Variable. To set the Java environment variable, open System Settings.
-
Go to My Computer and select Properties by Right-Clicking on empty space in My Computer.
-
Click on 'Change settings'.
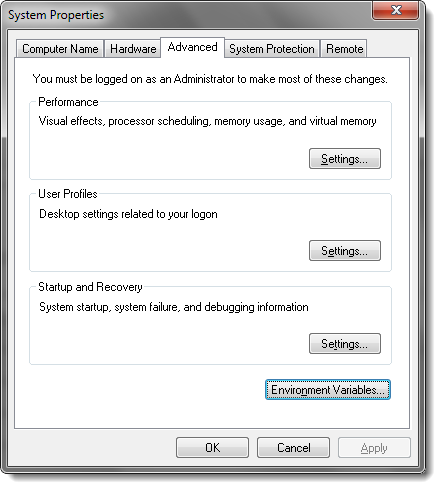
- A pop-up window will display, click on 'Advanced' tab and then click on 'Environment Variables'.
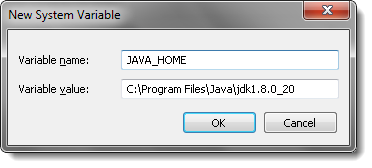
- Click on New button under 'System Variables'

- Write 'JAVA_HOME' in the Variable name box and enter 'C:\Program Files\Java\jdk1.8.0_20' JDK path in the Variable value box and click OK.
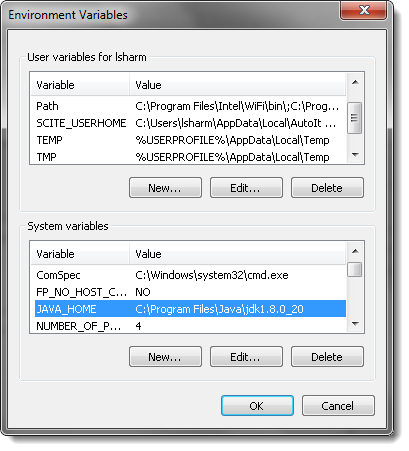
- Entry for newly created Java variable will be displayed under 'System Variables..'
Step 3: Download Maven and Set up Maven Environment Variable
- The next step is to download the Maven and it can be downloaded from this location.
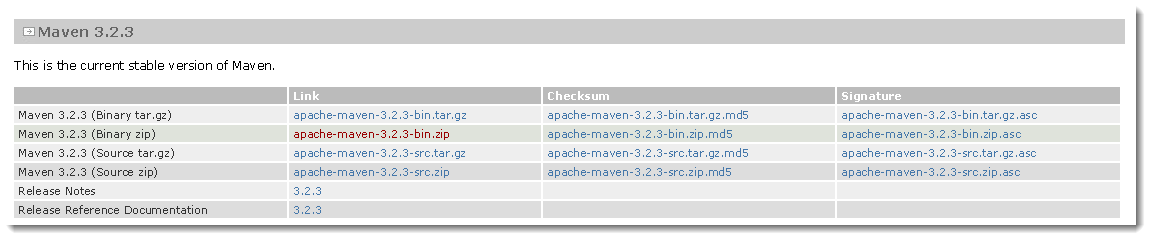
2) Extract it to some location. I have extracted it to 'C:/apache-maven-3.2.3'. You can choose your own location.
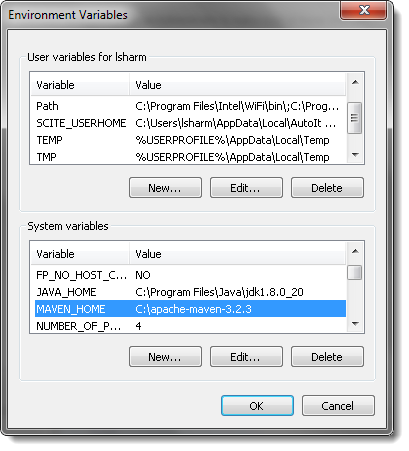
- Set up the Maven Environment Variable the same way we set up the Java Environment Variable above.
Write 'MAVEN_HOME' in the Variable name box then enter '8C:\apache-maven-3.2.3*' Maven path in the Variable value box and click OK.

Entry for newly created Maven variable will be displayed under 'System Variables..'
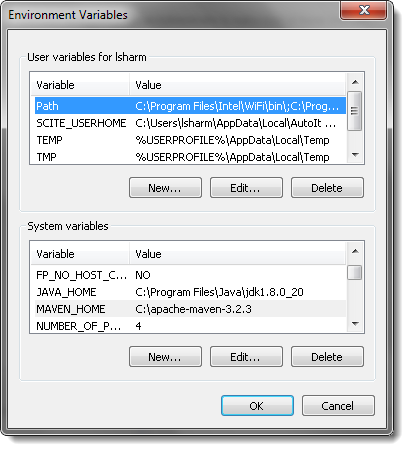
Step 4) Update the Path Variable
To run Maven from the command prompt, this is necessary to update the Path Variable with Maven’s installation 'bin' directory.
- Go to My Computer and select Properties by Right-Clicking on empty space in My Computer.
2) Click on 'Change Settings'.
- A pop-up window will display, click on 'Advanced' tab and then click on 'Environment Variables'.
4) Click on the Edit button under 'User Variables for UserName', where UserName is your machine name.
- Write 'PATH' in the Variable name box then enter 'C:\apache-maven-3.2.3\bin' Maven path in the Variable value box and click OK.
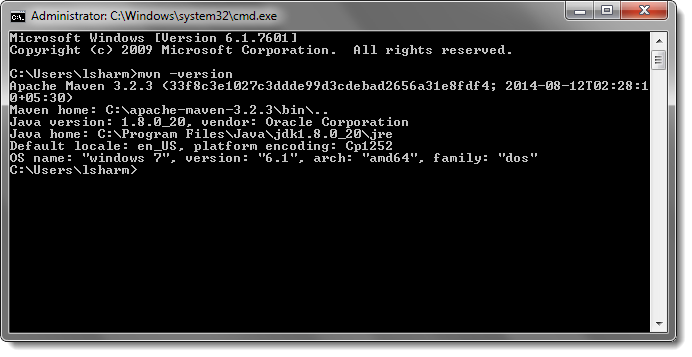
Step 5) Test the Maven Installation
Maven installation is complete. Now, let's test it from windows command prompt. Go to Run and type 'cmd' in the application location search box. A new command prompt will be opened. Type mvn -version in command prompt.
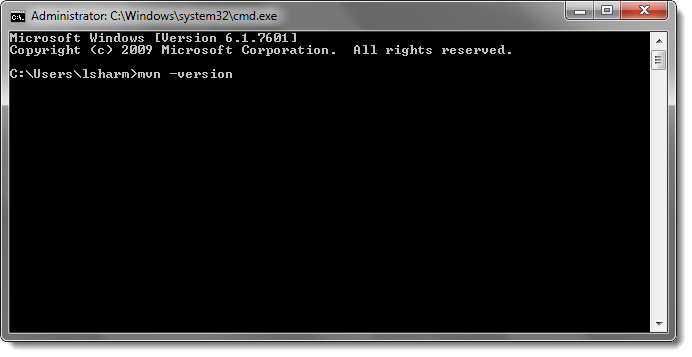
Hit ENTER.