As we know that a project is a defined set of steps that can execute to achieve a measurable result. In the same fashion, for testing any system, we need to define a set of actions which, when executed in a specific order, will result in verification and validation of the system under test. Each automation tool provides a certain way to define and group these testing steps, which is a Project in that tools. Similarly, SoapUI-project defines a particular set of commands or steps to accomplish the testing of the system. SoapUI being a standard tool for automation supports testing of various types of APIs and web services and accordingly supports multiple types of projects, which we will try to understand by covering the following topics in this article:
- What kinds of projects does SoapUI support?
- What are SOAP projects in SoapUI?
- Additionally, what are REST projects in SoapUI?
- What are Generic projects in SoapUI?
- What hierarchy does a SoapUI project follows?
- How to create a new workspace in SoapUI?
- How to add a project under the workspace in SoapUI?
What types of projects does SoapUI support?
Depending on the type of service to be tested, you can create the following types of projects in the SoapUI:
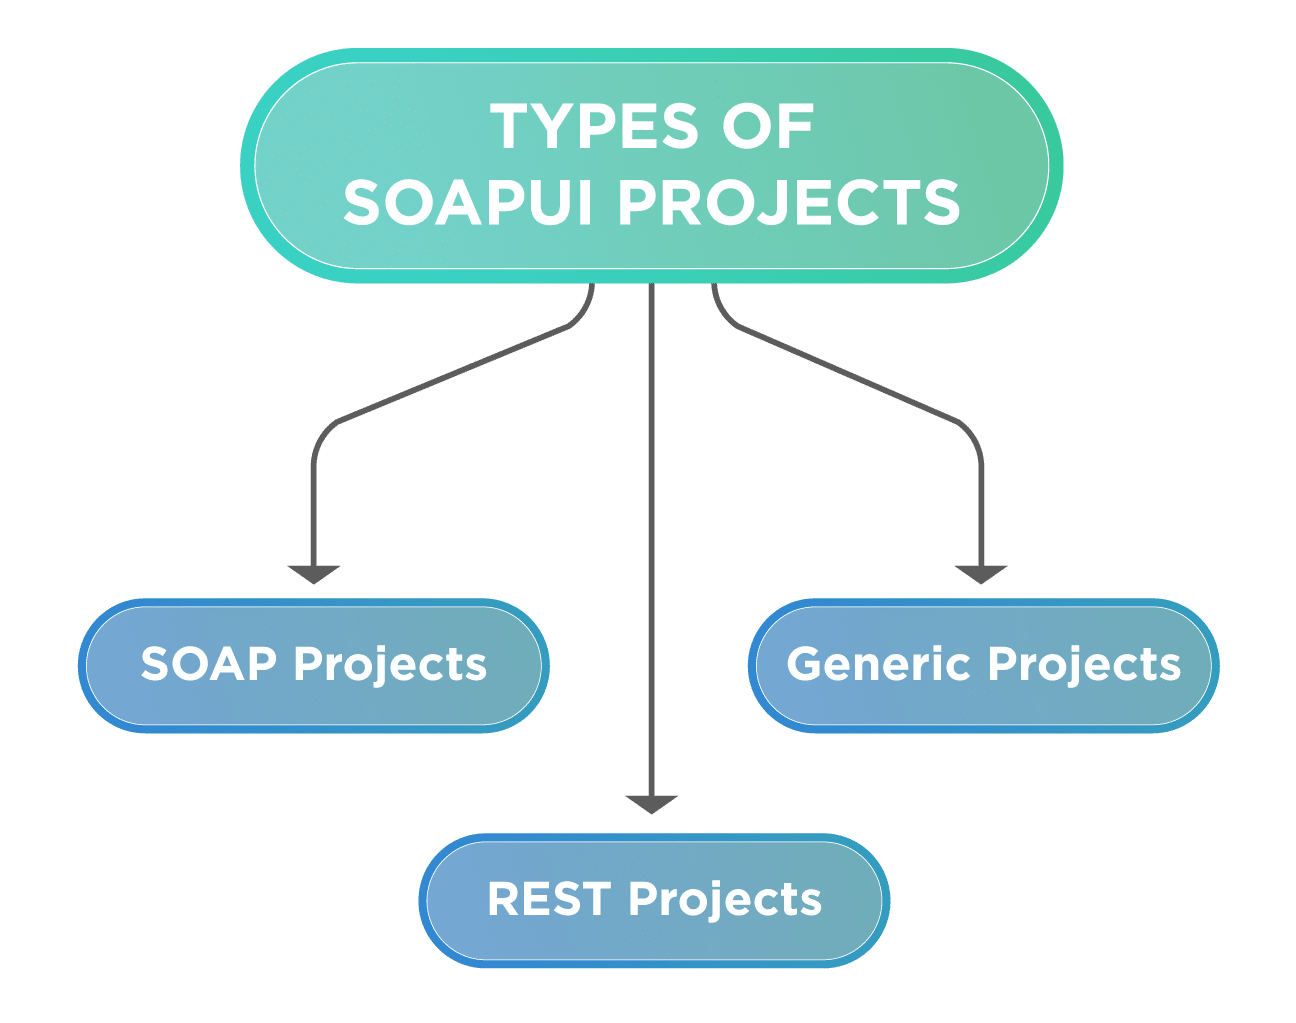
Let's understand the details of all these types of projects in the following sections:
What are SOAP projects in SoapUI?
A SOAP project tests the web service based on the SOAP protocol. You can import a WSDL in a SOAP project, and it will list all the request*(s)* or endpoints exposed by that WSDL. You can perform both functional and non-functional (load, etc.) testing of these services using SoapUI and can also validate various standards such as WS-Security, WS-Addressing, etc. Before creating a SOAP project, let's understand what a WSDL is?
What is WSDL?
A Web Service Description Language (WSDL) is an XML based language that specifies the functionality of a SOAP-based web service. A WSDL defines the contract between the provider and the consumer of the service. The below figure shows the basic usage of WSDL communication:
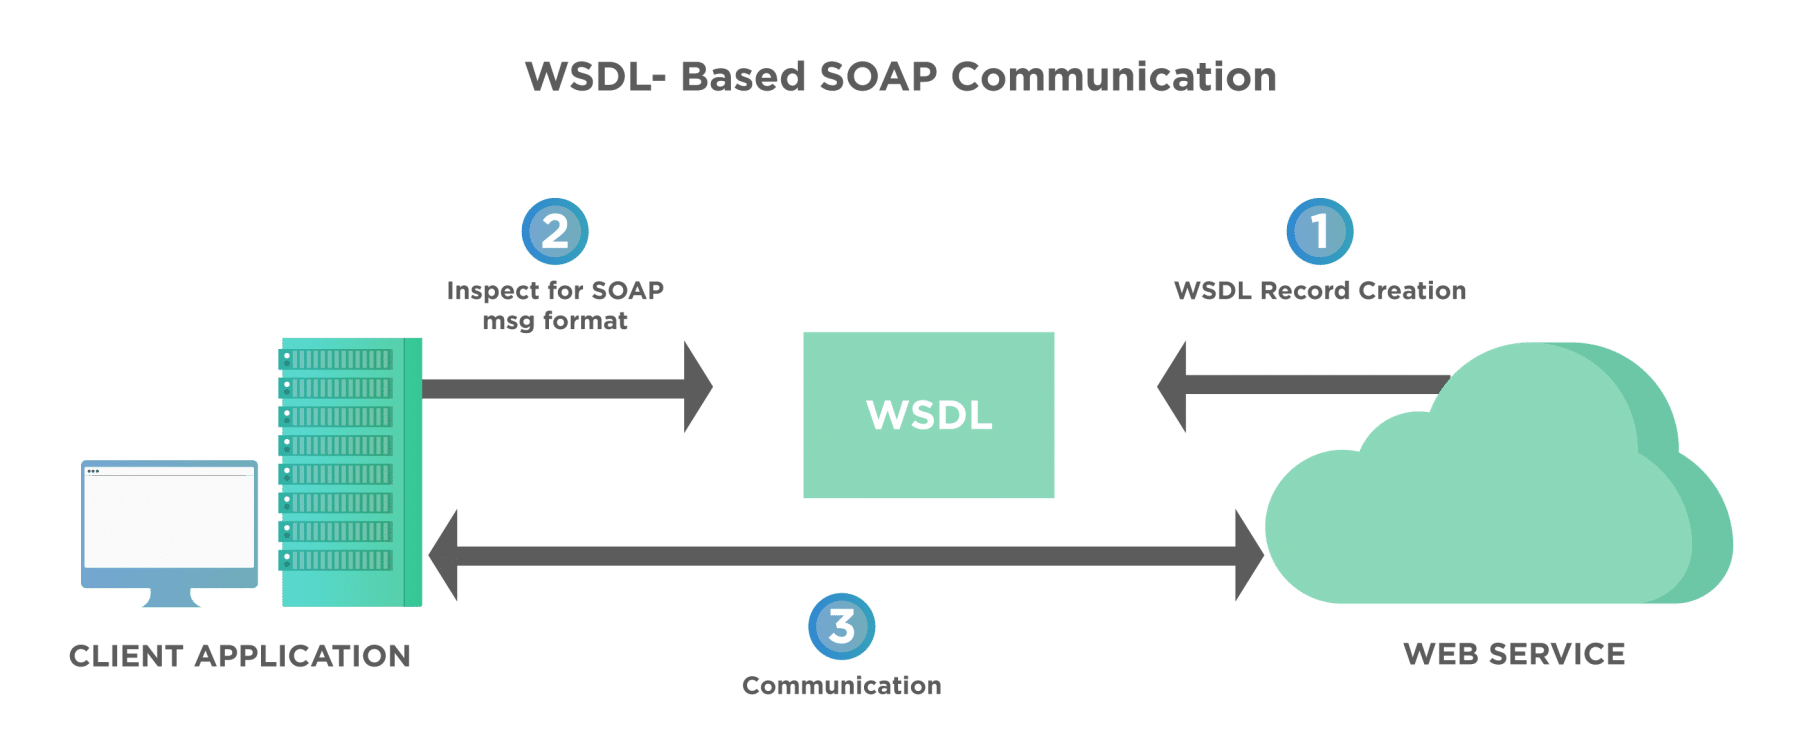
As we can see from the above figure, the client application and the web service shares a contract in a WSDL format and communicates with each other using SOAP-based messages.
How to create a SOAP project in SoapUI?
Perform the following steps to create a new SOAP project by using a WSDL (http://bookstore.toolsqa.com/BookStoreService.wsdl) in SoapUI :
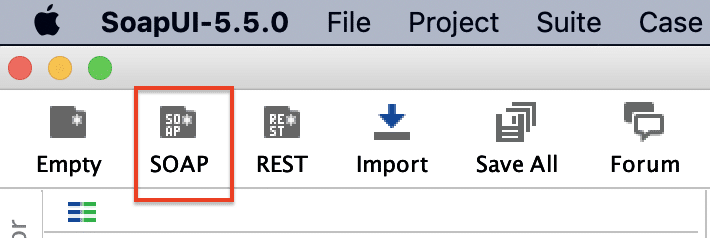
- Click on the "New SOAP Project" from the "File" menu

OR the "SOAP" icon on the toolbar as highlighted below:
- Specify the path of the WSDL(http://bookstore.toolsqa.com/BookStoreService.wsdl) in the "Initial WSDL" section:
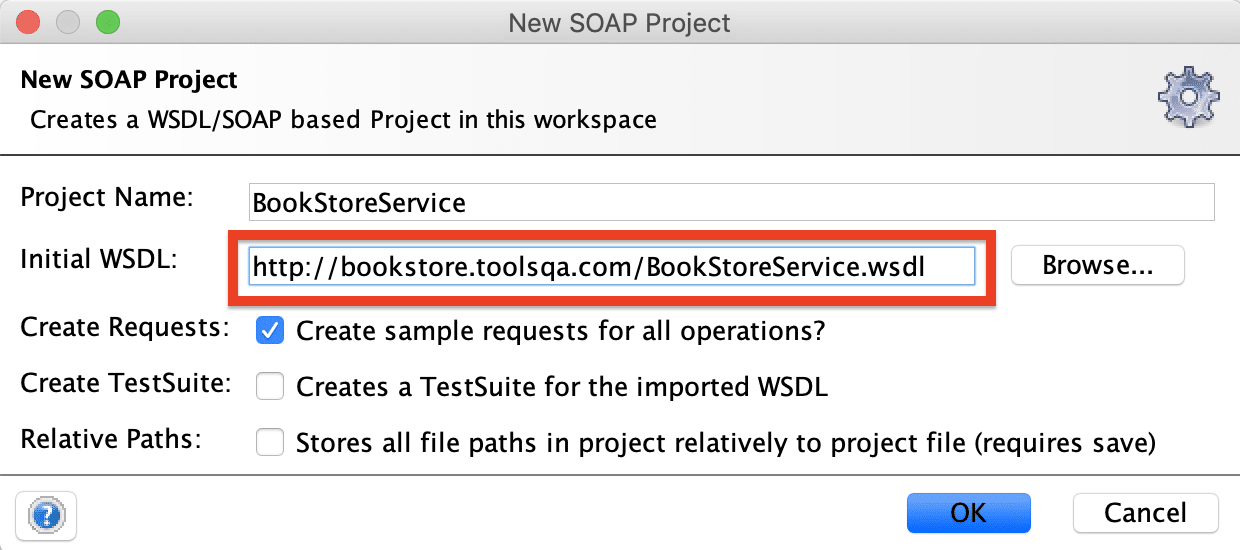
- Clicking on the "OK" button will import the WSDL and show the methods exposed by the service as highlighted below:
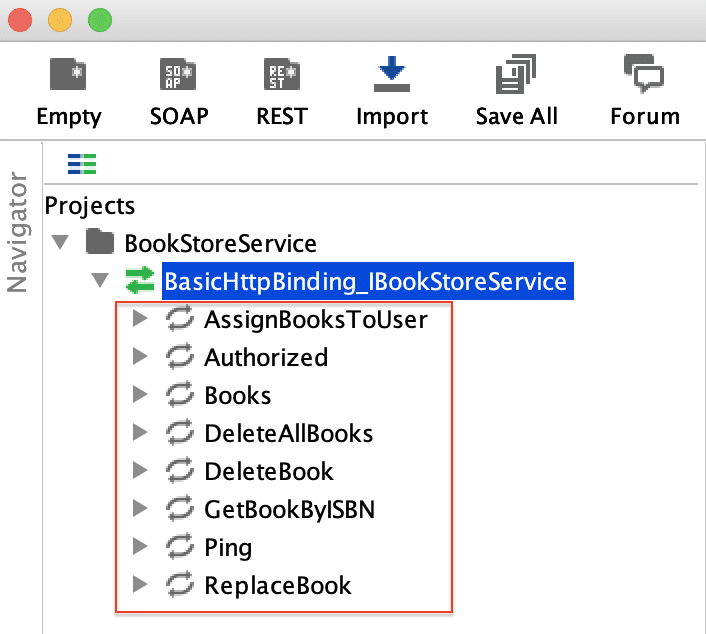
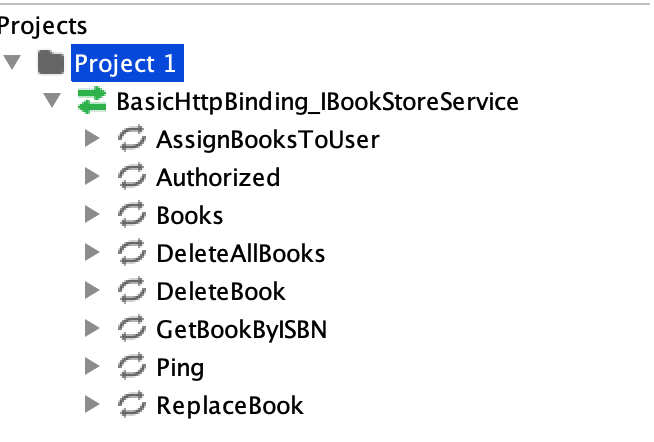
So, now we have a new SOAP project named "BookStoreService" created in the SoapUI, which can write test cases for each of the exposed methods.
Note: We will be covering the "writing test cases" for the SOAP service methods in future articles.
What are REST projects in SoapUI?
If your web service has exposed RESTful (Representational State Transfer) endpoints, you will need to create a REST project in SoapUI to test the REST Webservice. You can create a REST project in SoapUI by importing a WADL file or by directly specifying the URI and its parameters. Similar to SOAP projects, you can perform both functional and non-functional testing of REST APIs using SoapUI. Before creating a SOAP project, let's understand what a WADL is?
What is WADL?
The Web Application Description Language (WADL) is a machine-readable XML explanation of HTTP-based web services. WADL models the resources given by a service and the relationships between them. WADL intends to simplify the reuse of web services whose basis is on the existing HTTP architecture of the Web. The below figure shows the communication between client and server using WADL:
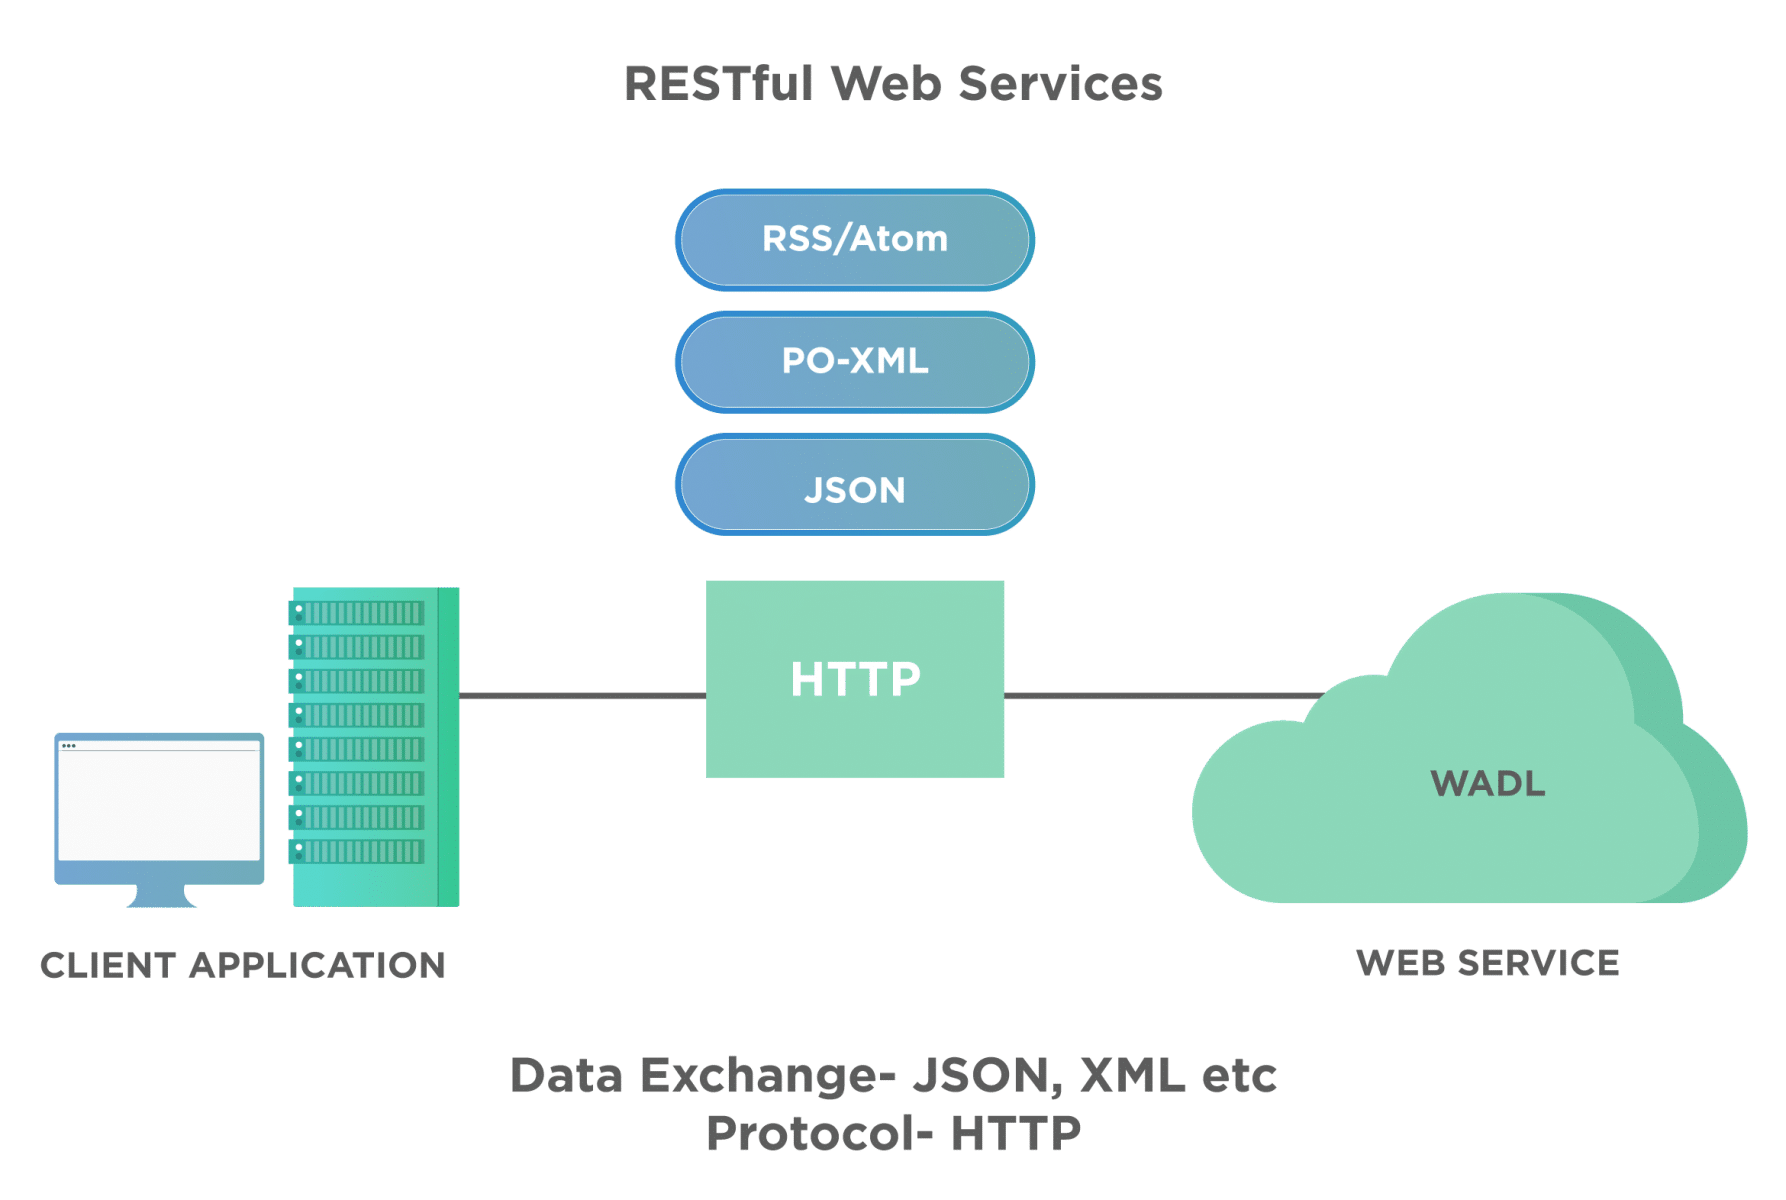
As we can see from the above picture, in the case of RESTful services, uses the Http protocol, and the data exchange can happen over formats like JSON or XML.
How to create a REST project in SoapUI?
Perform the following steps to create a new REST project by using a web service(http://bookstore.toolsqa.com/BookStore/v1/Books) in SoapUI:
- First, Click on the "New REST Project" from the "File" menu.
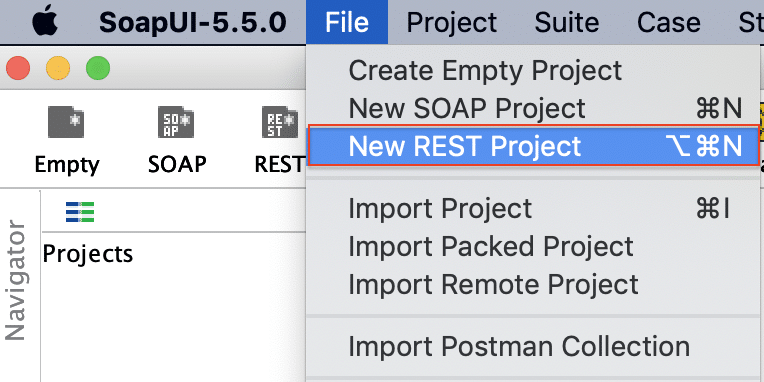
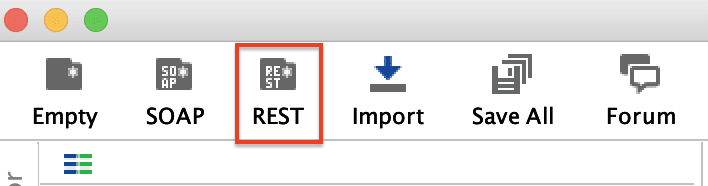
OR by clicking the "REST" icon on the toolbar as highlighted below:
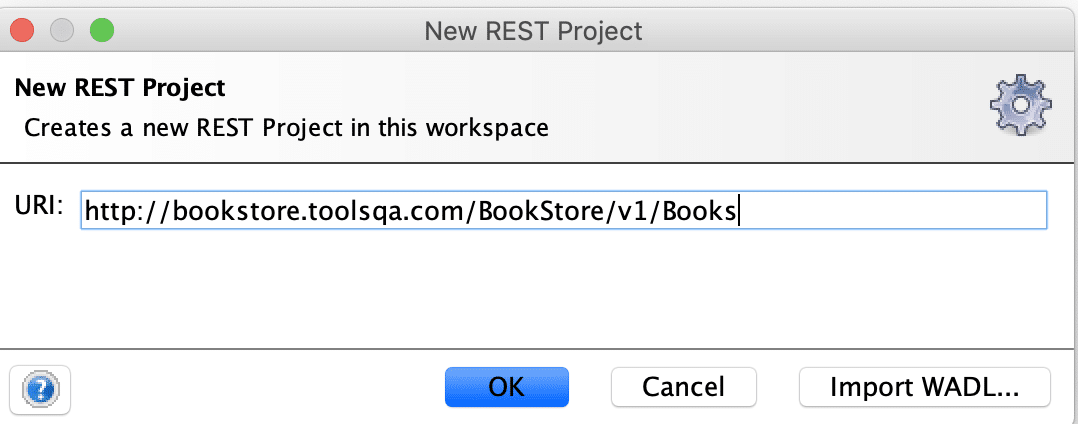
- Specify the path of the REST web service(http://bookstore.toolsqa.com/BookStore/v1/Books) in the "URI" section:
- Clicking on the "OK" button will import the service and show the methods exposed by the service as highlighted below:
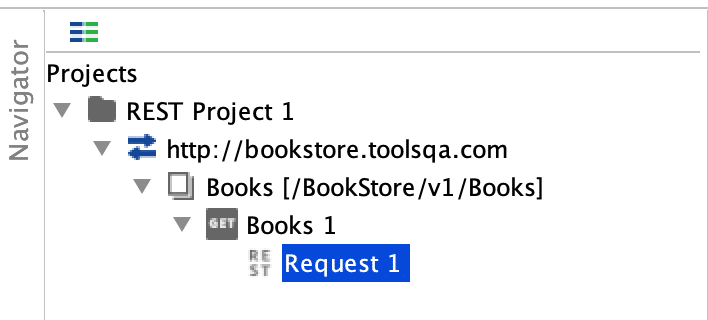
So, now we have a new REST project named "REST Project 1" created in the SoapUI, which can write test cases for each of the exposed methods.
Note: We will be covering the "writing test cases" for the REST service methods in future articles.
What are Generic projects in SoapUI?
If your application exposes both SOAP and REST-based services, you can create a Generic project in SoapUI. It is a combination of SOAP and REST. Let's understand how we can create a "Generic" project in SoapUI:
How to create a Generic project in SoapUI?
Perform the following steps to create a new Generic project in SoapUI
- Firstly, click on the "New Empty Project" from the "File" menu
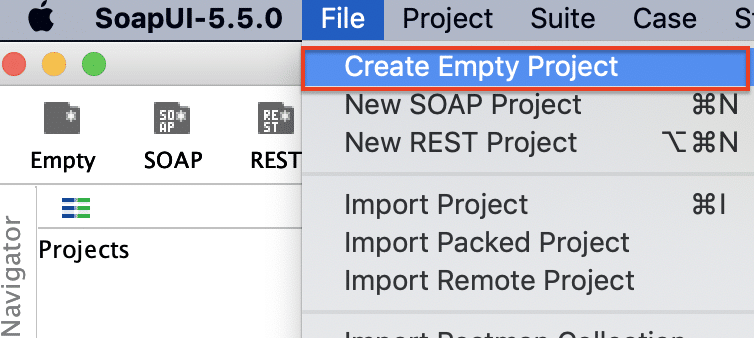
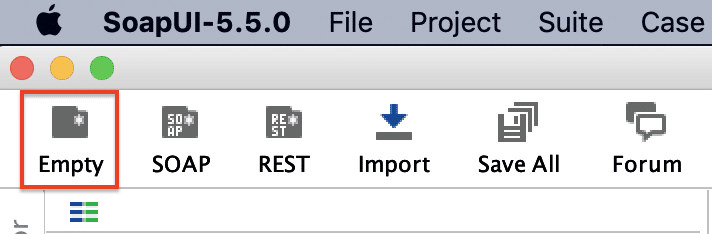
OR by clicking the "Empty" icon on the toolbar as highlighted below:
- It will create an empty project "Project1" and will show a pop-up as below:
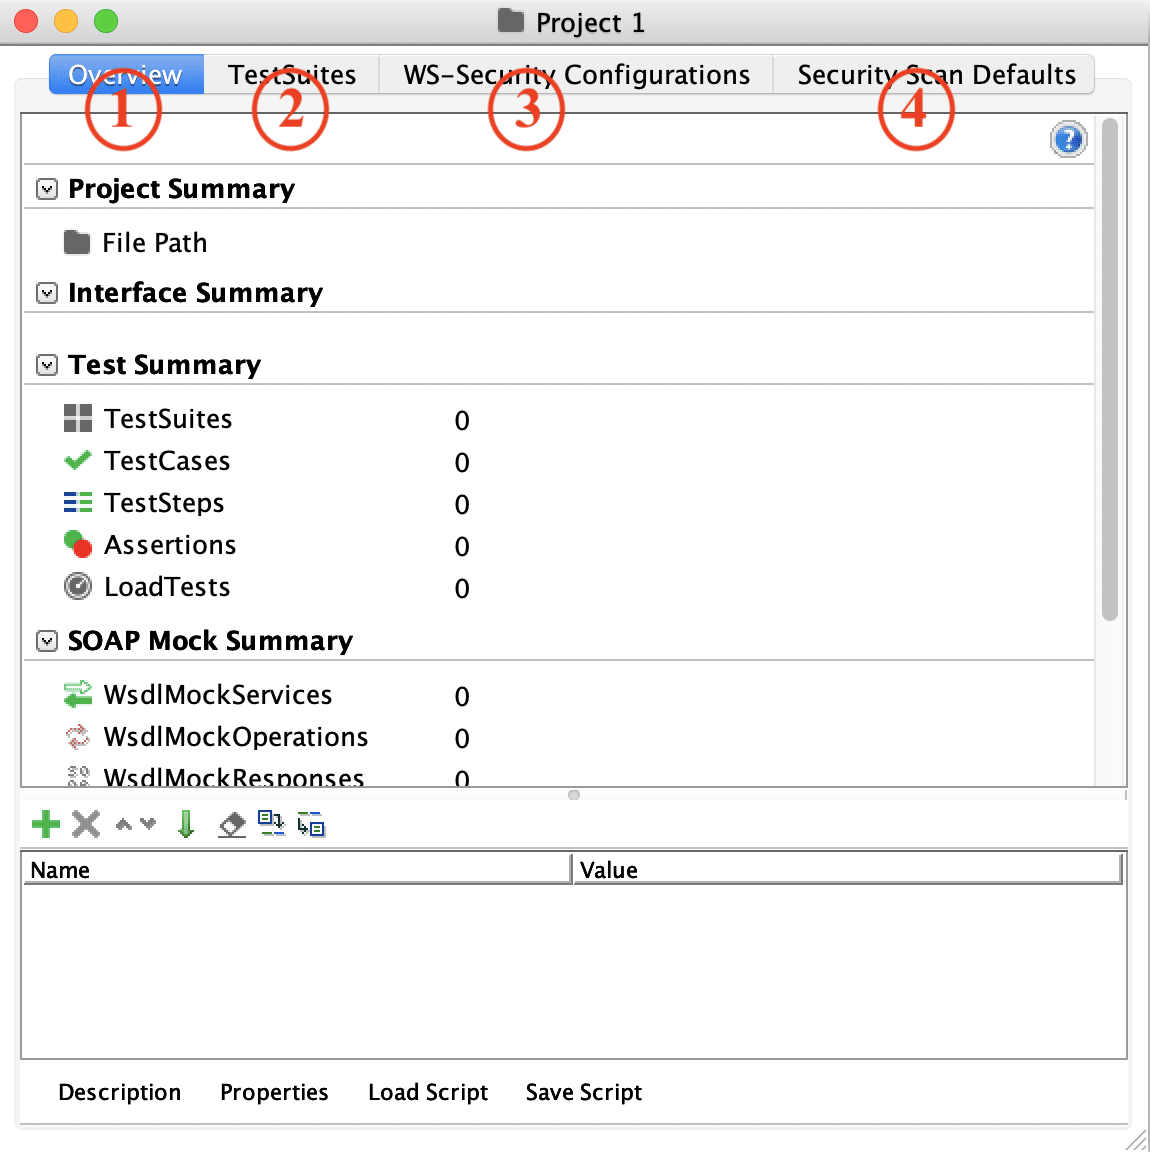
Where,
-
Overview Tab: It shows the general data of the project.
-
TestSuites: It shows all the functional test suites in the project.
-
WS-Security Configurations: It shows the project-level WS-Security configurations for SOAP-bases Web Services.
-
Security Scan Defaults: It shows the Sensitive Information Tokens for the project.
-
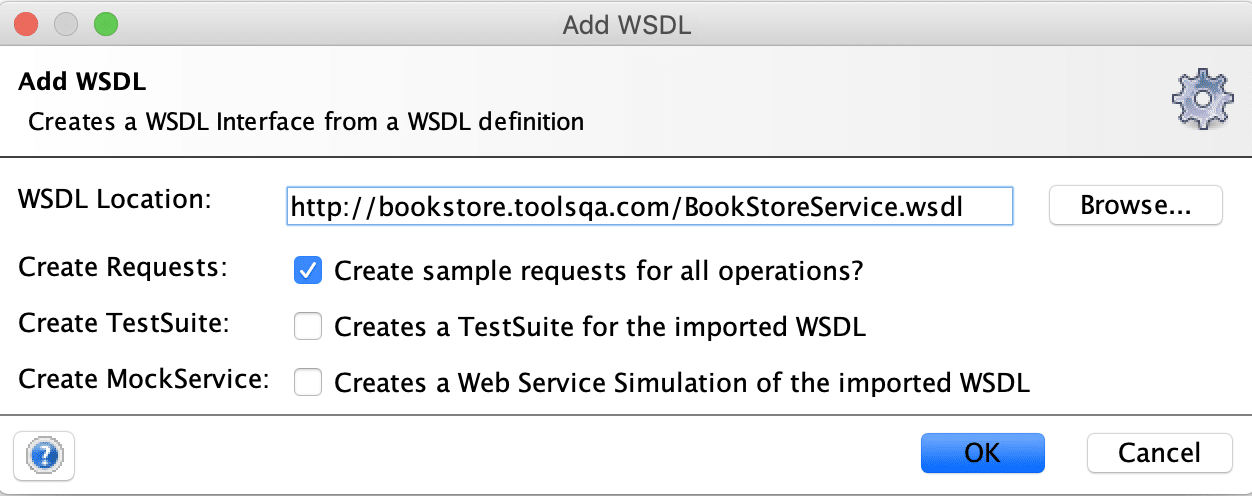
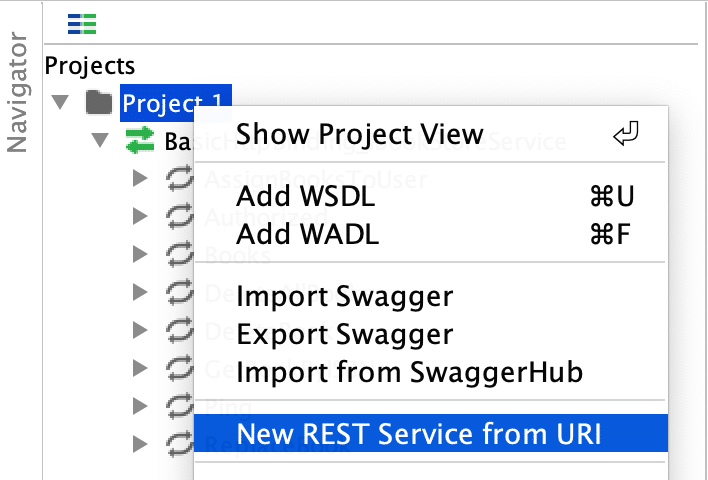
Now to add a SOAP service to the project, right-click on the "Project1" in the Projects sections and click on "Add WSDL".
%20to%20Empty%20Project%20in%20SoapUI.png)
- Specify the path of WSDL (http://bookstore.toolsqa.com/BookStoreService.wsdl) in the "*WSDL Location" section as below:
- Click on the "OK" button, and it will import the SOAP service under the Project1 as shown below
- Now again right-click on "Project1" and click on "Import Rest Service from URI" to add a rest service to the same project:
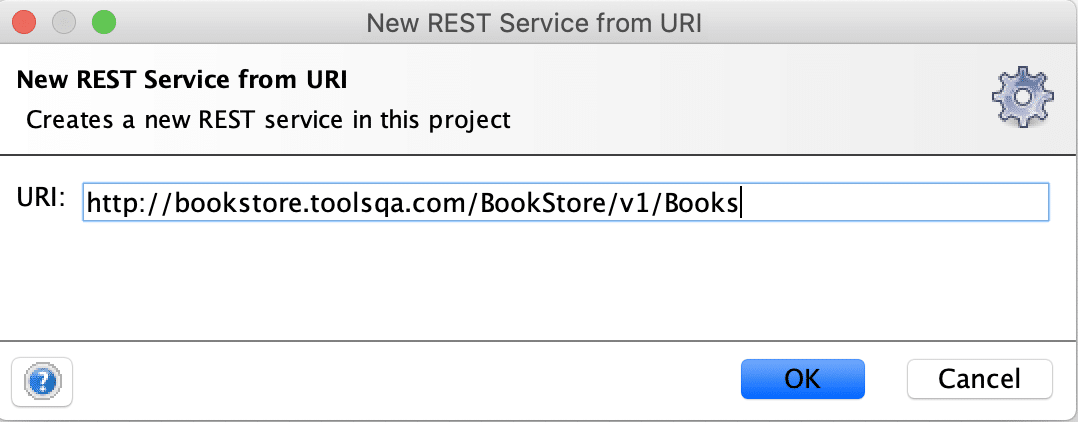
- Specify the path of the REST web service(http://bookstore.toolsqa.com/BookStore/v1/Books) in the "URI" section:
- Click on the "OK" button, and you will have a new "Service" imported under the same project "Project1" as shown below:
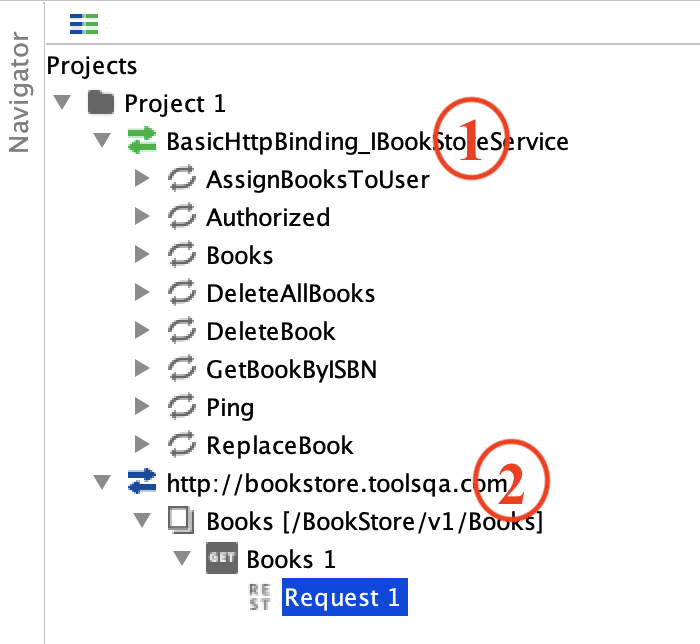
As we can see from the above image, both SOAP and REST services have imported under the same project "Project1".
What hierarchy does a SoapUI project follows?
Like all the standard automation tools, SoapUI also provides generic recommendations to arrange the test cases in a particular hierarchy of Test Suites and Projects. A sample hierarchy is represented as follows in SoapUI:
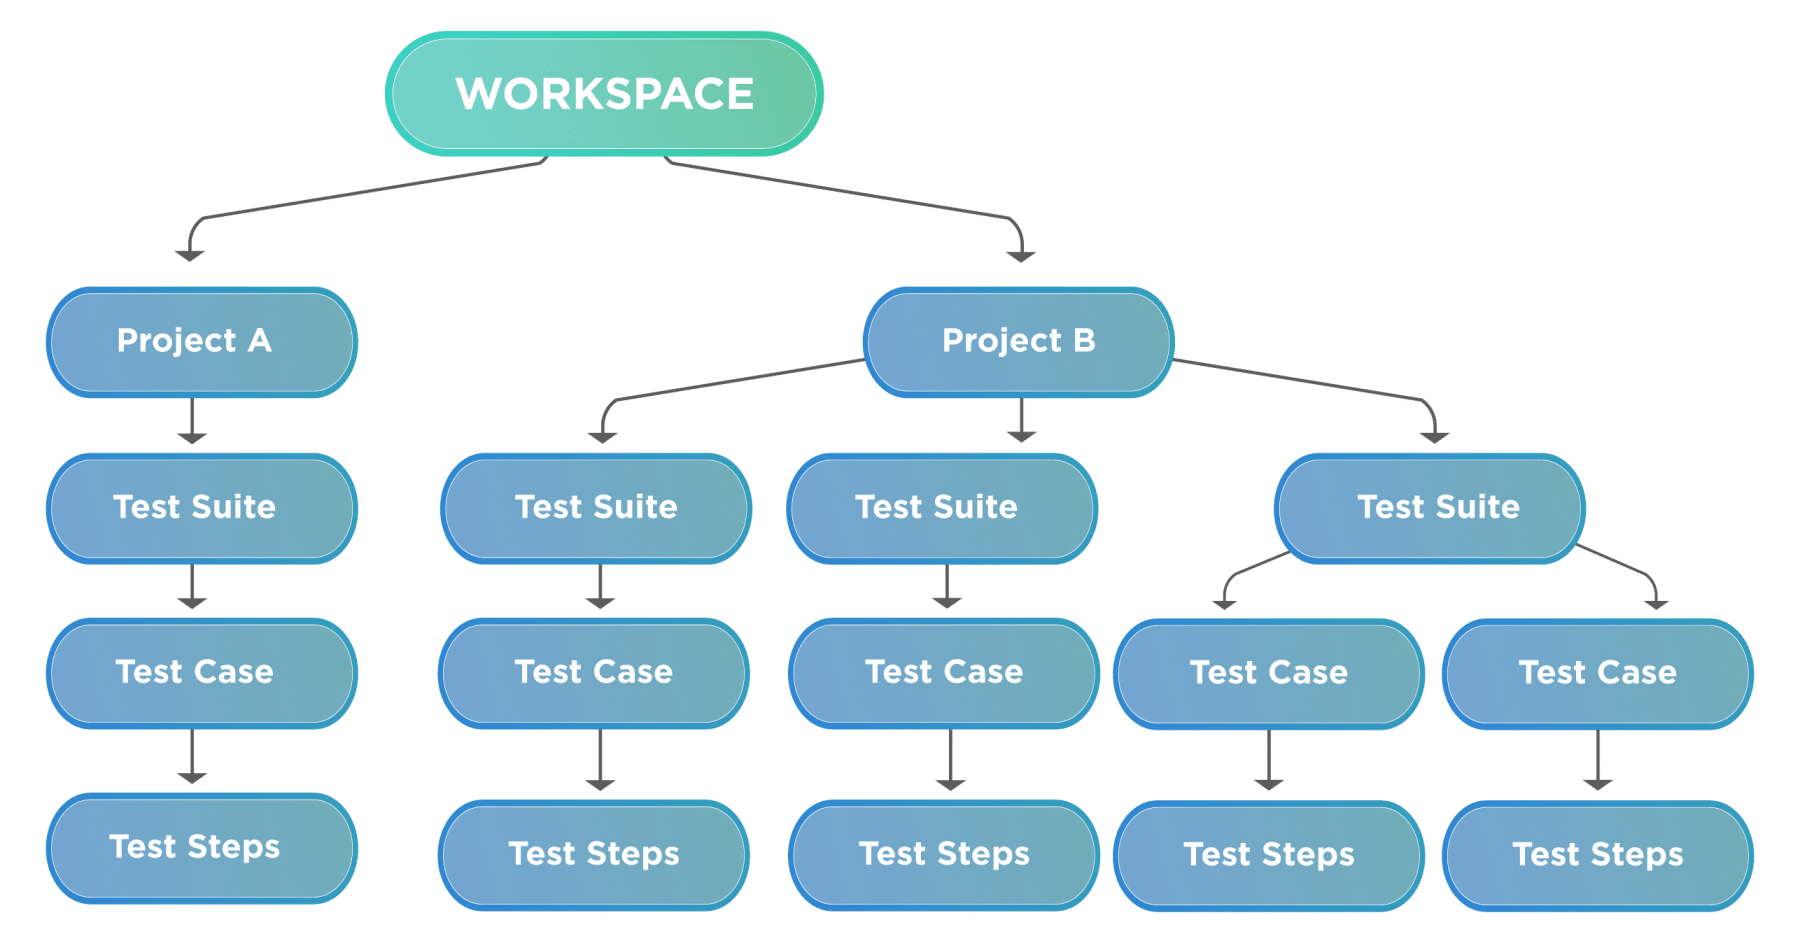
As we can see from the above figure, a SoapUI workspace can contain multiple projects, each project can have various TestSuites, each TestSuite can have multiple Test cases, and each Testcase can have numerous Test Steps. Let's understand what all these terms signify:
- *Workspace: The Workspace is a placeholder that can hold one or many projects. As we can see in the above figure, the workspace is holding two projects. *
- Projects: A Project includes all of the requests, tests, mock service, etc. It's a single XML file. You will be arranging your test cases under a project.
- Test Suite: A Test Suite is a logical group of various Test Cases. If you want to execute a set of Test Cases in a single go, you can group them in a Single Test Suite.
- Test Case: Test Cases are a set of steps grouped to achieve/test specific functionality.
- Test Step: The Test Step is the basic building block, which represents aa unique action. Multiple Test Steps executed in a sequence constitutes a Test Case.
Let's start from the top and understand how to add a new Workspace in SoapUI:
How to create a new workspace in SoapUI?
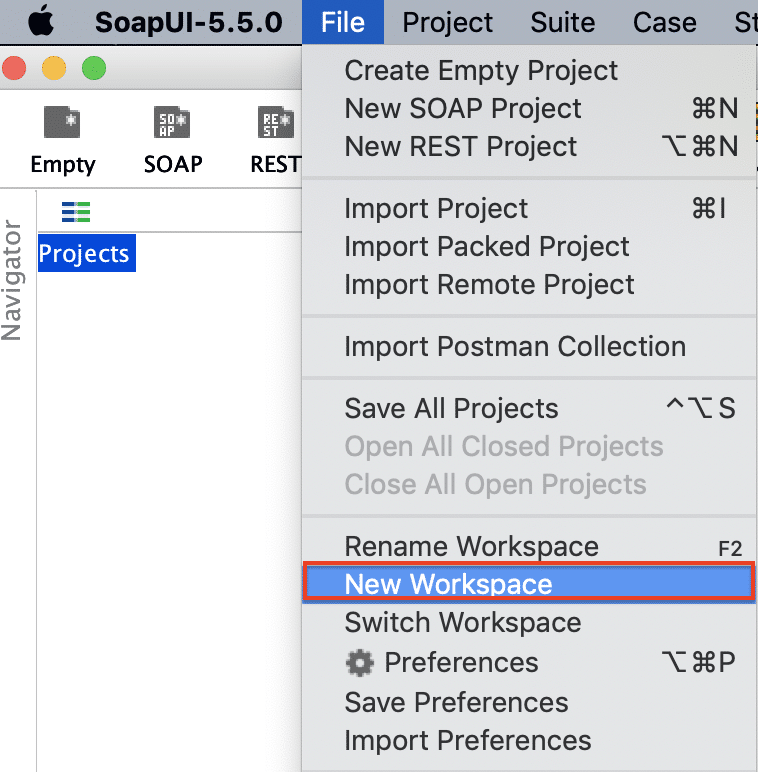
When you create a new project in SoapUI, it adds a default workspace named "Projects", and the newly created project will always create under that workspace. But if you want to maintain your different projects in different workspaces, you can create a new workspace by following the steps mentioned below:
- Click on the "New Workspace" option from the "File" menu as shown below:
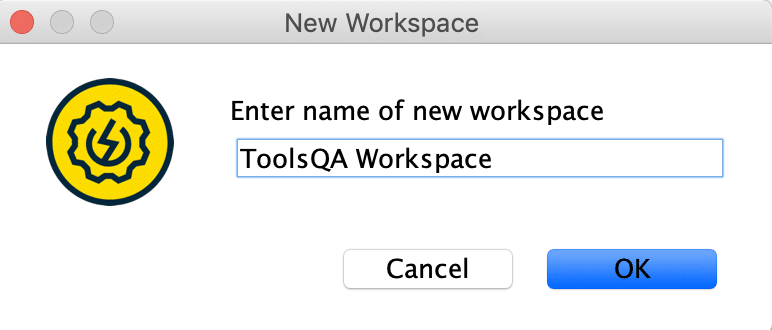
- It will open a pop-up. Specify the name of the workspace, as shown below:
- Click on the "OK" button, and it will serve as for the path to save the workspace as shown below:
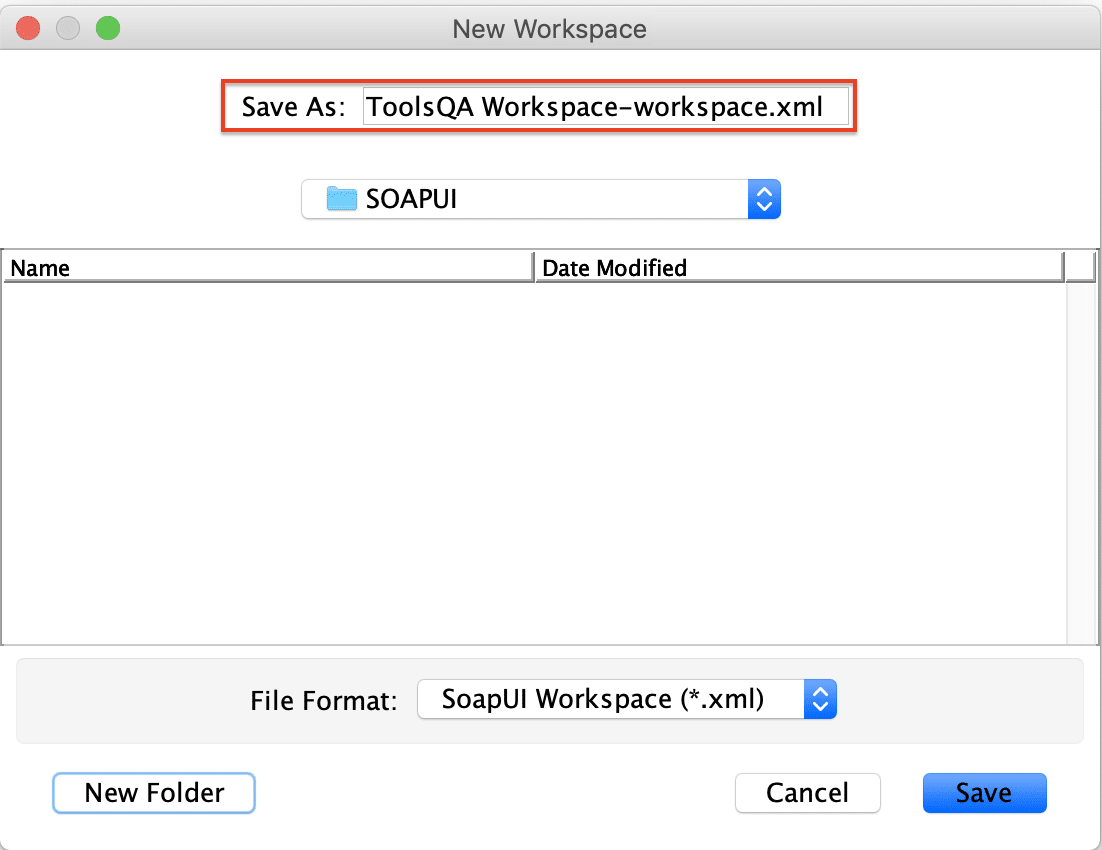
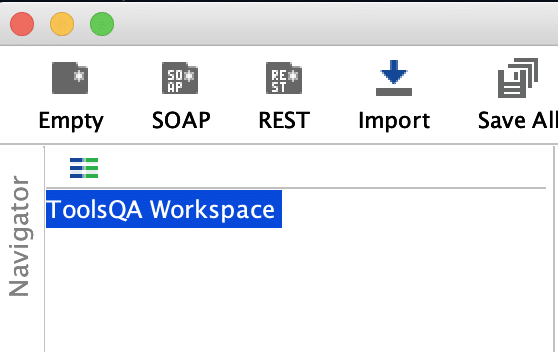
- Specify the folder where you want to save the newly created workspace and click on the "Save" button. It will add a new workspace with the name "ToolsQA Workspace" as shown below:
So, now we have a new workspace added in the SoapUI, and we can add our projects under this workspace. Let's understand how we can add the projects under this newly created framework in the following section:
How to add a project under the workspace in SoapUI?
There are two ways of adding a project to the workspace.
- Add the project to the workspace while creating a new project.
- Add the project to the workspace by importing an existing project.
Let's understand the details of both of these ways in the following sections:
How to add the project to the workspace while creating a new project?
The addition of a new project to the named workspace*(created in the above section)* can be done in the same way as it was for a default workspace. So, after creating the workspace, if we follow the same steps (as mentioned in the sections "How to create a SOAP/REST/Generic projects" above), it will automatically add the newly created project under the workspace only. So, ideally, no explicit steps as needed to add a newly created project under a workspace, it will automatically be added whenever we create a new project.
How to add the project to the workspace by importing an existing project?
If you already have a project which you want to import into this newly created workspace, follow the steps as mentioned below:
- Click on the "Import Project" option under the "File" menu, as shown below:
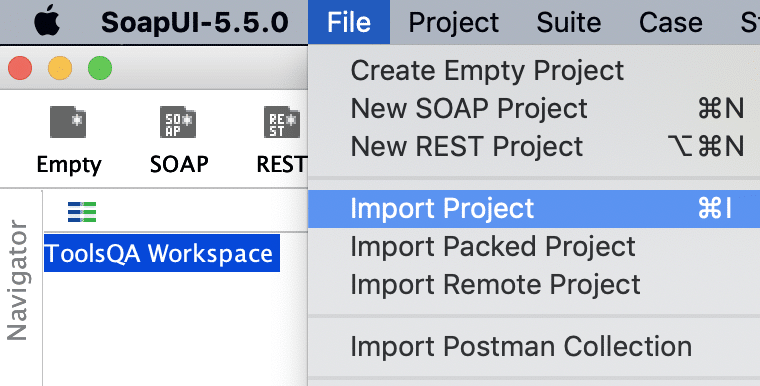
- Select the project which you want to import. In our scenario, we will be importing the "Book Store SOAP project", which we created in the above steps:
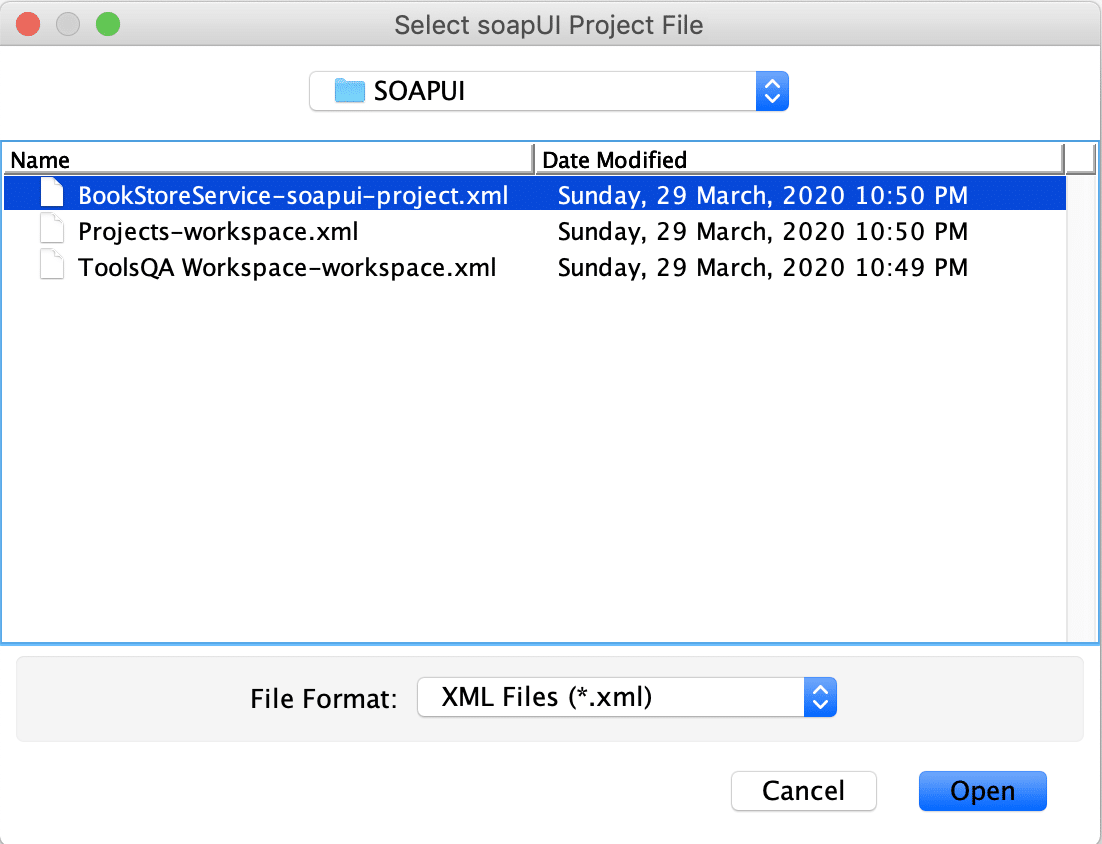
- Click on the "Open" button, and it will import the project in the new workspace as shown below:
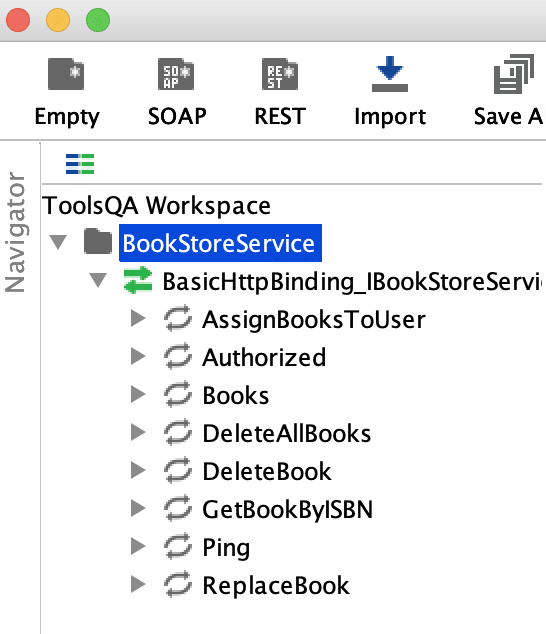
As we can see in the above screenshot, the SOAP project successfully imported into the new workspace "ToolQA Workspace".
Key Takeaways
- SoapUI supports three types of projects: the SOAP Project, REST Project, and Generic Project.
- SoapUI provides very intuitive UI widgets to create a new project.
- Each SoapUI project follows the hierarchy of Workspace to Project to TestSuite to TestCase.
- Thee SoapUI projects can be added to a workspace while creating a new project or by importing an existing project into the workspace.
So by now, we have understood the details of a SoapUI project and workspace. Let's move to the next article to understand the details of "TestCases in SoapUI".