Build JMeter Test Plan
A Test Plan can be considered as a root node that has potentially many levels of additional elements / nodes that forms a hierarchy, which JMeter executes when we run test plan. A test plan can consist of one or more elements like Thread Groups, Logic Controllers, Configuration Elements, Timers, Listeners and Assertions. There should be at least one thread group in every test plan. We can add or remove elements from test plan easily.
Let’s start building test plan by launching JMeter by following these two steps:
• Go to your JMeter bin folder e.g. E:\apache-jmeter-3.0\bin
• Double click ApacheJMeter.jar file.
Now, you can see the following JMeter GUI after a short break.
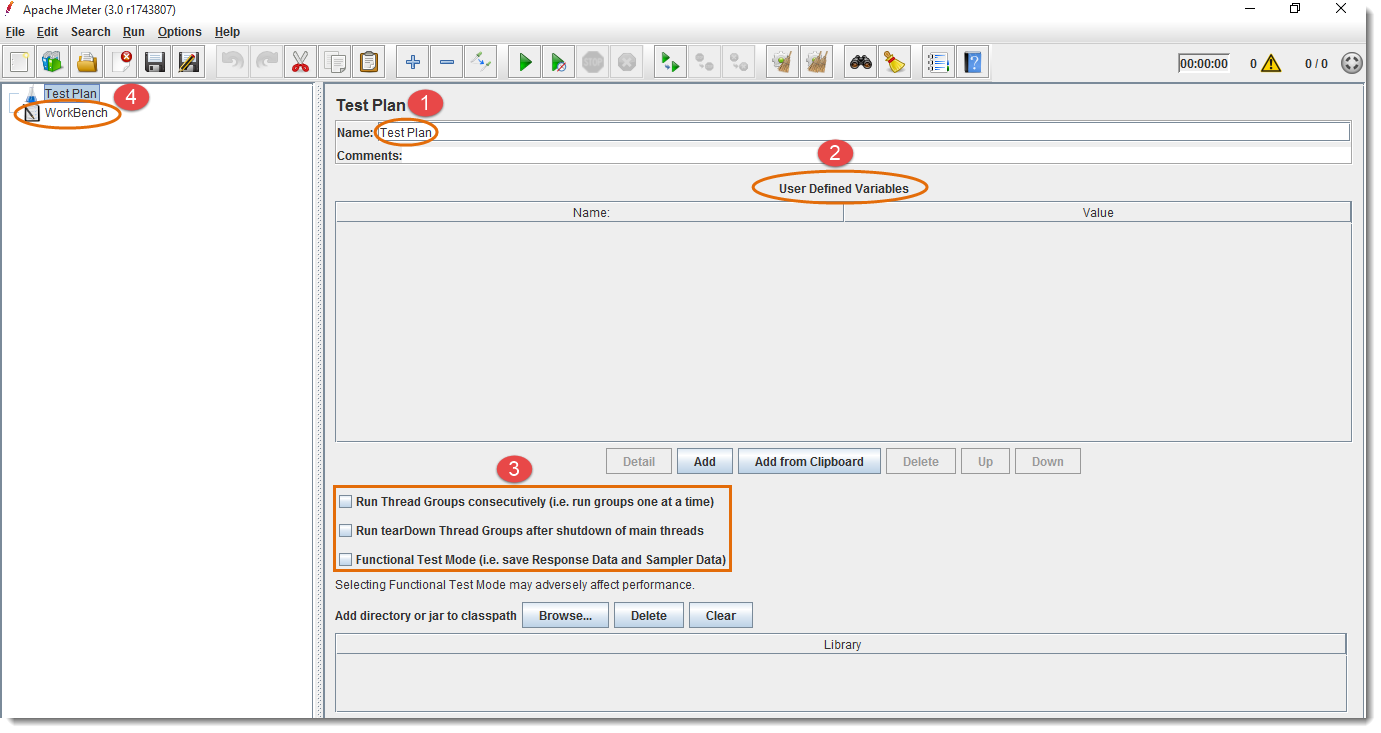
- Rename your test plan
- User Defined Variables provides flexibility when you have to repeat any value in several parts of the test plan. You will be able to change the value from a single point, and it will reflect everywhere.
- Optional – or you can use according to your needs
- WorkBench is used to store test elements temporary for copy/paste. It is also used for Non-Test Elements like HTTP(S) Test Script Recorder, HTTP Mirror Server and Property Display. If you need to save it along with the test plan, then you should select the option “Save WorkBench” from WorkBench control panel.
After renaming test plan and defining variable, JMeter will look like as follows:
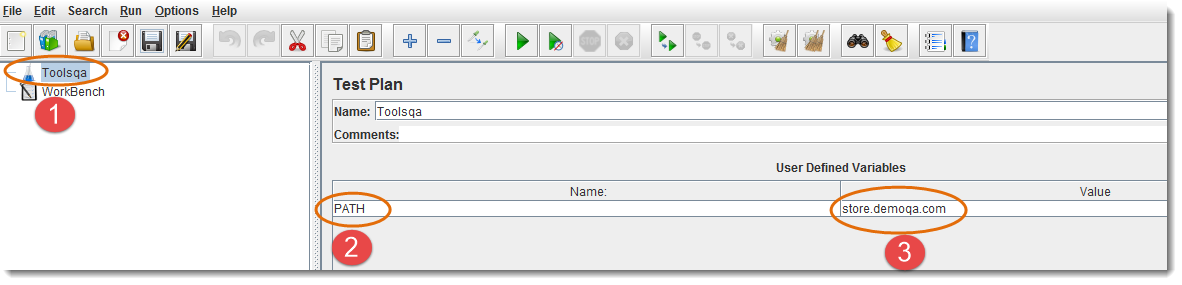
- New test plan name will also reflect on left side
- E.g. Variable name is set to “PATH”
- E.g. Variable value is set to URL (without http://): “store.demoqa.com”
Now, this variable can be used in any part of the test plan elements like this ${PATH}
Look at the following example.

Add and Remove Test Plan Elements
Once the Test Plan for JMeter is created, the next thing we should be learning is to Add and Remove Elements to JMeter Test Plan.
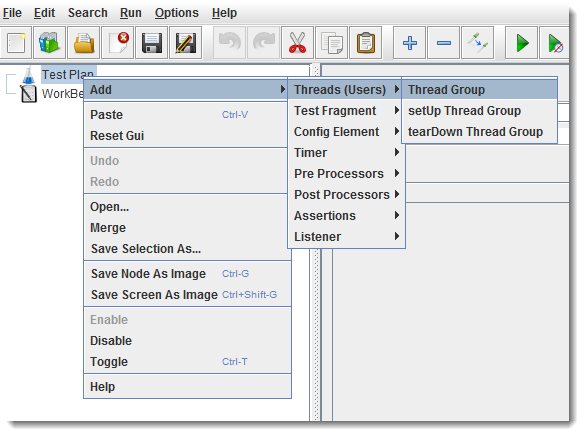
Steps to Add Elements to JMeter Test Plan
- Select test plan node or any element
- Right click the selected element
- Mouse hover on “Add” option, then Elements list will be displayed
- Mouse hover on desired list element, and select appropriate option by clicking it
In our tutorial, we are adding Thread Group element:
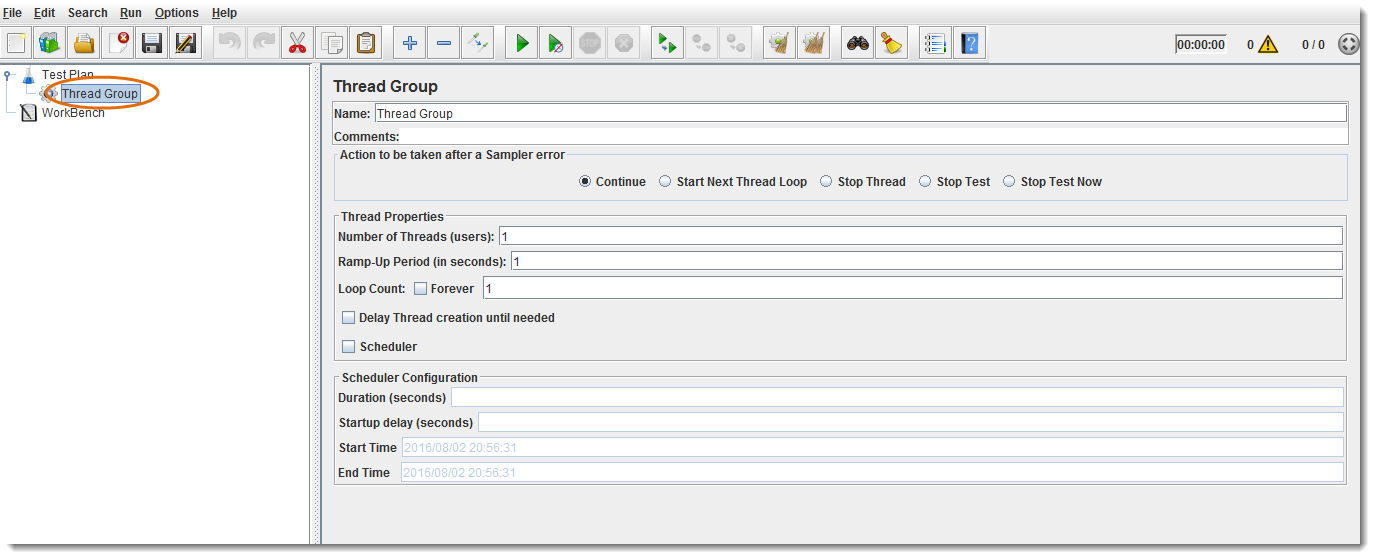
After adding Thread Group element, you can see the following screen:
Note : Elements can also be loaded from a file and added by selecting the “merge” or “open” options.
Steps to Remove Elements from JMeter Test Plan
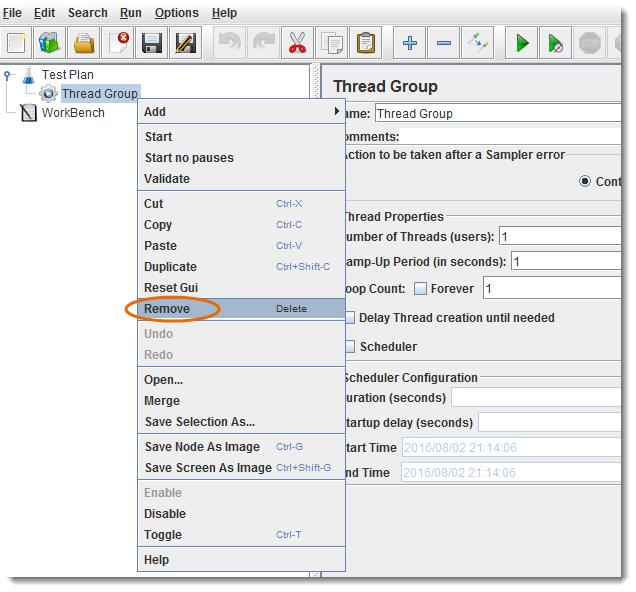
When you add number of Elements to Test Plan, you may like to remove one which is not required any more. That can be done by following the below steps:
- Select the desired element
- Right click on the element
- Choose the “Remove” option
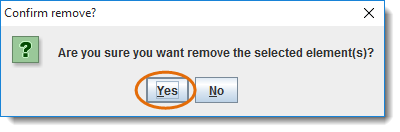
Click “Yes” on the remove confirmation popup
Load and Save JMeter Test Plan Elements
Above we learned to add and remove elements. Now it is the time to Load and Save Elements to JMeter Test Plan.
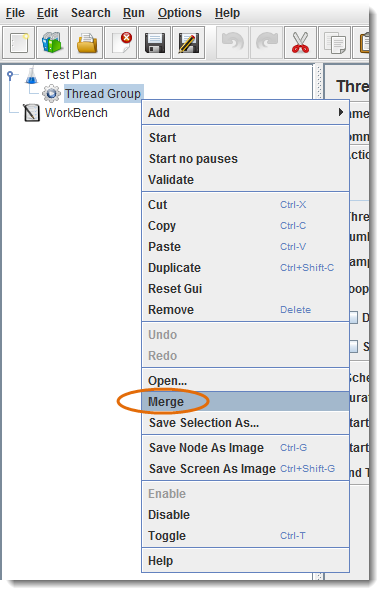
Steps to Load Elements to JMeter Test Plan Tree
- Select and right click on any Tree Element, in which you want to add the loaded element
- Select “Merge” option
- Choose the .jmx file where you saved the elements
- Elements will be Merged into the tree
- Don’t forget to Save test plan / element
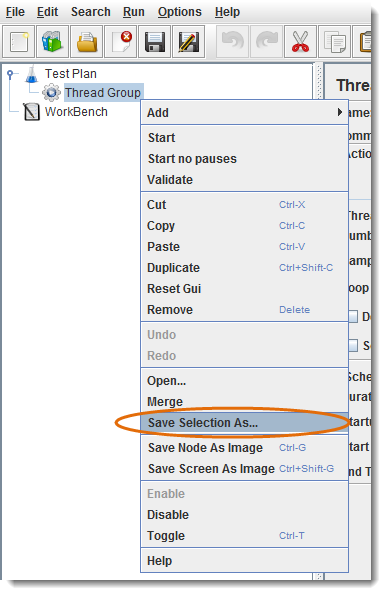
Steps to Load Elements to JMeter Test Plan Tree
- Select and Right click on the element
- Choose “Save Selection As” option
- Save file on desired location
JMeter will save the element, and all the child elements beneath it.
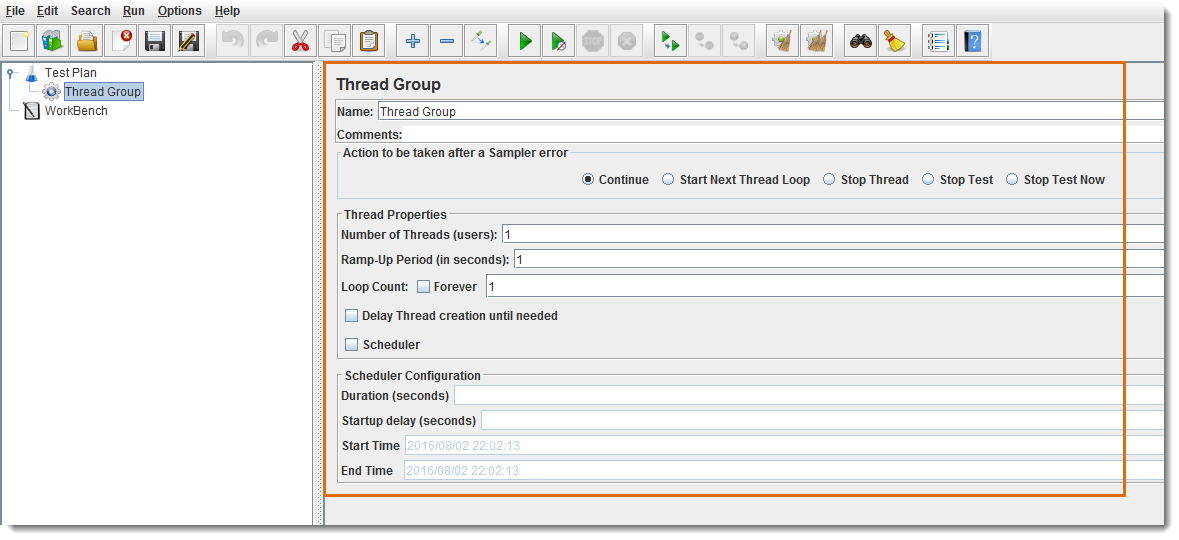
Steps to Configure Tree Elements
Elements can be configured by using controls present on JMeter’s right hand side frame. The controls allow us to configure behaviour of the selected element. The configuration varies from element to element.
- E.g. Thread Group can be configured for Number of Threads, Ramp-Up Period, and Scheduler etc., as shown below:
JMeter Actions on Test Plan
Till now we are done with Creating a Test Plan, Adding a Element and Configuring a Tree. Let's just move forward with different operations on Test Plan like Save, Run & Stop.
Steps to Save JMeter Test Plan
It’s always better to Save Test Plan before executing it. Test Plan can be saved by choosing “Save” or “Save Test Plan As” from File menu.
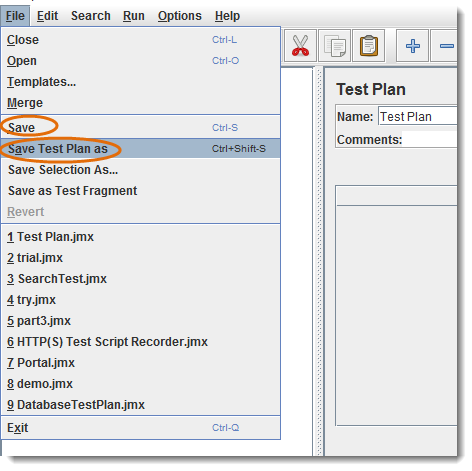
Note: WorkBench will not be saved along with the Test Plan, you should select the option “Save WorkBench” from WorkBench control panel otherwise your WorkBench data will be lost.

Steps to Run JMeter Test Plan
Test plan can be run from the “Run” menu item or by clicking Green Play button.

- Green button shows that test plan is running.
- Number of active threads / Total number of threads.
- Stop button is enabled when test plan is running.
Steps to Stop to JMeter Test Plan
- Stop (Control + '.') It stops the threads immediately if possible. Many samplers are interruptible so active samples can be terminated early.
- Shutdown (Control + ',') It requests the threads to stop at the end of any ongoing task. It will not interrupt any active samples.

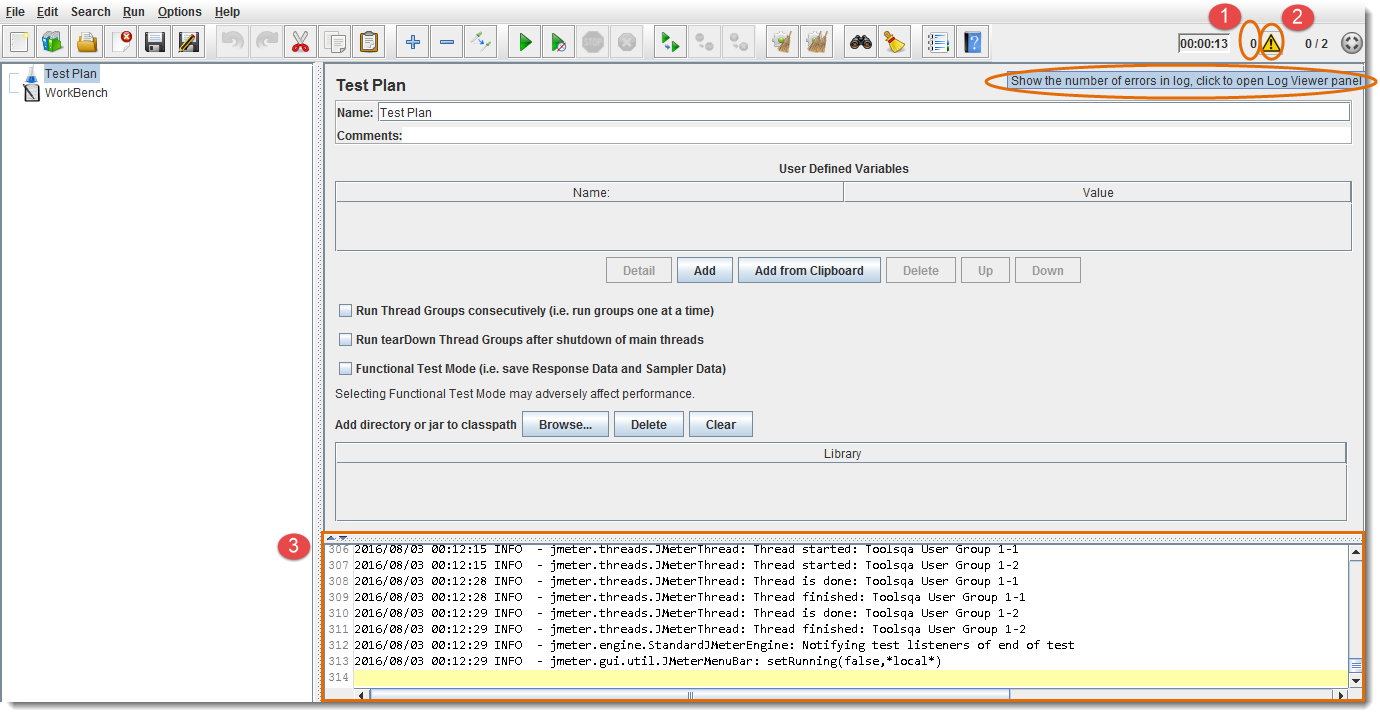
Steps to Check JMeter Test Plan Execution Logs
JMeter stores test run details, warnings and errors to the jmeter.log file by default, you can access Jmeter logs for debugging purpose.
- It shows the total number of errors in log
- Click yellow triangle button to view log panel
- Logs are displaying in log panel