Now that we have our AUT class present we will write our first test. In Junit we write tests in the form of classes. Each class has a method or a set of methods which test a particular functionality of the Unit. Here we will first write a simple test to verify that MathProvider class is able to give us right addition result.
Step 1: Write the First JUnit Test
- First, we need to import the necessary namespaces
import static org.junit.Assert.*;
import org.junit.Test;
import Application.MathProvider;
First Import - org.junit.Assert.* : This will import all the assertion statements. These assertions will be used in the test to verify test logics.
Second Import - org.junit.Test : This will import the @Test annotation of Junits, this annotation tells the Junit framework that this method is a test method.
Third Import - Application.MathProvider : This is to import the MathProvider class.
- Define the class and the class variables. Also, define the constructor if needed.
public class JunitMathProvider_1{

		MathProvider provider;

	public JunitMathProvider_1(){

		provider = new MathProvider();
		}
	}
In this step, we have just created a simple class called 'JunitMathProvider_1' and created a Class variable called provider of the type MathProvider. It is because we have to test MathProvider class.
- Define the test
@Test
public void add()
{
	System.out.println("Starting test " + new Object(){}.getClass().getEnclosingMethod().getName());
	int firstNumber = 10;
	int secondNumber = 20;
	assertEquals(firstNumber + secondNumber, provider.Add(firstNumber, secondNumber));
	System.out.println("Ending test " + new Object(){}.getClass().getEnclosingMethod().getName());
}
Here we have created a method inside the class called add(). This method will test the add functionality of MathProvider class. To test it we have declared two integers name firstNumber and lastNumber and assigned them values 10 and 20. Now we will assert that sum of these two numbers is equal to the sum of the number returned by MathProvider.Add functionality.
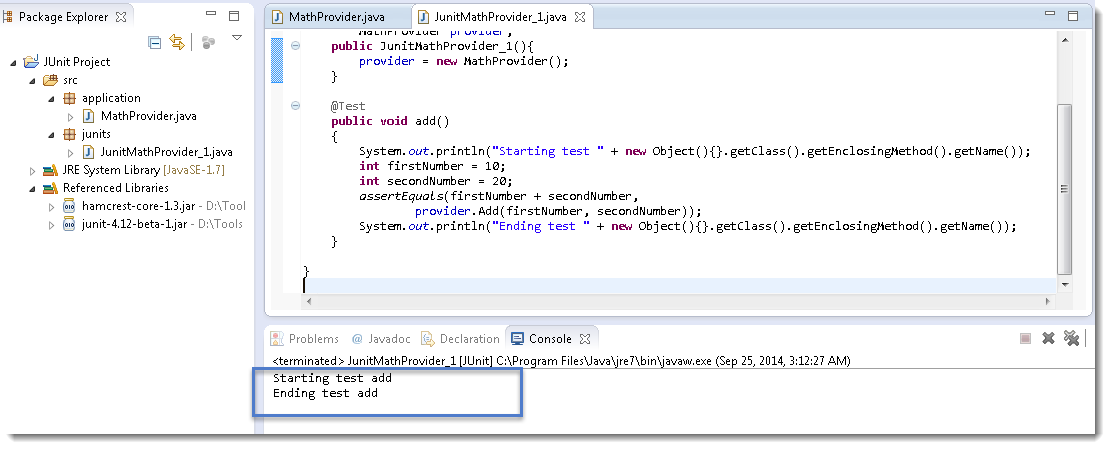
NOte: Don't worry about the System.out.println statement, it's just a log to the System.out stream to print the method name with some text.
What is Asserts?
Asserts mean verifying the values. Assert can be of an Object type, Boolean type, Int type or any data type. It simply verifies the actual value with the expected value and asserts records only the failed scenario.
What is '@Test' Annotation?
Pay attention to the '@Test' annotation. All the tests in Junit4 has a @Test annotation that should be put on a test method. This helps the Junit framework to identify tests inside a test class.
Now your complete test will look like this:
package Application.UnitTests;

import static org.junit.Assert.*;
import junit.extensions.*;
import org.junit.Test;
import Application.MathProvider;

public class JunitMathProvider_1 {

		MathProvider provider;

	public SimpleTest(){
		provider = new MathProvider();
	}

	@Test
	public void add()
	{
		System.out.println("Starting test " + new Object(){}.getClass().getEnclosingMethod().getName());
	    int firstNumber = 10;
	    int secondNumber = 20;
		assertEquals(firstNumber + secondNumber, provider.Add(firstNumber, secondNumber));
		System.out.println("Ending test " + new Object(){}.getClass().getEnclosingMethod().getName());
	}

}
Step 2: Run the First JUnit Test
Its time to see our test run. You can run Junit test case one by one and all together. In next coming chapter we will learn how to execute all the Junit test cases together as a batch. But for now we will run a single test case.
- Right click on the 'JunitMathProvider_1' class, go to 'Run As' > 'Junit Test'. Your test, project window and test result would look like this.
Step 3: Set up JUnit Perspective:
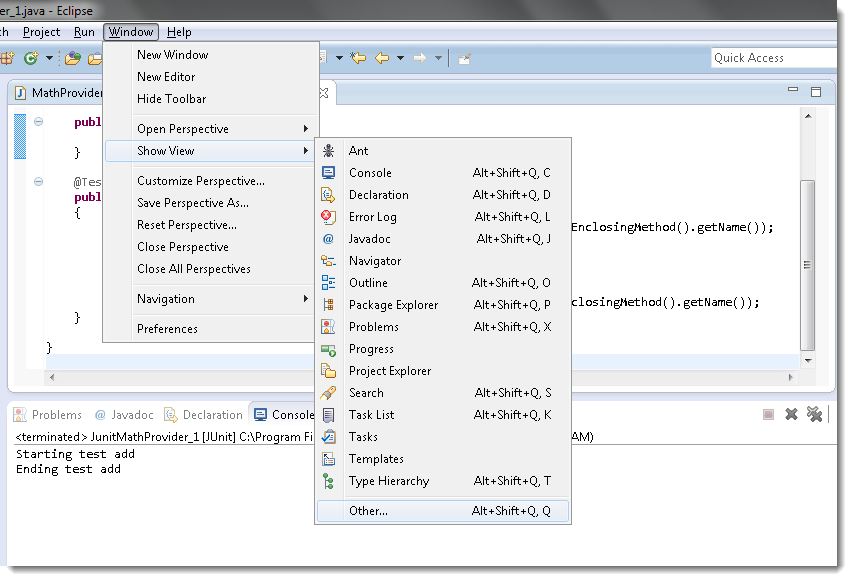
- If you are using eclipse you can see the Junit perspective by clicking on Window > Show View > Other
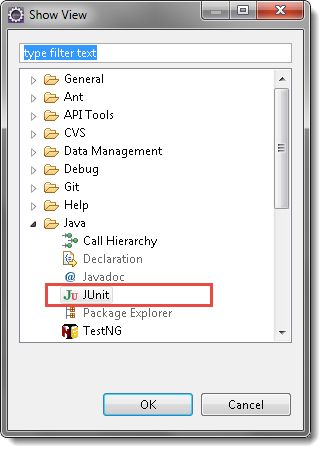
- Search for Junit in the window that pops up and select Junit.
- You will start seeing the JUnit view in the View pane. As shown here:
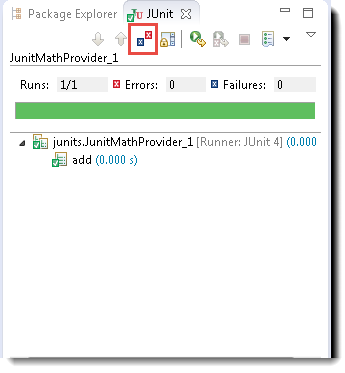
Note: Make sure that the 'two small cross' button marked with the highlighter is not clicked. If it is clicked, you will not see the pass result, it will only show failed results.
You will see that it shows the test class and the number of tests inside it. At this moment we have only one test add() inside it.
To run the test now all you have to do is click on the run button on the Junit view pane. It will run the tests and show you the results right there.