In this tutorial, we are going to learn What is Mouse Hover Action and How to perform Mouse Hover Action in Selenium?
What is Mouse Hover Action?
A mouse hover is also called as hover. Mouse hover action is basically an action where a user places a mouse over a designated area like a hyperlink. It can cause some event to get triggered.
For Example, moving the mouse over an element on web page displays some pop-up windows or maybe description boxes. In our website https://www.toolsqa.com, if you mouse hover TUTORIAL tab, you will see Menu list of different topics gets displayed as below:

In automation also, many times it is required to perform some action on the element which gets visible only on mouse hover on some other element. For this, mouse cursor needs to be placed over an element. As mentioned in the Actions class tutorial, Actions class provides a rich set of APIs for mouse events and keyboard events. So, to perform mouse event also, Actions class provides moveToElement() methods.
So, here are the methods Actions class has provided for Mouse Hover action:
- moveToElement(WebElement target)
- moveToElement(WebElement target, int xOffset, int yOffset)
Note: Action class is present in package: org.openqa.selenium.interactions package
Mouse Hover Action in Selenium
Let's just start understanding moveToElement method of Actions class.
1. How to move the mouse cursor to the middle of the web element?
moveToElement(WebElement target): Moves the mouse to the middle of the element.
First, instantiate an Actions class:
Actions actions = new Actions(driver);
As seen above, the moveToElement() method has argument WebElement target. So, it is required to pass a WebElement object to the method. This WebElement target is any web element where the mouse needs to be moved. To find the target element use the below command:
WebElement target = driver.findElement(Any By strategy & locator);
Here, you can use any By strategy to locate the WebElement like find element by its id, name attribute, etc.
Now, when we have got the actions class object and the element as well, just invoke perform() method to make a move to the element:
actions.moveToElement(target).perform();
Let’s see what happens internally when invoke the perform() method above:
- Move Mouse Action: Mouse gets moved to the middle of the element.
- Here, the element is scrolled into view and its location gets calculated using getBoundingClientRect.
- Build: build() method is used to generate a composite action containing all actions.
- In this case, it’s just a single move mouse action. If you observe, we have not invoked it in our above command. This is because the build is executed in the perform method internally.
- Perform: perform() method performs the actions we have specified. But before that, it internally invokes build() method first. After the build, the action is performed.
Practice Exercise to Perform Mouse Hover using Actions Class in Selenium
Let’s consider an example from an already available demo page on Toolsqa as https://demoqa.com/menu/
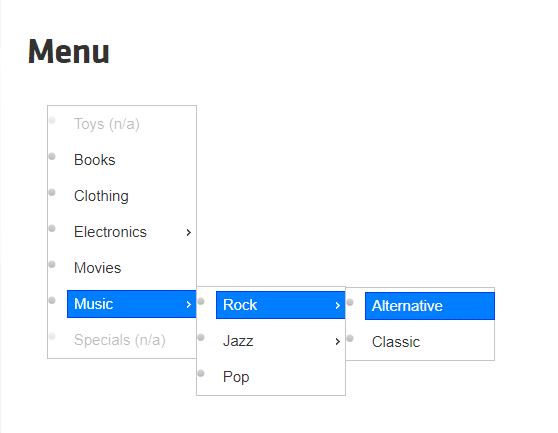
In the above image, consider a case when it is required to select an option from the menu. For this, it’s required to first mouse hover ‘Music’ which displays menu list with options like ‘Rock’, ‘Jazz’, ‘Pop’. After that mouse-hover at ‘Rock’ which finally displays menu list with options ‘Alternative’ and ‘Classic’. Then at last select ‘Alternative’ option.
Music
==> Rock
======>Alternative
Now it is the time to write a selenium automation script to mouse hover the object using moveToElement() method.
Find below the steps of the scenario to be automated:
- Launch the web browser and launch our practice page https://demoqa.com/menu/
- Find the required element i.e. ‘Music’ object in our sample
- Now move the mouse on ‘Music’ option which will display the submenu list
- Find the required element i.e. ‘Rock’ object in the sub menu list
- Move mouse on ‘Rock’ option which will display one more submenu list
- Find the required element i.e. ‘Alternative’ object in submenu list
- Click on ‘Alternative’
- Close the browser to end the program
Practice Exercise Code
package com.toolsqa.tutorials.actions;

import java.util.concurrent.TimeUnit;

import org.openqa.selenium.By;
import org.openqa.selenium.WebDriver;
import org.openqa.selenium.WebElement;
import org.openqa.selenium.interactions.Actions;

public class MouseHover1 {

 public static WebDriver driver;

 public static void main(String[] args) {

	//Set system properties for geckodriver This is required since Selenium 3.0
	System.setProperty("webdriver.gecko.driver", "C:\\Selenium\\Toolsqa\\lib\\geckodriver.exe");

	 // Launch the URL
        driver.get("https://demoqa.com/menu/");
        System.out.println("demoqa webpage Displayed");

    	//Maximise browser window
	 driver.manage().window().maximize();

	//Adding wait
	driver.manage().timeouts().implicitlyWait(10000, TimeUnit.MILLISECONDS);

        //Instantiate Action Class
        Actions actions = new Actions(driver);
        //Retrieve WebElement 'Music' to perform mouse hover
    	WebElement menuOption = driver.findElement(By.xpath(".//div[contains(text(),'Music')]"));
    	//Mouse hover menuOption 'Music'
    	actions.moveToElement(menuOption).perform();
    	System.out.println("Done Mouse hover on 'Music' from Menu");

    	//Now Select 'Rock' from sub menu which has got displayed on mouse hover of 'Music'
    	WebElement subMenuOption = driver.findElement(By.xpath(".//div[contains(text(),'Rock')]"));
    	//Mouse hover menuOption 'Rock'
    	actions.moveToElement(subMenuOption).perform();
    	System.out.println("Done Mouse hover on 'Rock' from Menu");

    	//Now , finally, it displays the desired menu list from which required option needs to be selected
    	//Now Select 'Alternative' from sub menu which has got displayed on mouse hover of 'Rock'
    	WebElement selectMenuOption = driver.findElement(By.xpath(".//div[contains(text(),'Alternative')]"));
    	selectMenuOption.click();
    	System.out.println("Selected 'Alternative' from Menu");

        // Close the main window
    	driver.close();
 }

}
Now, let’s move on to an overloaded version of moveToElement() method.
2. How to move the mouse cursor to an element offset?
moveToElement(WebElement target, int xOffset, int yOffset): Moves the mouse to an offset from the top-left corner of the element.
Basically, the purpose of this method is to take a mouse on specific points on target elements.
In the earlier method which we saw, the mouse gets moved to the middle of the element. Usually, we need to move the mouse on any element on a web page to display tooltip or maybe to display submenu as seen in the above example. In such common situations, it doesn’t matter even if the mouse is moved to the middle of the element by default as long as it displays desired element like tooltip or submenu, etc.
So here a question arises is then why do we need to move the mouse to any specific point on the element? An answer to this question is, there are some cases where to perform some actions on an element, it is mandatory to move the mouse to a specific location on the element only.
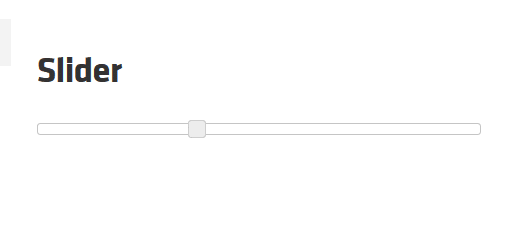
Let’s consider Slider which is used to select some range. This can be selected by moving the slider thumb or clicking on a specific point on the slider element. To perform this action through automation script, we can take help of this particular method i.e. moveToElement(WebElement target, int xOffset, int yOffset) where we specify the exact location to move the mouse on the element.
Just try doing manually on https://demoqa.com/slider/
Let’s see how to use overloaded moveToElement method to perform mouse hover action.
First, instantiate an Actions class:
Actions actions = new Actions(driver);
As seen above, the moveToElement() method has argument WebElement target xOffset, yOffset to be passed. So, it is required to pass a WebElement object to the method. This WebElement target is any web element where the cursor needs to be moved.
Now, remaining two parameter values i.e. xOffset and yOffset are values in pixel.
For Example, if an x-Offset value is set as 50, it means the mouse needs to be moved to 50 pixels offset from the top-left corner of the target element in the horizontal direction. Similarly, if a y-Offset value is set as 50, it means the mouse needs to be moved to 50 pixels offset from the top-left corner of the target element in the vertical direction.
To find the source and target element use the below command:
WebElement target = driver.findElement(Any By strategy & locator);
Here, you can use any By strategy to locate the WebElement like find element by its id, name attribute, etc.
Now, when we have got the actions class object and the element, x-offset, and y-offset as well, just invoke perform() method for the moveToElement:
actions.moveToElement(target, xOffset, yOffset).perform();
Let’s see what happens internally when invoke the perform() method above:
- Move Mouse Action: Moves the mouse to an offset from the top-left corner of the element. Here, the element is scrolled into view and its location gets calculated using getBoundingClientRect. NOTE: Note the difference, in First method i.e. moveToElement(WebElement target), we have seen, Mouse gets moved to the middle of the element
- Build: build() method is used to generate a composite action containing all actions. In this case, it’s just a single move mouse action. But if you observe, we have not invoked it in our above command. This is because the build is executed in the perform method internally.
- Perform: perform() method performs the actions we have specified. But before that, it internally invokes build() method first. After the build, the action is performed.
Practice Exercise to Perform Mouse Hover using Actions Class in Selenium
Let’s consider the same example of Slider we discussed above in this section.
In the above image, consider a case to select a range by clicking on a specific location on the Slider element.
Find below the steps of the scenario to be automated:
- Launch the web browser and launch our practice page https://demoqa.com/slider/
- Find the required element i.e. Slider object in our sample
- Now specify x and y offset to move the mouse in the horizontal and vertical direction from top-left of the slider element
- Move mouse on specified offset on the slider
- Click on the slider
- Close the browser to end the program
Practice Exercise Code
package com.toolsqa.tutorials.actions;

import java.util.concurrent.TimeUnit;

import org.openqa.selenium.By;
import org.openqa.selenium.WebDriver;
import org.openqa.selenium.WebElement;
import org.openqa.selenium.interactions.Actions;

public class MouseHover2 {

 public static WebDriver driver;

 public static void main(String[] args) {

	 //Set system properties for geckodriver This is required since Selenium 3.0
	 System.setProperty("webdriver.gecko.driver", "C:\\Selenium\\Toolsqa\\lib\\geckodriver.exe");

        // Launch the URL
        driver.get("https://demoqa.com/slider/");
        System.out.println("demoqa webpage Displayed");

    	//Maximise browser window
	driver.manage().window().maximize();

	//Adding wait
	driver.manage().timeouts().implicitlyWait(10000, TimeUnit.MILLISECONDS);

        //Instantiate Action Class
        Actions actions = new Actions(driver);
        //Retrieve WebElemnt 'slider' to perform mouse hover
    	WebElement slider = driver.findElement(By.id("slider"));
    	//Move mouse to x offset 50 i.e. in horizontal direction
    	actions.moveToElement(slider,50,0).perform();
    	slider.click();
    	System.out.println("Moved slider in horizontal directions");

        // Close the main window
        driver.close();
 }

}
Summary:
In this tutorial, we have covered the concept of Mouse Hover elements in a web page and how to perform through following methods of Actions class:
- moveToElement(WebElement target): Here, we learned how to move the mouse cursor to the middle of an element
- moveToElement(WebElement target, int xOffset, int yOffset): Here, we learned how to move the mouse cursor to the middle of the element in the horizontal and vertical direction by specified offset.